Installation Instructions
Water Piping
*A WARNING
HOTTER WATER CAN SCALD: Water heaters are intended to _roduce hot water. Water heated to a temperature which will satisfyclothes washing,dish washing,and other sanitizing needs can scaldand permanently injure you upon contact. Some pet- fie are more likely to be permanently injured by hot water than others. These include the elderly, children, the infirm, or physb cally/mentally handicapped. If anyone using hot water in your home fits into one of these groups or if there is a local code or state law requiring a certain temperature water at the hot water tap, then you must take special precautions. In addition to using the lowest possibletemperature setting that satisfiesyour hot water needs, a means such as a mixing valve, shouldbe used at the hot water taps used by these people or at the water heater.
Mixing valves are available at plumbing supply or hardware stores. Follow manufacturers instructions for installation of the
valves. Before changing the factory setting on the thermostat read the "Temperature Regulation" section in this manual.
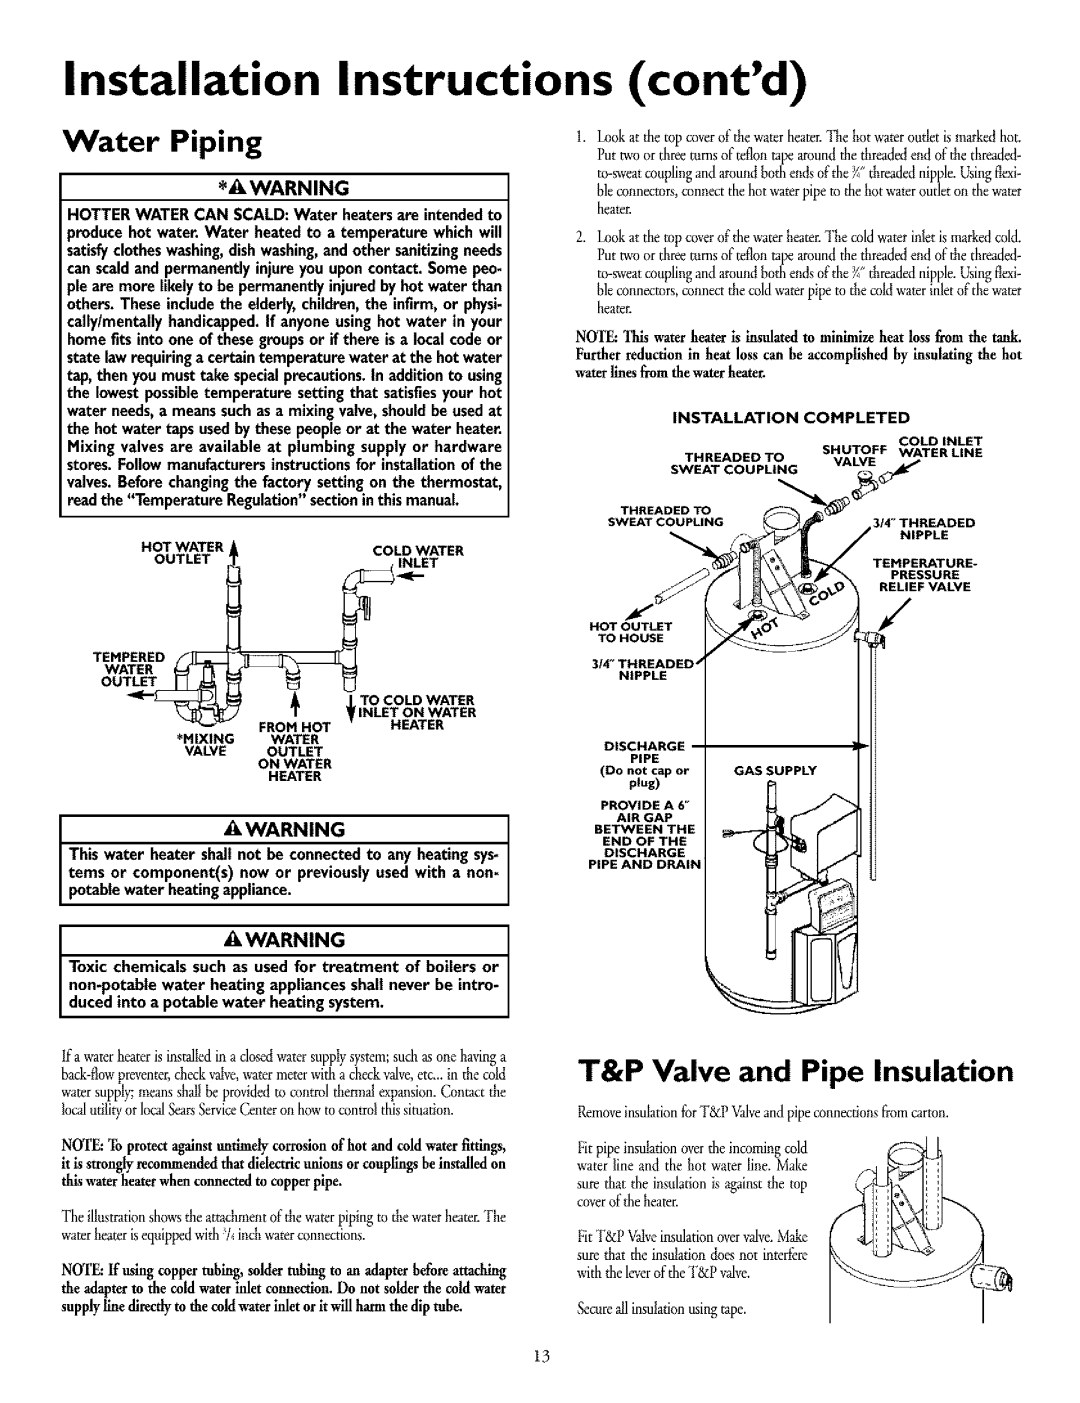
HOT WATER | COLD WATER |
OUTLET |
|
TEMPERED |
|
|
WATER | t |
|
OUTL ET | 'INLET ON WATER | |
|
| TO COLDWATER |
| FROM HOT | HEATER |
*MIXING | WATER |
|
VALVE | OUTLET |
|
| ON WATER |
|
| HEATER |
|
AWARNING
This water heater shall not be connected to any heating sys- tems or component(s) now or previously used with a non= potable water heating appliance.
AWARNING
Toxic chemicals such as used for treatment of boilers or
lfa waterheateris installedin a closedwatersupplysystem;suchasone havinga
NOTE:Toprotectagainstuntimelycorrosionof hot and coldwaterfittings, it is stronglyrecommendedthatdielectricunionsorcouplingsbeinstalledon thiswaterheaterwhenconnectedto copperpipe.
The illustrationshowstheattachmentofthe waterpipingto thewaterheaterThe. waterheaterisequ'ppedw'th/_ 'nchwaterconnect'ons.
NOTE:If usingcoppertubing,solder tubingto an adapterbeforeattaching the adapterto the coldwater inlet connection.Do not solderthe coldwater supplyline directlyto the coldwaterinletorit willharmthe diptube.
(cont'd)
Lookat the topcoverofrhe waterhearerThe. hotwateroutletis markedhot. Put twoor threeturnsofteflonrapearoundrilethreadedend ofthethreaded-
hieconnectors,connectthehotwaterpipeto thehotwateroudetoll thewater heater.
Lookat the topcoverofthewaterheater.The coldwaterinletismarkedcold. Put twoor threeturnsofteflonrapearoundthe threadedend ofrilethreaded-
bleconnectors,connectthecoldwaterpipeto thecoldwaterinletoftbewater hearer.
NOTE:Thiswaterheateris insulatedto minimizeheat loss fromthe tank.
Furtherreductionin heat loss can be accomplishedby insulatingthe hot waterlinesfromthe waterheater.
INSTALLATION COMPLETED
COLD INLET
SHUTOFF WATER LINE
THREADED TOVALVE ._"
SWEAT COUPLING
THREADED TO
SWEAT COUPLING
NIPPLE
TEMPERATURE-
PRESSURE
RELIEF VALVE
HOT OUTLET
TO HOUSE
3/4"THREADED j
NIPPLE
PIPE
(Do not cap or plug)
PROVIDE A 6"
AIR GAP
BETWEEN THE
END OF THE
DISCHARGE
PIPE AND DRAIN
T&P Valve and Pipe Insulation
Removeinsulationfor T&P Valveand pipe connectionsfromcarton.
Fit pipe insulationover the incomingcold water line and the hot water line. Make
sure that the insulationis against the top coverof the heater.
FitT&PValveinsulationovervalveMake. suredlar the insulationdoesnot interfbre withtheleverof'theT&I) valve.
Secureall insulationusingtape.
13