PREPARE THE HOOD
NOTE |
The following instructions are for the horizontal installation only. For a vertical installation, go to the “Install the hood” section on page 11.
These Kenmore Elite Series range hoods are factory shipped with the blower mounted for a vertical discharge configuration. For a horizontal discharge configuration, disassemble the blower from the inner top of the hood (see illustrations below). It will be assembled to the inner back of the hood once the hood is mounted on the wall.
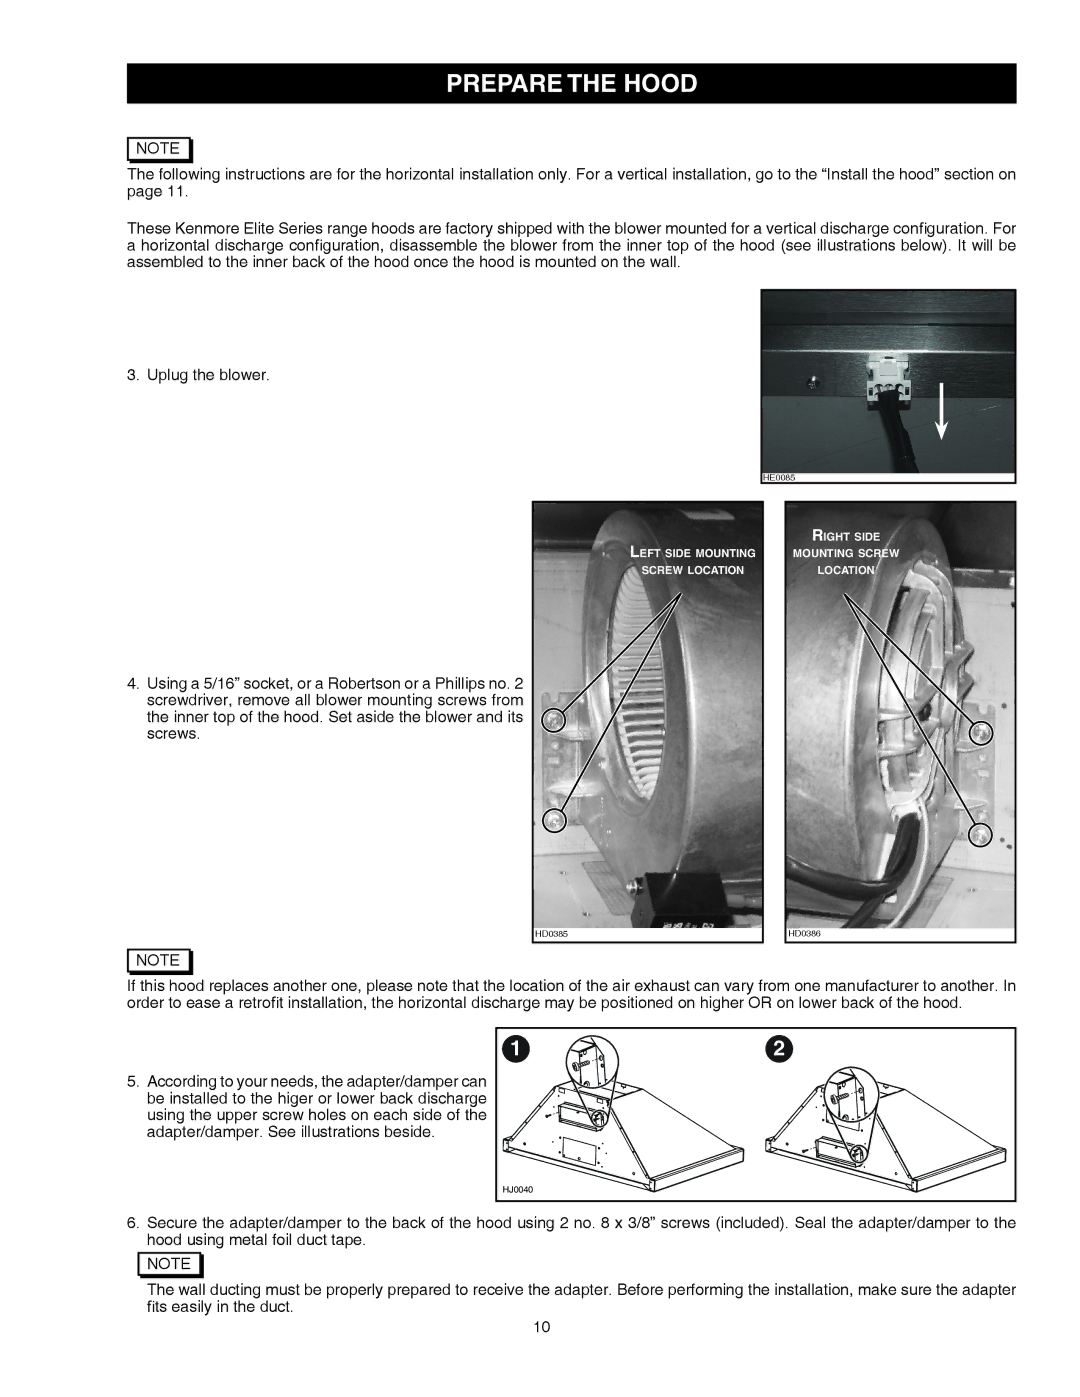
3. Uplug the blower.
HE0085
4.Using a 5/16” socket, or a Robertson or a Phillips no. 2 screwdriver, remove all blower mounting screws from the inner top of the hood. Set aside the blower and its screws.
LEFT SIDE MOUNTING
SCREW LOCATION
RIGHT SIDE
MOUNTING SCREW
LOCATION
HD0385
HD0386
NOTE |
If this hood replaces another one, please note that the location of the air exhaust can vary from one manufacturer to another. In order to ease a retrofit installation, the horizontal discharge may be positioned on higher OR on lower back of the hood.
5.According to your needs, the adapter/damper can be installed to the higer or lower back discharge using the upper screw holes on each side of the adapter/damper. See illustrations beside.
1 | 2 |
HJ0040 |
|
6. Secure the adapter/damper to the back of the hood using 2 no. 8 x 3/8” screws (included). Seal the adapter/damper to the |
hood using metal foil duct tape. |
NOTE |
The wall ducting must be properly prepared to receive the adapter. Before performing the installation, make sure the adapter |
fits easily in the duct. |
10