
790.9805 specifications
The Kenmore 790.9805 is a highly regarded oven that embodies a blend of modern technology, efficient cooking performance, and elegant design. This kitchen appliance stands out for its robust features, making it a top choice for home chefs and cooking enthusiasts alike.One of the most notable features of the Kenmore 790.9805 is its spacious oven capacity. With a generous interior, it allows users to cook multiple dishes simultaneously, making it ideal for family meals or entertaining guests. The oven is equipped with a convection cooking system, which circulates hot air throughout the oven cavity. This technology ensures even cooking and consistent results, reducing cooking times and enhancing flavors.
The Kenmore 790.9805 also boasts a user-friendly control panel that provides ease of access to various cooking settings. With a digital display, users can easily set timers, temperature controls, and select cooking modes. The oven includes multiple cooking modes, such as bake, broil, and roast, giving users flexibility in preparing a wide range of dishes.
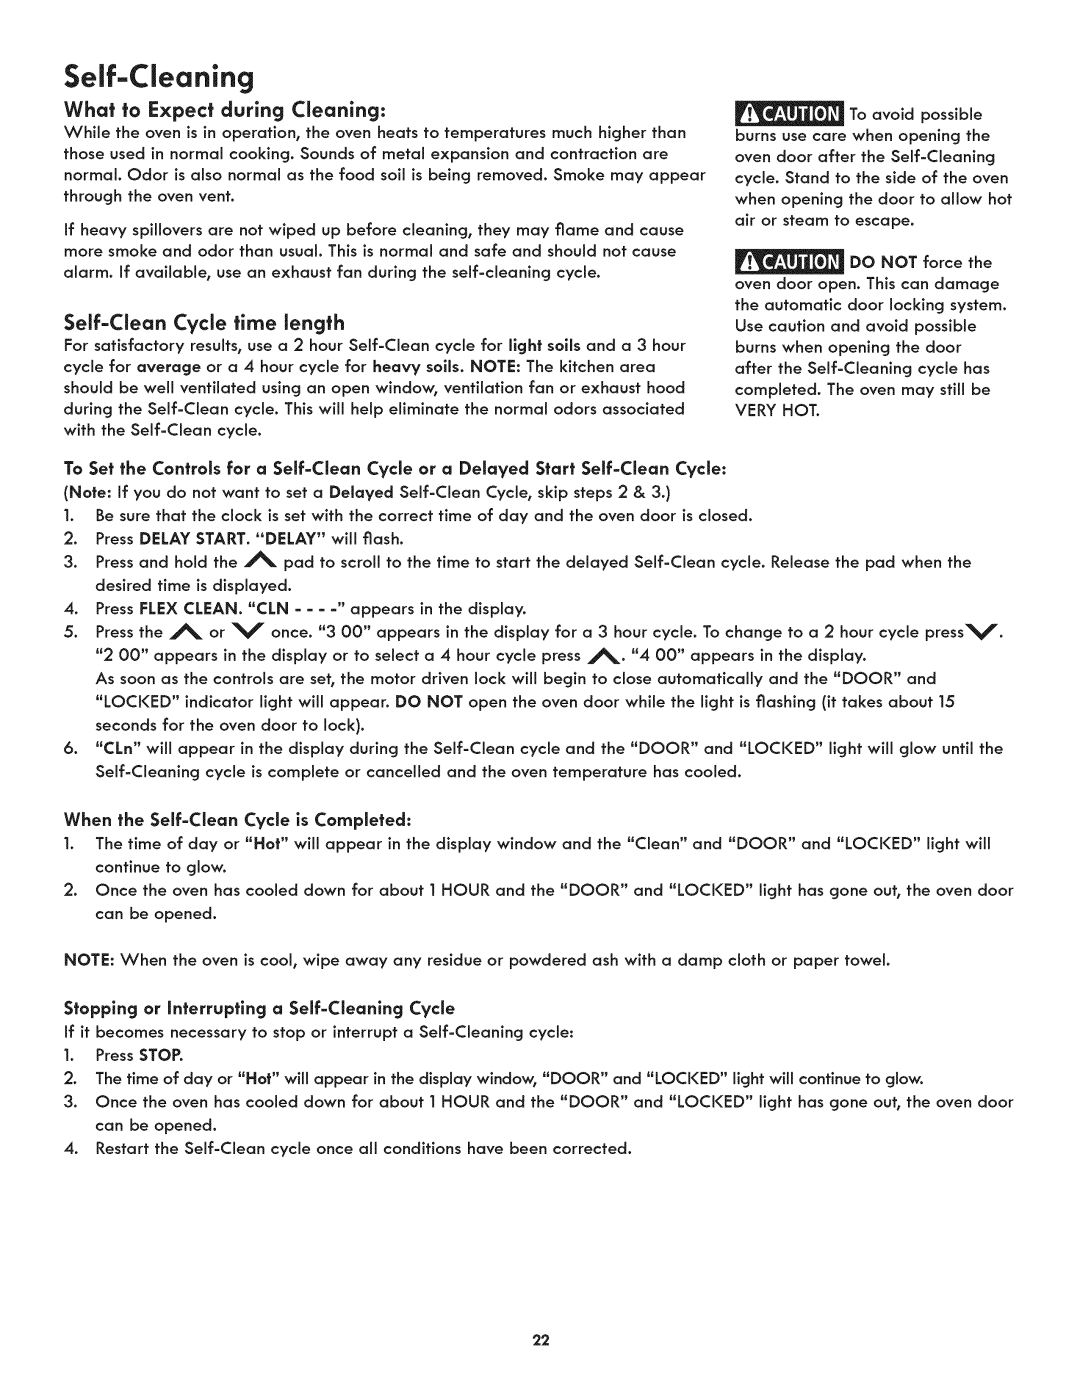
Moreover, this model features self-cleaning capabilities, ensuring that maintenance is hassle-free. The self-cleaning function uses high temperatures to burn off food residues, leaving the oven clean without the need for harsh cleaning chemicals. This feature is particularly beneficial for busy households where time is of the essence.
The design of the Kenmore 790.9805 aligns with modern aesthetics, boasting a sleek stainless steel finish that not only looks stylish but is also resistant to fingerprints and easy to clean. The oven’s design integrates seamlessly into any kitchen decor, enhancing the overall ambiance.
Safety features are also a priority in the Kenmore 790.9805. The appliance comes equipped with an automatic shut-off function and a cool-touch door, preventing burns and ensuring peace of mind while cooking.
Additional characteristics include adjustable oven racks, which provide customizable space for different cooking needs, as well as a range of accessories that enhance its functionality.
In conclusion, the Kenmore 790.9805 is a versatile and efficient oven that combines innovative technology with user-friendly features. Whether you're baking, roasting, or broiling, this oven delivers consistently excellent results, making it a valuable addition to any kitchen.