
790-.9663, 9664 specifications
The Kenmore 9664,790-.9663 is a versatile and high-performance appliance designed to meet the needs of modern households. Known for its reliability and innovative features, this model has gained popularity among consumers seeking efficiency and functionality in their kitchen.One of the standout features of the Kenmore 9664 is its advanced cooking technology. It includes a powerful convection oven that ensures even heating throughout the cooking process. This means users can expect perfectly baked goods and well-cooked meals every time. The convection system circulates hot air, significantly reducing cooking time while enhancing flavor and texture.
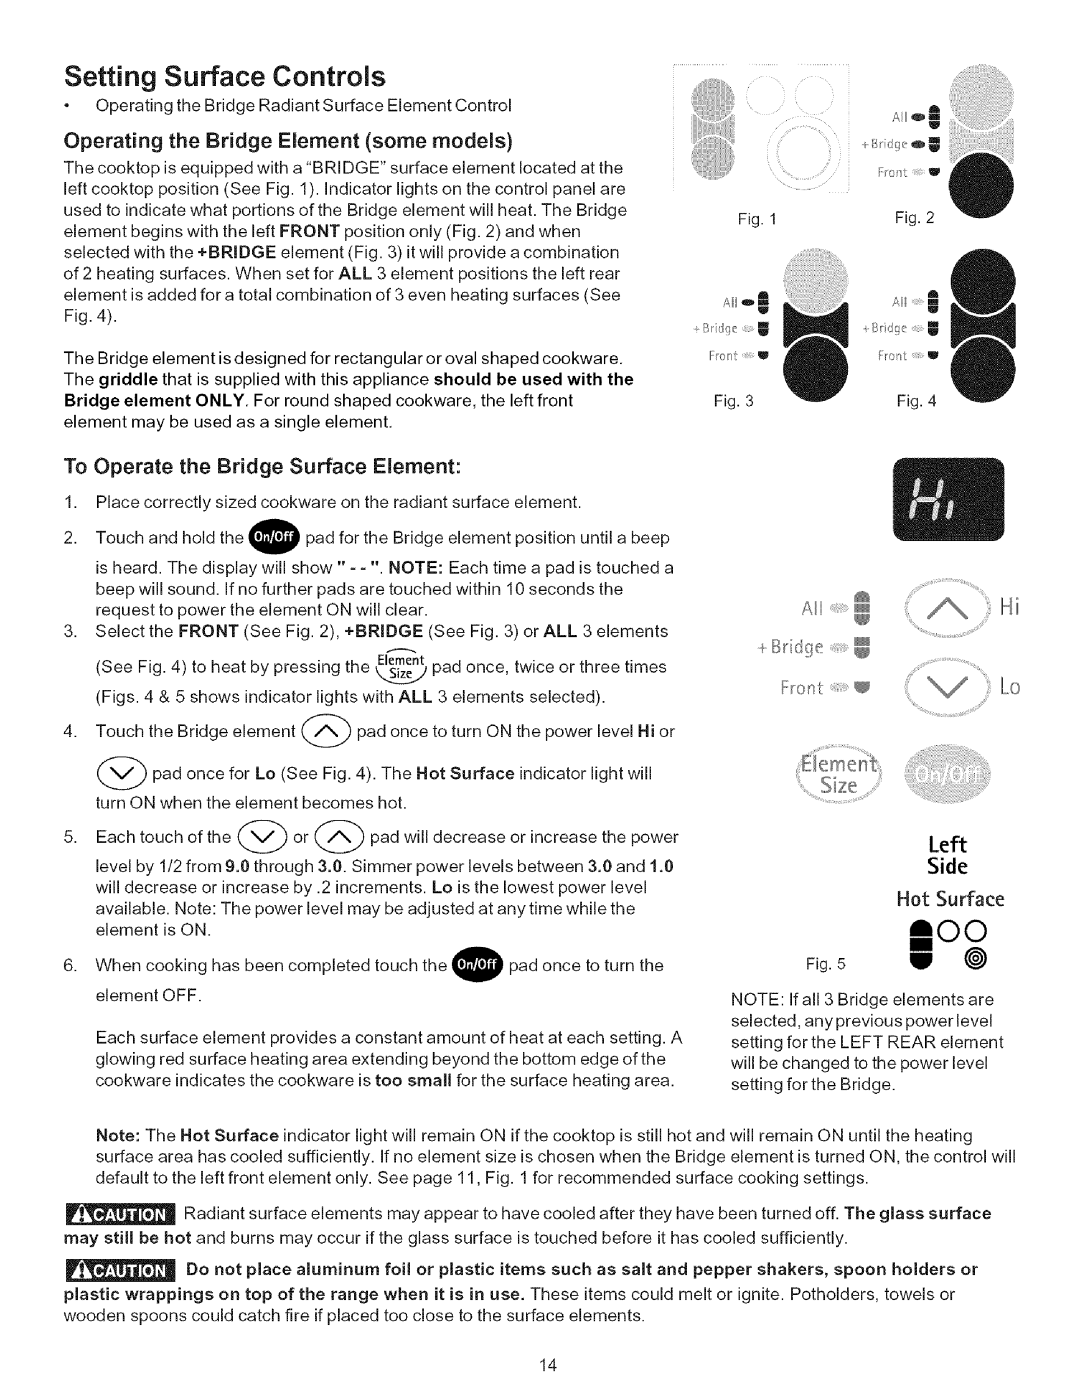
The cooktop of the Kenmore 9664 is equally impressive. It features multiple burners, including high-output options for rapid boiling and simmering elements for delicate sauces. The smooth, ceramic glass surface is easy to clean, adding convenience to the cooking experience. Additionally, the control knobs are intuitive and user-friendly, allowing for precise temperature adjustments.
In terms of design, the Kenmore 9664 combines aesthetics with practicality. Its sleek, stainless steel finish not only complements modern kitchen decor but also resists smudging and scratches. The appliance is built with energy efficiency in mind, featuring an Eco mode that reduces energy consumption when the oven is not in use.
Another notable characteristic is its spacious interior. The oven boasts ample capacity, making it suitable for preparing large meals or multiple dishes simultaneously, perfect for family gatherings and holiday feasts. The inclusion of multiple racks allows for flexible cooking options, providing the ability to cook different types of food at various temperatures.
Safety is a priority with the Kenmore 9664 as well. It comes equipped with a variety of safety features, including automatic shut-off and a child lock function, ensuring peace of mind for families with young children.
In summary, the Kenmore 9664,790-.9663 stands out as a reliable and efficient appliance, designed to cater to the diverse needs of modern cooking. With its advanced convection technology, user-friendly design, and strong emphasis on safety, this model is an excellent choice for anyone looking to elevate their culinary experience. Whether you're a novice cook or a seasoned chef, the Kenmore 9664 is sure to impress with its performance and versatility.