Gas Pressure Regulator
The gas pressure regulator supplied with this range must be used. The inlet pressure to the regulator should be as follows for proper operation:
Natural Gas:
Minimum pressure: 6" (15.2 cm) WCP
Burner Input Rating - Altitude
Input ratings shown on the model/serial rating plate are for elevations up to 2,000 ft (609.6 m).
For elevations above 2,000 ft (609.6 m), ratings are reduced at a rate of 4% for each 1,000 ft (304.8 m).
Maximum pressure: 14" (35.6 cm) WCP
LP Gas:
Minimum pressure: 11" (27.9 cm) WCP
Maximum pressure: 14" (35.6 cm) WCP
Contact local gas supplier if you are not sure about the inlet pressure.
Gas Supply Pressure Testing
Gas supply pressure for testing regulator must be at least
1" water column pressure above the manifold pressure shown on the model/serial rating plate.
Line pressure testing above ½ psi gauge (14" WCP)
The range and its individual shutoff valve must be disconnected from the gas supply piping system during any pressure testing of that system at test pressures in excess of ½ psi (3.5 kPa).
Line pressure testing at ½ psi gauge (14" WCP) or lower
The range must be isolated from the gas supply piping system by closing its individual manual shutoff valve during any pressure testing of the gas supply piping system at test pressures equal to or less than ½ psi (3.5 kPa).
INSTALLATION INSTRUCTIONS
Unpack Range
![]() WARNING
WARNING
Excessive Weight Hazard
Use two or more people to move and install range. Failure to do so can result in back or other injury.
1.Remove shipping materials, tape and film from range. Keep shipping pallet under range. Remove oven racks, grates and parts package from inside oven.
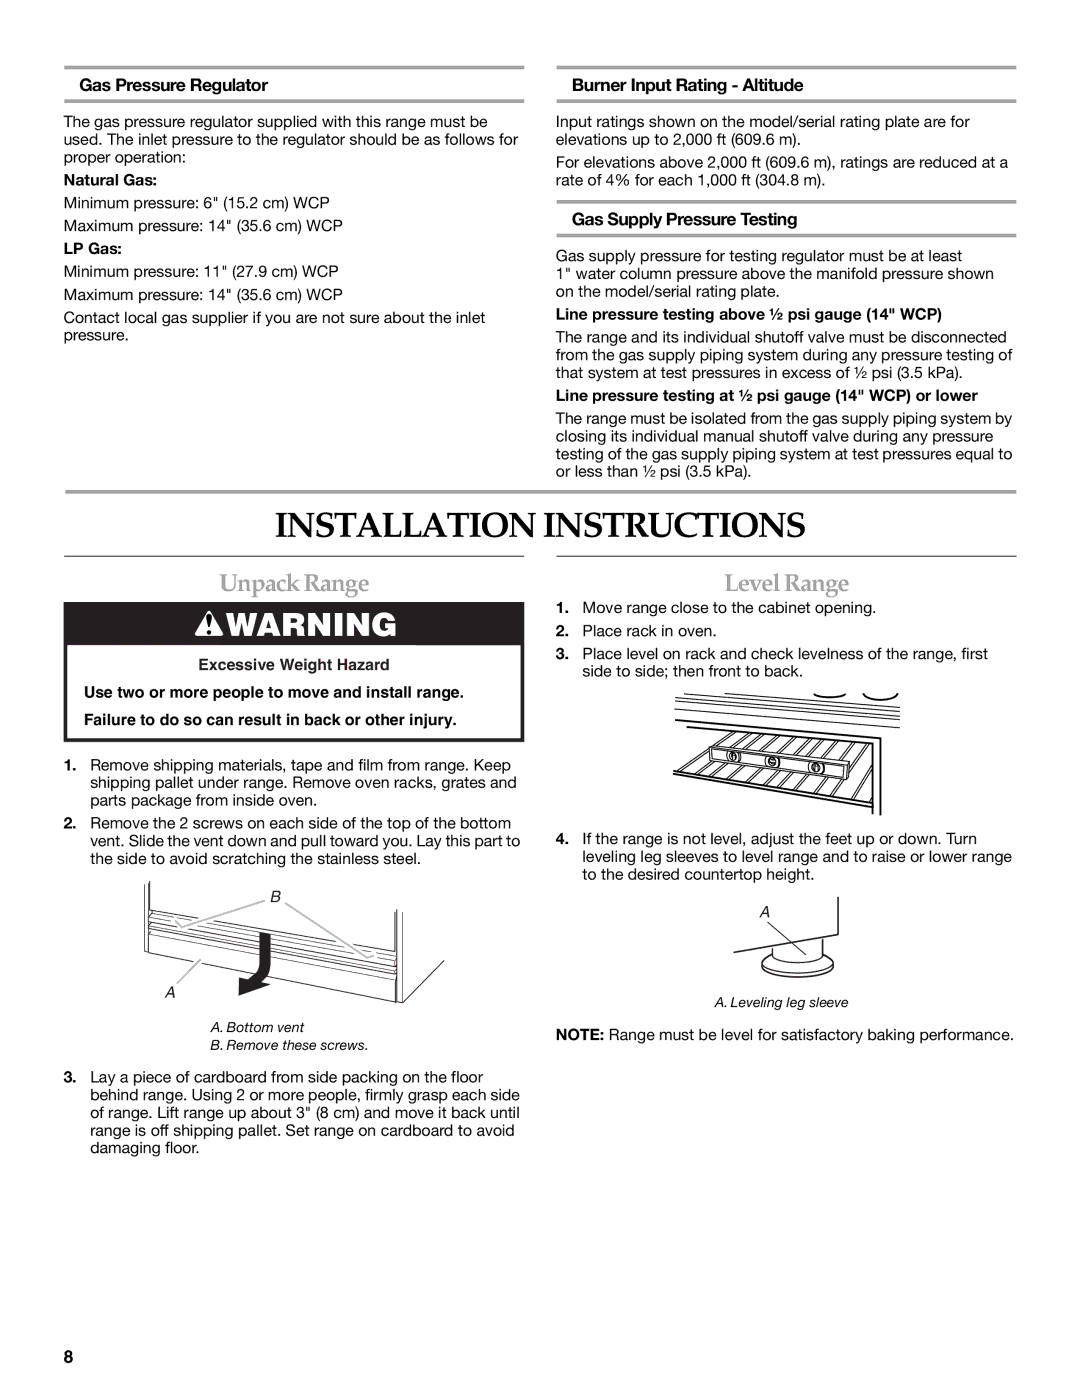
2.Remove the 2 screws on each side of the top of the bottom vent. Slide the vent down and pull toward you. Lay this part to the side to avoid scratching the stainless steel.
B
A
A. Bottom vent
B. Remove these screws.
3.Lay a piece of cardboard from side packing on the floor behind range. Using 2 or more people, firmly grasp each side of range. Lift range up about 3" (8 cm) and move it back until range is off shipping pallet. Set range on cardboard to avoid damaging floor.
Level Range
1.Move range close to the cabinet opening.
2.Place rack in oven.
3.Place level on rack and check levelness of the range, first side to side; then front to back.
4.If the range is not level, adjust the feet up or down. Turn leveling leg sleeves to level range and to raise or lower range to the desired countertop height.
A
A. Leveling leg sleeve
NOTE: Range must be level for satisfactory baking performance.
8
