Fixing the hob to the work top. Flush fitted model
Important: The following procedure must | 860 |
|
be carried out by competent technical | 510 |
|
personnel only. The hob can be installed |
| |
on, or into different types of materials, | 80 |
|
such as masonry, metal, wood and heat | 861 |
|
848 |
| |
resistant laminate coated wood (90°C). |
| |
|
| |
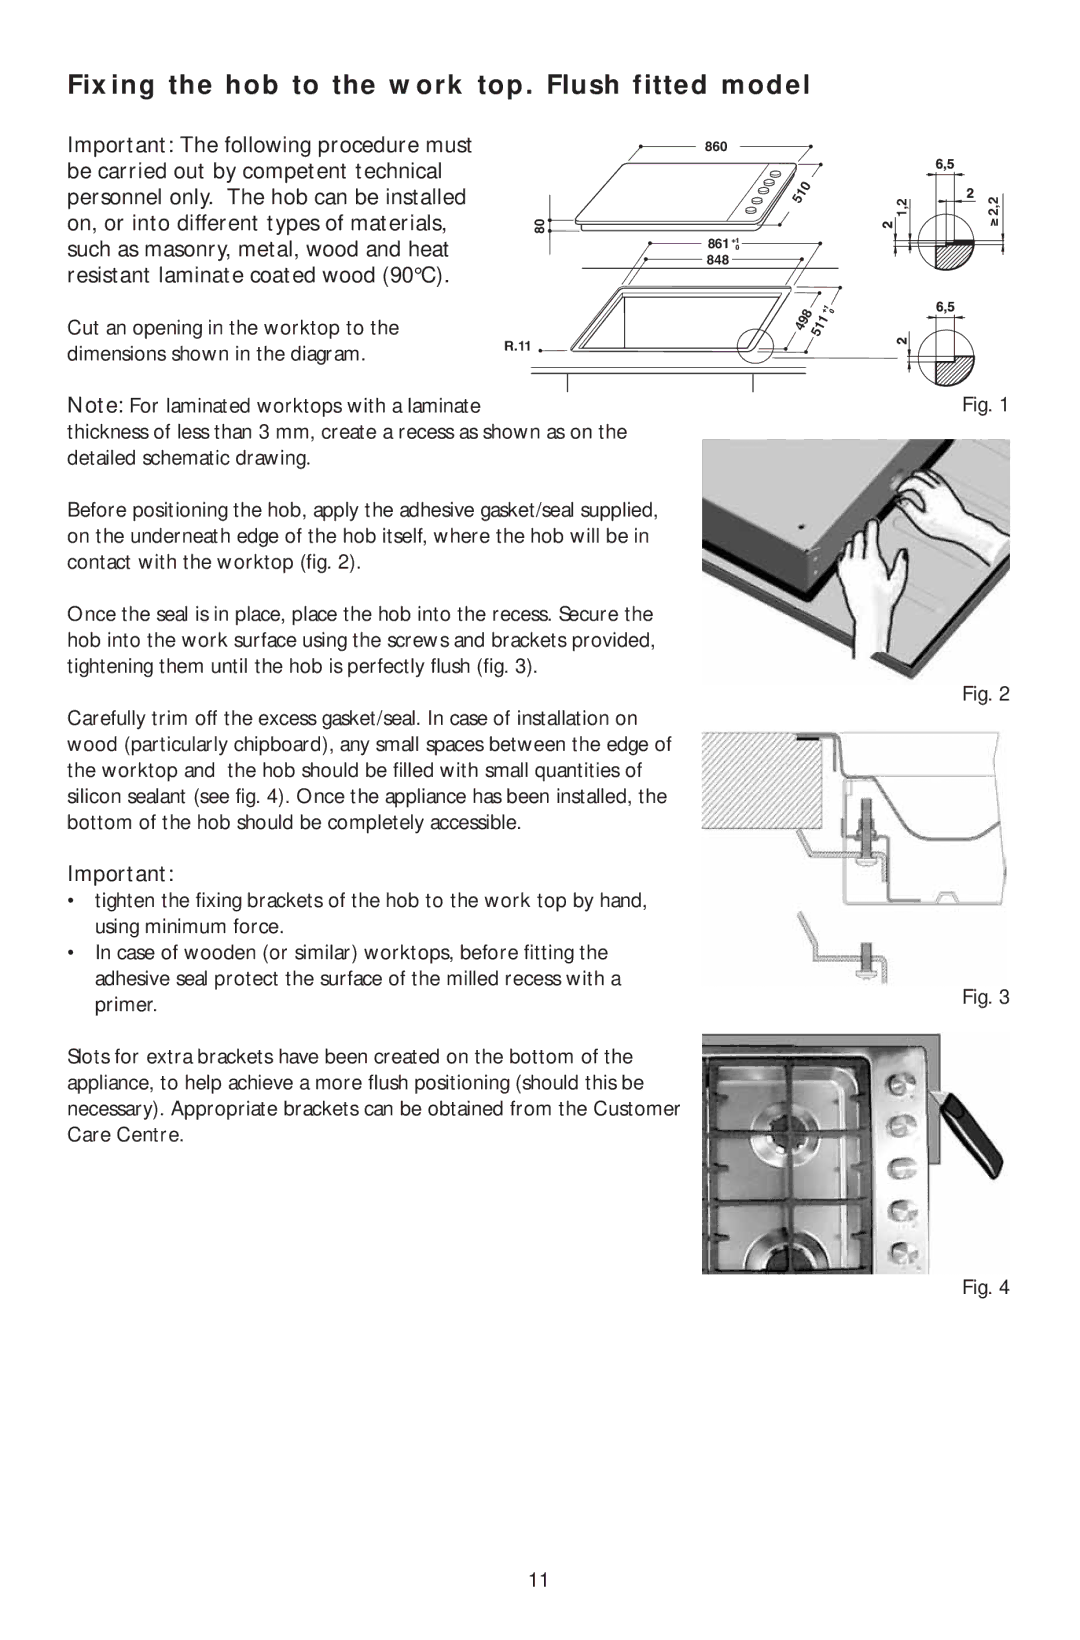
Cut an opening in the worktop to the | 498 | 511 |
dimensions shown in the diagram. | R.11 |
|
|
|
Note: For laminated worktops with a laminate
thickness of less than 3 mm, create a recess as shown as on the detailed schematic drawing.
Before positioning the hob, apply the adhesive gasket/seal supplied, on the underneath edge of the hob itself, where the hob will be in contact with the worktop (fig. 2).
Once the seal is in place, place the hob into the recess. Secure the hob into the work surface using the screws and brackets provided, tightening them until the hob is perfectly flush (fig. 3).
Carefully trim off the excess gasket/seal. In case of installation on wood (particularly chipboard), any small spaces between the edge of the worktop and the hob should be filled with small quantities of silicon sealant (see fig. 4). Once the appliance has been installed, the bottom of the hob should be completely accessible.
Important:
•tighten the fixing brackets of the hob to the work top by hand, using minimum force.
•In case of wooden (or similar) worktops, before fitting the adhesive seal protect the surface of the milled recess with a primer.
Slots for extra brackets have been created on the bottom of the appliance, to help achieve a more flush positioning (should this be necessary). Appropriate brackets can be obtained from the Customer Care Centre.
1,2 | 2,2 |
| ≥ |
Fig. 1
Fig. 2
Fig. 3
Fig. 4
11