5 CONNECTING THE DRAIN LINE
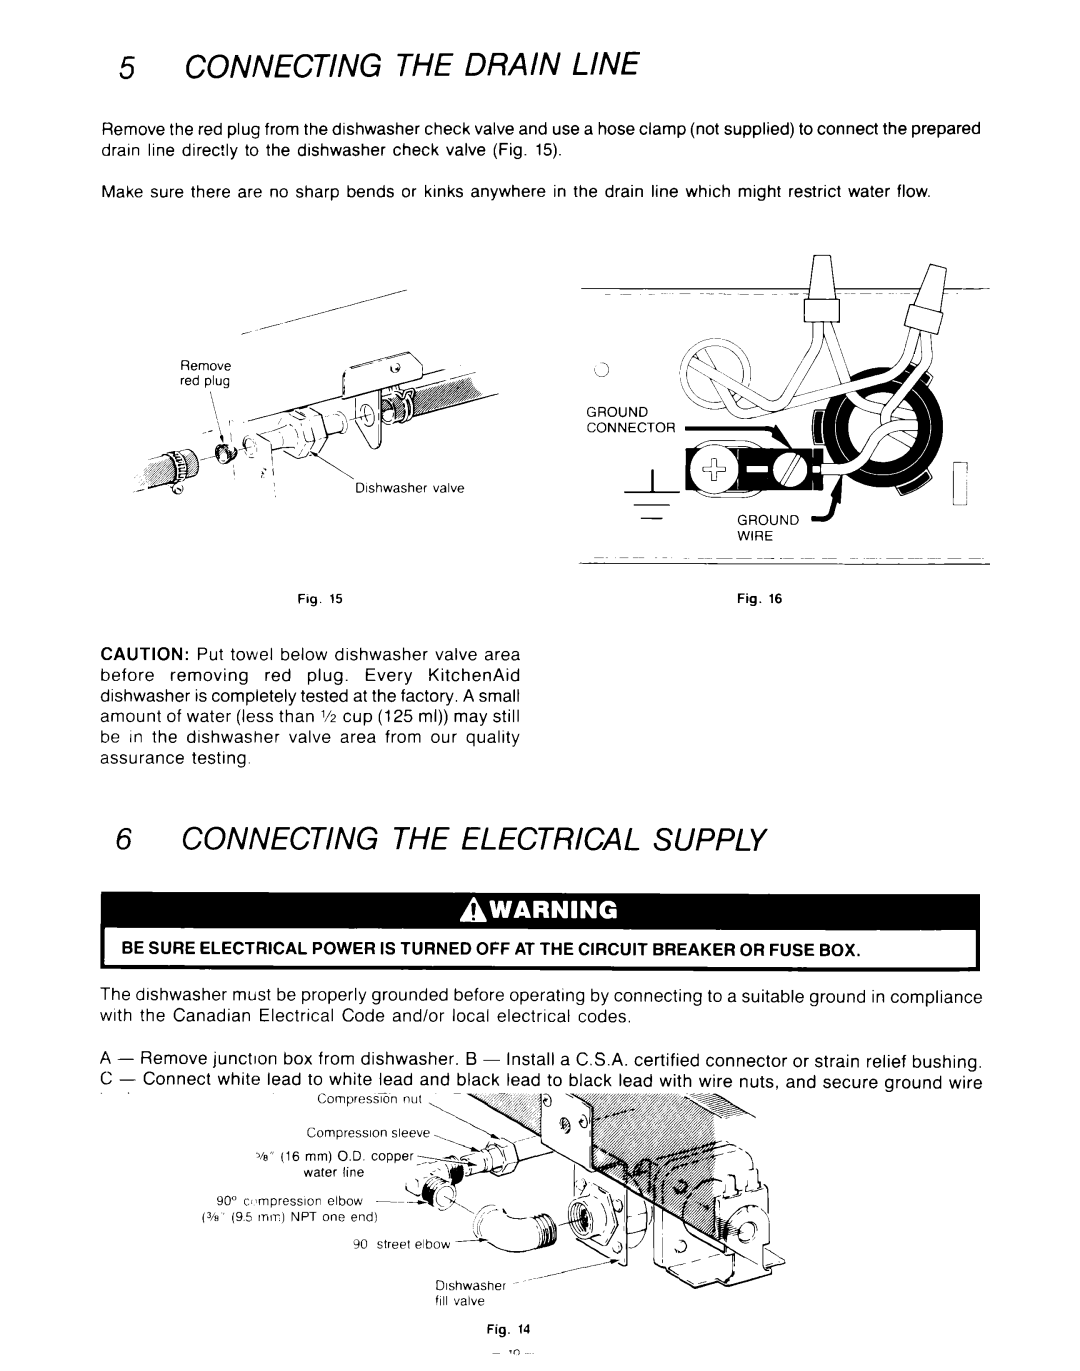
Remove the red plug from the dishwasher check valve and use a hose clamp (not supplied) to connect the prepared drain line direc!ly to the dishwasher check valve (Fig. 15).
Make sure there are no sharp bends or kinks anywhere in the drain line which might restrict water flow.
Remove
red plug
| CONNECTOR |
|
DIshwasher | valve |
|
| - | GROUND 2 |
|
| |
|
| WIRE |
Fig. 15 |
| Fig. 16 |
CAUTION: Put towel below dishwasher valve area
before removing red plug. Every KitchenAid dishwasher is completely tested at the factory. A small amount of water (less than l/z cup (125 ml)) may still be In the dishwasher valve area from our quality assurance testing.
6 CONNECTING THE ELECTRICAL SUPPLY
I BE SURE ELECTRICAL POWER IS TURNED OFF AT THE CIRCUIT BREAKER OR FUSE BOX. | I |
The dishwasher must be properly grounded before operating by connecting to a suitable ground in compliance with the Canadian Electrical Code and/or local electrical codes.
A - Remove | junction | box | from dishwasher. |
| B - | Install |
| a C.S.A. | certified | connector | or | strain relief bushing. | ||||
C | - | Connect | white | lead | to white | lead | and | black | lead | to | black lead with | wire nuts, | and | secure ground wire | ||
in | the | copper | ground | connector | (Fig. | 16). | D | - | Reinstall | junction | box. |
|
|
| ||
When | house | wiring | is aluminum. | use | C.S.A. | certified | aluminum | to copper connectors |
| |||||||
MAKE SURE THAT WATER SUPPLY LINE, DRAIN LINE, AND WIRING DO NOT TOUCH ANY EXPOSED |
|
ITERMINALS OF DISHWASHER WIRING. | I |
