To replace top grille:
1.Insert top grille hooks (located on the back of the top grille) into the slots on the side trim.
2.Pull grille down slightly to lock into place.
Wraparound Door Models (on some models)
To remove top grille:
1.Grasp both ends of louver panel. Push louver panel straight up, then pull straight out. Lay the panel on a soft surface.
2.Grasp both ends of the top grille. Push top grille straight up, then pull straight out. Lay the top grille on a soft surface.
1.Top grille
2.Cabinet side trim
3.Louver panel
To replace top grille:
1.Insert top grille hooks (located on the back of the top grille panel) into the slots on side trim. Pull grille down slightly to lock into place.
2.Insert louver panel hooks (located on the back of the louver panel) into the slots on the side trim. Pull panel down slightly to lock into place.
To Turn Power On or Off:
1.Remove top grille.
2.Press main power switch to the ON or OFF position.
3.Replace top grille.
IMPORTANT: Be sure the power switch is set to the ON position after cleaning refrigerator or changing light bulbs.
1 ![]()
![]()
1. Power On/Off switch
Water System Preparation
(on some models)
Please read before using the water system.
Immediately after installation, follow the steps below to make sure that the water system is properly cleaned.
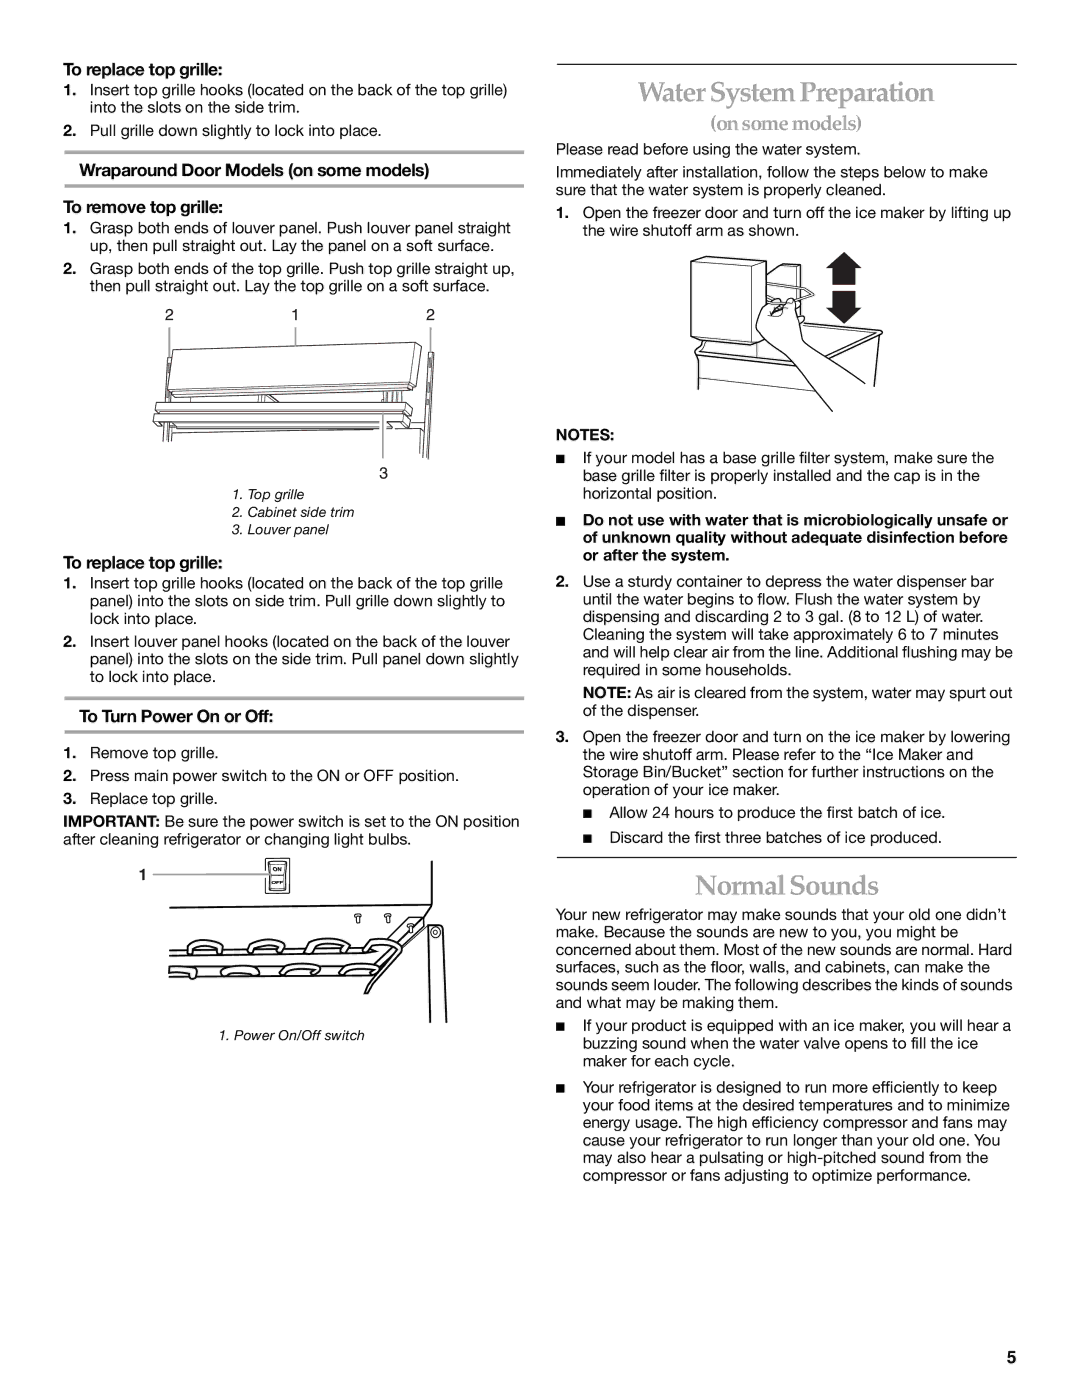
1.Open the freezer door and turn off the ice maker by lifting up the wire shutoff arm as shown.
NOTES:
■If your model has a base grille filter system, make sure the base grille filter is properly installed and the cap is in the horizontal position.
■Do not use with water that is microbiologically unsafe or of unknown quality without adequate disinfection before or after the system.
2.Use a sturdy container to depress the water dispenser bar until the water begins to flow. Flush the water system by dispensing and discarding 2 to 3 gal. (8 to 12 L) of water. Cleaning the system will take approximately 6 to 7 minutes and will help clear air from the line. Additional flushing may be required in some households.
NOTE: As air is cleared from the system, water may spurt out of the dispenser.
3.Open the freezer door and turn on the ice maker by lowering the wire shutoff arm. Please refer to the “Ice Maker and Storage Bin/Bucket” section for further instructions on the operation of your ice maker.
■Allow 24 hours to produce the first batch of ice.
■Discard the first three batches of ice produced.
Normal Sounds
Your new refrigerator may make sounds that your old one didn’t make. Because the sounds are new to you, you might be concerned about them. Most of the new sounds are normal. Hard surfaces, such as the floor, walls, and cabinets, can make the sounds seem louder. The following describes the kinds of sounds and what may be making them.
■If your product is equipped with an ice maker, you will hear a buzzing sound when the water valve opens to fill the ice maker for each cycle.
■Your refrigerator is designed to run more efficiently to keep your food items at the desired temperatures and to minimize energy usage. The high efficiency compressor and fans may cause your refrigerator to run longer than your old one. You may also hear a pulsating or
5
