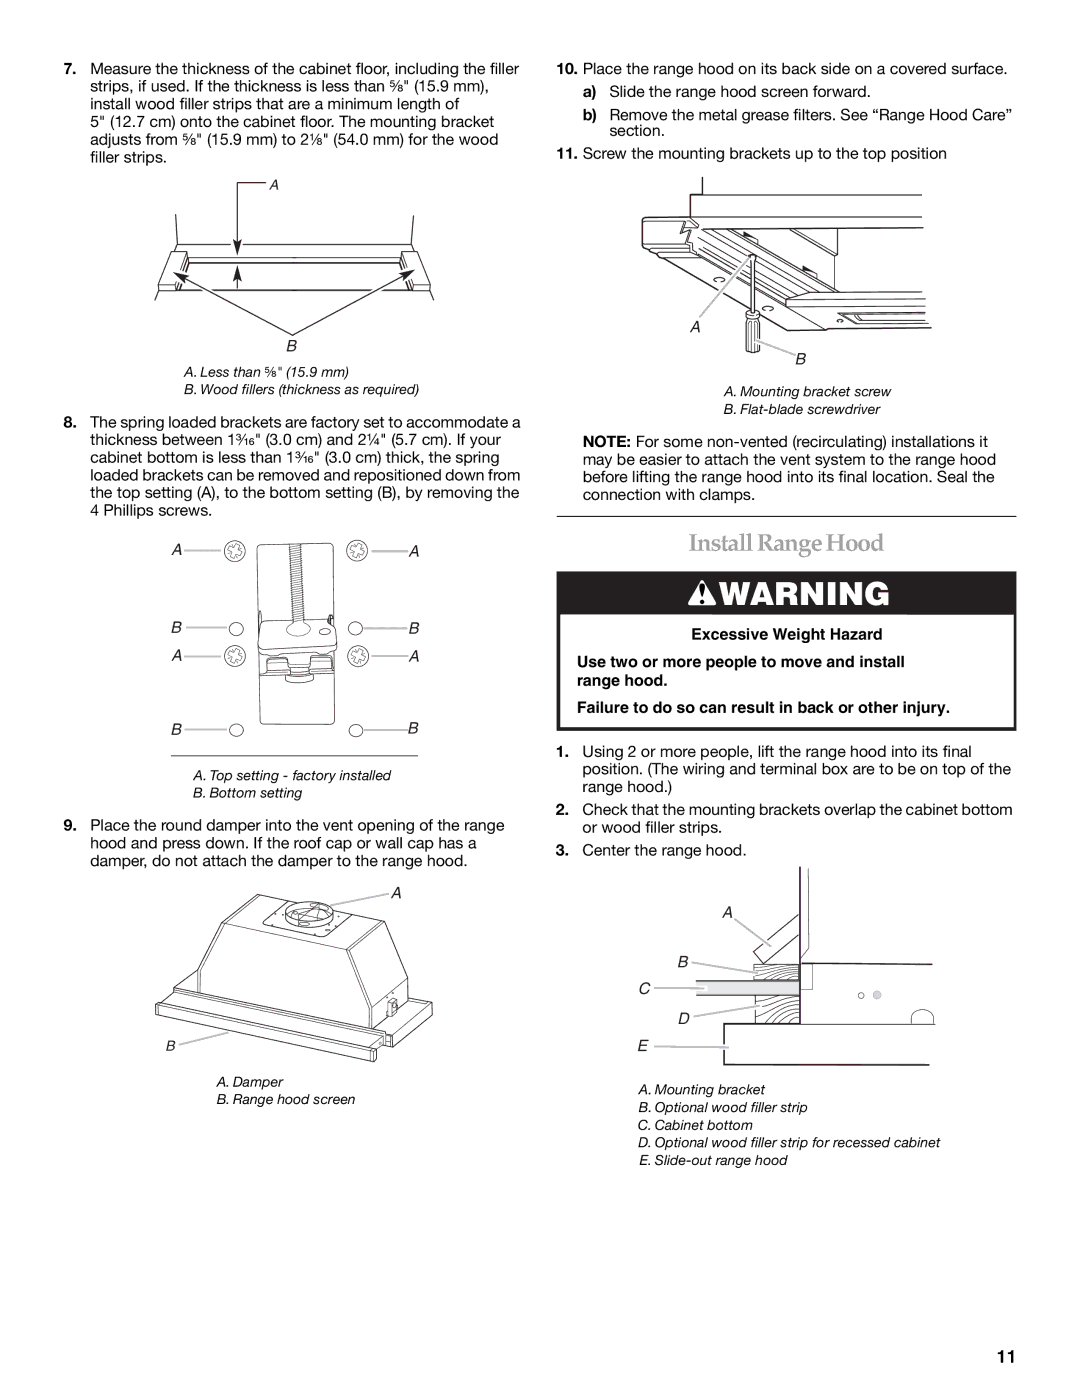
7.Measure the thickness of the cabinet floor, including the filler strips, if used. If the thickness is less than ⁵⁄₈" (15.9 mm), install wood filler strips that are a minimum length of
5" (12.7 cm) onto the cabinet floor. The mounting bracket adjusts from ⁵⁄₈" (15.9 mm) to 2¹⁄₈" (54.0 mm) for the wood filler strips.
A
B
A. Less than ⁵⁄₈" (15.9 mm)
B. Wood fillers (thickness as required)
8.The spring loaded brackets are factory set to accommodate a thickness between 1³⁄₁₆" (3.0 cm) and 2¼" (5.7 cm). If your cabinet bottom is less than 1³⁄₁₆" (3.0 cm) thick, the spring loaded brackets can be removed and repositioned down from the top setting (A), to the bottom setting (B), by removing the 4 Phillips screws.
A ![]()
![]()
![]()
![]() A
A
BB
A ![]()
![]()
![]()
![]() A
A
BB
A. Top setting - factory installed
B. Bottom setting
9.Place the round damper into the vent opening of the range hood and press down. If the roof cap or wall cap has a damper, do not attach the damper to the range hood.
A
B
A.Damper
B.Range hood screen
10.Place the range hood on its back side on a covered surface.
a)Slide the range hood screen forward.
b)Remove the metal grease filters. See “Range Hood Care” section.
11.Screw the mounting brackets up to the top position
A
B
A. Mounting bracket screw
B.
NOTE: For some
InstallRange Hood
![]() WARNING
WARNING
Excessive Weight Hazard
Use two or more people to move and install range hood.
Failure to do so can result in back or other injury.
1.Using 2 or more people, lift the range hood into its final position. (The wiring and terminal box are to be on top of the range hood.)
2.Check that the mounting brackets overlap the cabinet bottom or wood filler strips.
3.Center the range hood.
A
B![]()
![]()
C ![]()
![]()
D ![]()
E ![]()
A. Mounting bracket
B. Optional wood filler strip
C. Cabinet bottom
D. Optional wood filler strip for recessed cabinet
E.
11