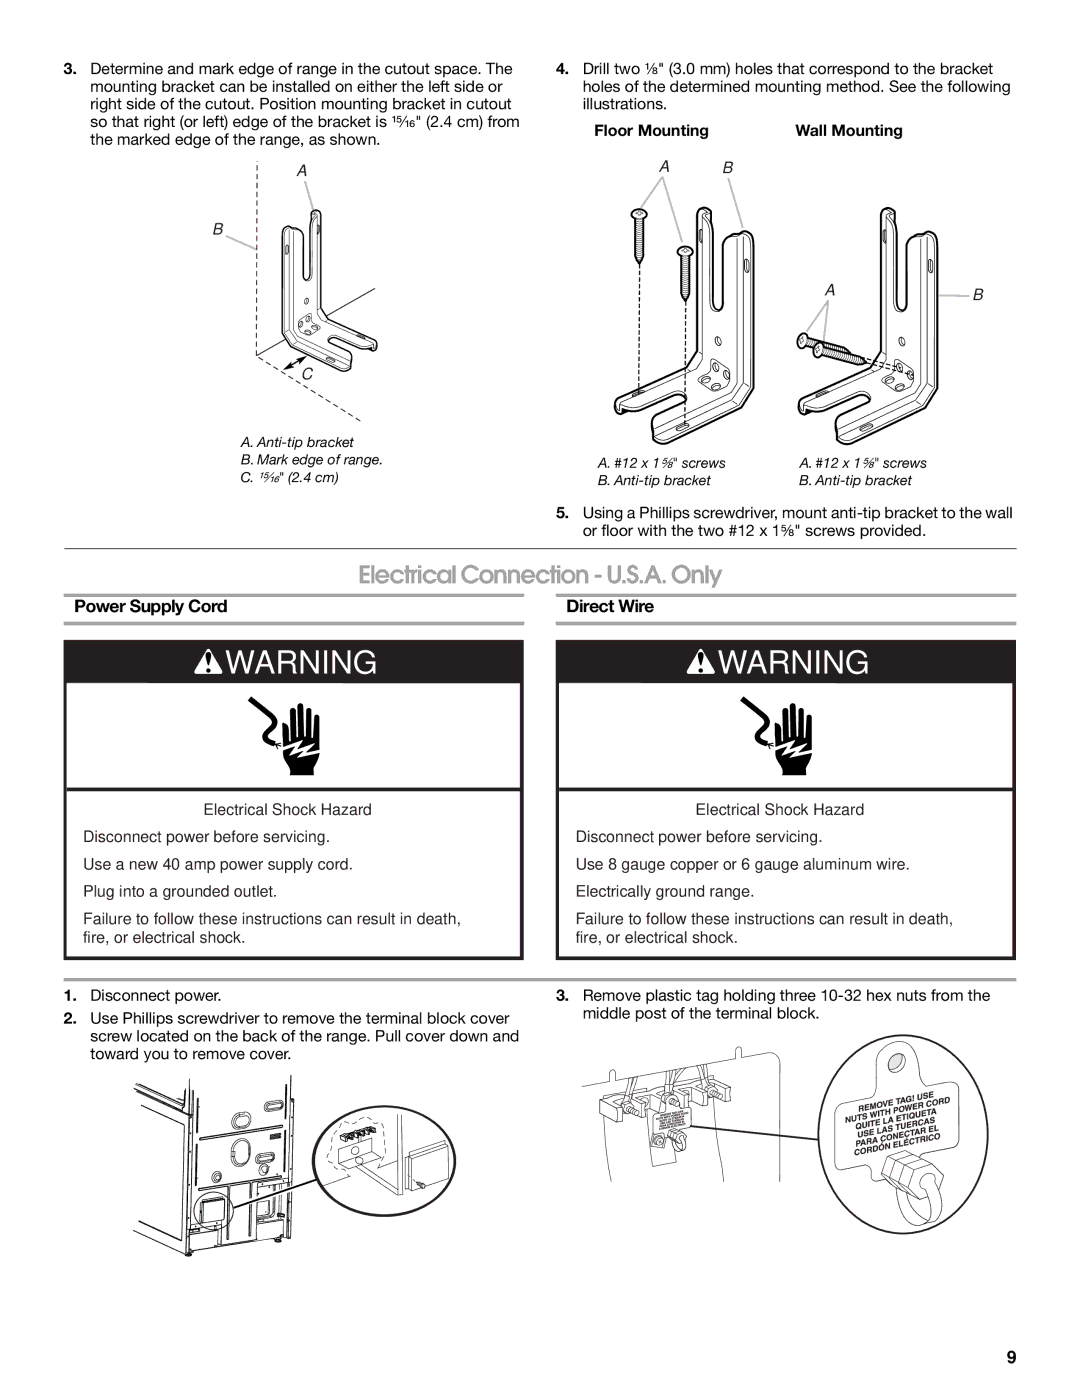
3.Determine and mark edge of range in the cutout space. The mounting bracket can be installed on either the left side or right side of the cutout. Position mounting bracket in cutout so that right (or left) edge of the bracket is ¹⁵⁄₁₆" (2.4 cm) from the marked edge of the range, as shown.
A
B
C
A.
B.Mark edge of range.
C.¹⁵⁄₁₆" (2.4 cm)
4.Drill two ¹⁄₈" (3.0 mm) holes that correspond to the bracket holes of the determined mounting method. See the following illustrations.
Floor Mounting | Wall Mounting |
A B
AB
A. #12 x 1⁵⁄₈" screws | A. #12 x 1⁵⁄₈" screws |
B. | B. |
5.Using a Phillips screwdriver, mount
Electrical Connection - U.S.A. Only
Power Supply Cord
WARNING
Electrical Shock Hazard
Disconnect power before servicing.
Use a new 40 amp power supply cord.
Plug into a grounded outlet.
Failure to follow these instructions can result in death, fire, or electrical shock.
Direct Wire
WARNING
Electrical Shock Hazard
Disconnect power before servicing.
Use 8 gauge copper or 6 gauge aluminum wire.
Electrically ground range.
Failure to follow these instructions can result in death, fire, or electrical shock.
1.Disconnect power.
2.Use Phillips screwdriver to remove the terminal block cover screw located on the back of the range. Pull cover down and toward you to remove cover.
3.Remove plastic tag holding three
9