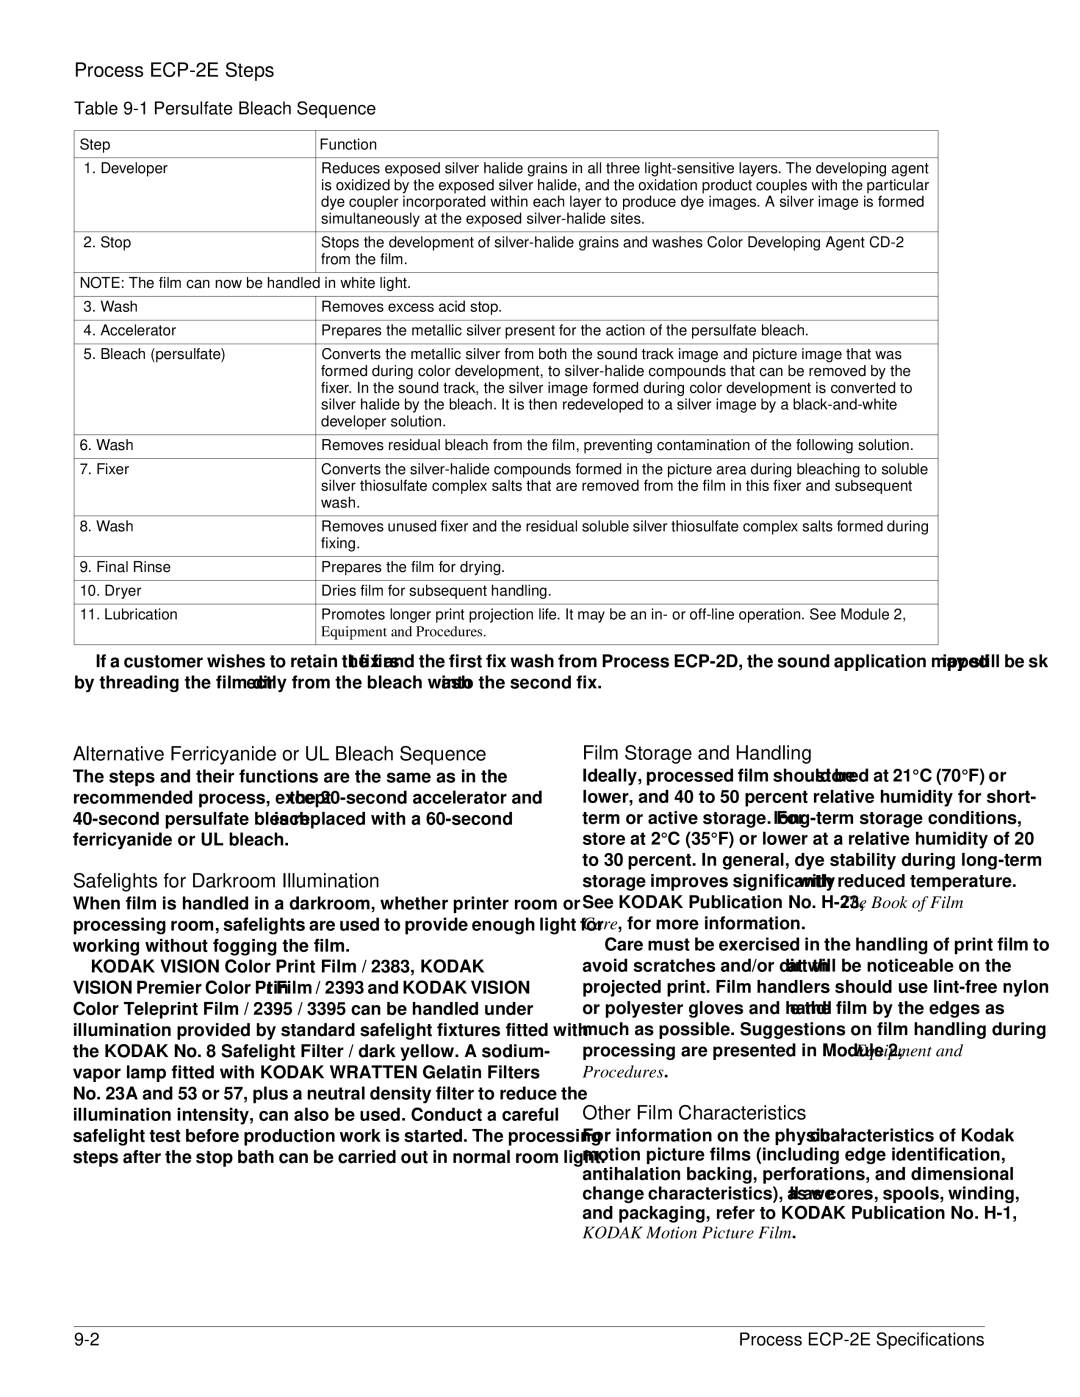
Process ECP-2E Steps

Table 9-1 Persulfate Bleach Sequence

Step

Function


1. Developer

Reduces exposed silver halide grains in all three light-sensitive layers. The developing agent


is oxidized by the exposed silver halide, and the oxidation product couples with the particular


dye coupler incorporated within each layer to produce dye images. A silver image is formed


simultaneously at the exposed silver-halide sites.


2. Stop

Stops the development of silver-halide grains and washes Color Developing Agent CD-2


from the film.


NOTE: The film can now be handled in white light.


3. Wash

Removes excess acid stop.


4. Accelerator

Prepares the metallic silver present for the action of the persulfate bleach.


5. Bleach (persulfate)

Converts the metallic silver from both the sound track image and picture image that was


formed during color development, to silver-halide compounds that can be removed by the


fixer. In the sound track, the silver image formed during color development is converted to


silver halide by the bleach. It is then redeveloped to a silver image by a black-and-white


developer solution.


6. Wash

Removes residual bleach from the film, preventing contamination of the following solution.


7. Fixer

Converts the silver-halide compounds formed in the picture area during bleaching to soluble


silver thiosulfate complex salts that are removed from the film in this fixer and subsequent


wash.


8. Wash

Removes unused fixer and the residual soluble silver thiosulfate complex salts formed during


fixing.


9. Final Rinse

Prepares the film for drying.


10. Dryer

Dries film for subsequent handling.


11. Lubrication

Promotes longer print projection life. It may be an in- or off-line operation. See Module 2,


Equipment and Procedures.


If a customer wishes to retain the first fix and the first fix wash from Process ECP-2D, the sound application may still be skipped by threading the film directly from the bleach wash into the second fix.

Alternative Ferricyanide or UL Bleach Sequence

The steps and their functions are the same as in the recommended process, except the 20-second accelerator and 40-second persulfate bleach is replaced with a 60-second ferricyanide or UL bleach.

Safelights for Darkroom Illumination

When film is handled in a darkroom, whether printer room or processing room, safelights are used to provide enough light for working without fogging the film.

KODAK VISION Color Print Film / 2383, KODAK VISION Premier Color Print Film / 2393 and KODAK VISION Color Teleprint Film / 2395 / 3395 can be handled under illumination provided by standard safelight fixtures fitted with the KODAK No. 8 Safelight Filter / dark yellow. A sodium- vapor lamp fitted with KODAK WRATTEN Gelatin Filters No. 23A and 53 or 57, plus a neutral density filter to reduce the illumination intensity, can also be used. Conduct a careful safelight test before production work is started. The processing steps after the stop bath can be carried out in normal room light.

Film Storage and Handling

Ideally, processed film should be stored at 21°C (70°F) or lower, and 40 to 50 percent relative humidity for short- term or active storage. For long-term storage conditions, store at 2°C (35°F) or lower at a relative humidity of 20 to 30 percent. In general, dye stability during long-term storage improves significantly with reduced temperature. See KODAK Publication No. H-23, The Book of Film Care, for more information.

Care must be exercised in the handling of print film to avoid scratches and/or dirt that will be noticeable on the projected print. Film handlers should use lint-free nylon or polyester gloves and handle the film by the edges as much as possible. Suggestions on film handling during processing are presented in Module 2, Equipment and Procedures.

Other Film Characteristics

For information on the physical characteristics of Kodak motion picture films (including edge identification, antihalation backing, perforations, and dimensional change characteristics), as well as cores, spools, winding, and packaging, refer to KODAK Publication No. H-1, KODAK Motion Picture Film.

9-2

Process ECP-2E Specifications

Page 4
Image 4
Kodak Module 9 Process ECP-2E Steps, Alternative Ferricyanide or UL Bleach Sequence, Safelights for Darkroom Illumination

Module 9 specifications

The Kodak Module 9 is a significant advancement in the world of imaging technology, specifically designed for professionals and enthusiasts seeking high-quality photo prints and efficient workflow solutions. As part of the Kodak line of products, the Module 9 offers a combination of cutting-edge technology and user-friendly features that cater to a diverse range of photographic needs.

One of the standout features of the Kodak Module 9 is its exceptional image quality. Leveraging advanced color science and innovative printing technologies, it produces vibrant and accurate color reproductions, ensuring that every detail of an image is captured and presented in its true form. This is particularly beneficial for photographers who require precise color representation, such as those working in fashion, product photography, or art reproduction.

The Kodak Module 9 is built with a high-performance print engine that supports various media types and sizes. This versatility allows for printing on everything from glossy photographic paper to fine art textures, enabling users to experiment with different materials to achieve their desired aesthetic. Additionally, the device is capable of producing large format prints, making it an ideal choice for those who need expansive visuals for exhibitions or displays.

Incorporating advanced connectivity options, the Module 9 ensures a seamless integration into modern workflows. It features Wi-Fi, USB, and Ethernet connectivity, which facilitates easy printing from multiple devices, whether it’s a camera, laptop, or mobile device. This flexibility is crucial for busy professionals who require quick turnaround times without compromising on quality.

One of the defining characteristics of the Kodak Module 9 is its user-friendly interface. The intuitive touchscreen display simplifies navigation, allowing users to easily adjust settings, select print modes, and monitor printing progress. This ease of use reduces the learning curve for new users, making it accessible to a wider audience.

In terms of sustainability, Kodak has incorporated environmentally friendly practices in the Module 9’s manufacturing and operation. The device supports energy-efficient modes and uses ink cartridges designed to minimize waste, aligning with the growing emphasis on sustainability in photography.

In conclusion, the Kodak Module 9 represents a forward-thinking solution in the photography and printing landscape. With its remarkable image quality, versatile media handling, robust connectivity, and user-oriented design, it stands out as a powerful tool for professionals aiming to elevate their imaging projects while maintaining an efficient and eco-friendly workflow.