Manuals
/
LaCie
/
Computer Equipment
/
Computer Drive
LaCie
Brick Step, Connect the power supply and switch on the drive, Getting Connected, page
Models:
Brick
1
11
29
29
Download
29 pages
56.26 Kb
8
9
10
11
12
13
14
15
Troubleshooting
Warranty
Precautions
Using Your LaCie Drive
Page 11
Image 11
Page 10
Page 12
Page 11
Image 11
Page 10
Page 12
Contents
Handbuch
User’s Manual
Manuel Utilisateur
Guída Utente
LaCie Brick Hi-Speed USB Desktop Hard Drive User’s Manual
Table of Contents
Table of Contents
Desktop Hard Drive User’s Manual
Foreword
LaCie Brick Hi-Speed USB
Consult the dealer or an experienced radio/TV technician for help
Precautions
Health And Safety Precautions
1.1. Minimum System Requirements
1. Unpacking Your LaCie Brick Hi-Speed USB 2.0 Hard Drive
Unpacking Your LaCie Drive
1.2 Stacking your LaCie Brick
Windows 98 SE and Windows Me Users Mac OS 9.x Users
2. Getting Connected
Getting Connected
C Silverlining 98 will then initialize the install screen
A Double-click the USB 2.0 Drivers Install folder
C Installation will finish automatically
B Double-click the Silverlining98Install.EXE icon
4 The Silverlining Utilities screen appears. Click on Continue
Mac OS 9.x Users Only! Silverlining Pro Installation
LaCie Brick Hi-Speed USB
3 Click on the Silverlining Installer icon Fig.2.1
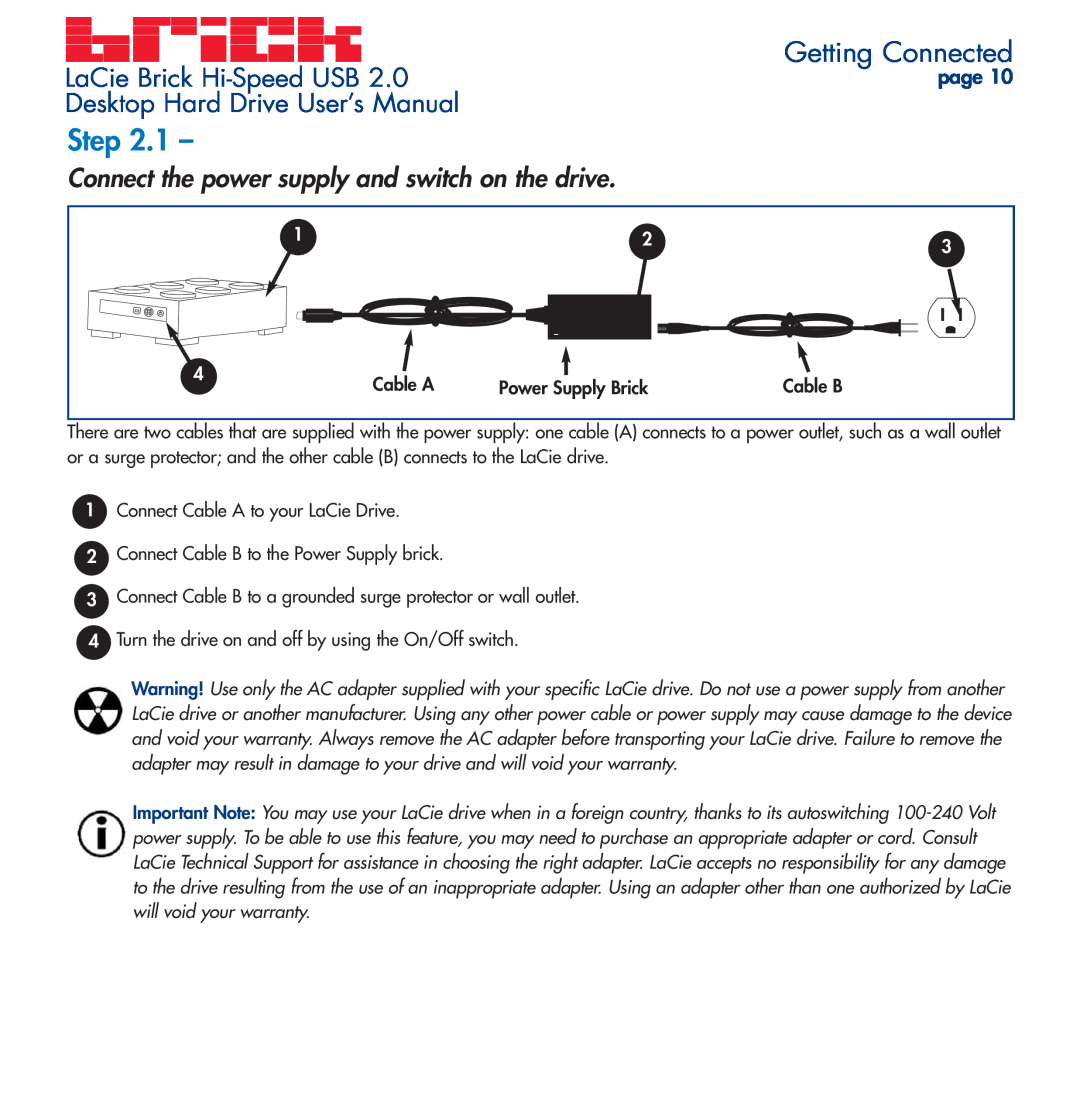
Step
Connect the power supply and switch on the drive
Mac OS
Connect the USB 2.0 cable to your LaCie Drive and to your computer
File System Formats
3. Using Your LaCie Drive
Using Your LaCie Drive
Important NoteCheck the quick format box
6 Click Finish to exit the Wizard
3.1.2. Mac Users
Formatting And Partitioning Using Mac OS
8 In the Volume Information section, create a name for each partition, choose the volume format Mac OS Extended, Mac OS Standard or UNIX File System and the volume size
Helpful Information
4.1. Advice For Optimizing USB 2.0 Connections
4. Helpful Information
Mac OS 9.x Mac OS
Windows Users
Mac Users
3 Disconnect your computer’s USB 2.0 cable. Wait 30 seconds. Reconnect
4.2 File System Formats
Mac OS 9.x Users
The Issue
5. Troubleshooting
Troubleshooting
Manual Updates
for more information
access the latest updates from Apple
fixes for their operating systems. Go to
LaCie Brick Hi-Speed USB
Troubleshooting
The Issue
Possible Solutions
LaCie Brick Hi-Speed USB
Contacting Customer Support
6. Contacting Customer Support
LaCie Technical Support
Warranty
7. Warranty
Top
Page
Image
Contents