Digital Display Wall Clock Guide | Page 20 |
|
|
Setting the Time
Time is set on the DDC Series Wall Clocks by depressing buttons located on the left side of the front panel. There are two setting buttons, "H" for hour and "M' for minute.
»To advance the hour or minute to the correct time one digit at a time press and release the proper button. Do this as many times as required until the correct time is displayed. When setting the hour, if the display is set to 12 Hour, a "dot" in the upper left corner of the display represents the PM hours.
»To rapidly advance the hour or minute press and hold the proper button. Release the button when the correct time is displayed. When setting the hour, if the display is set to 12 Hour, a "dot" in the upper left corner of the display represents the PM hours.
Note: Setting the minutes past 59 will not cause the hour to advance.
Note: Avoid using sharp or pointed objects to set the time as damage to the buttons may occur. A standard pencil eraser is suggested.
Time Formats
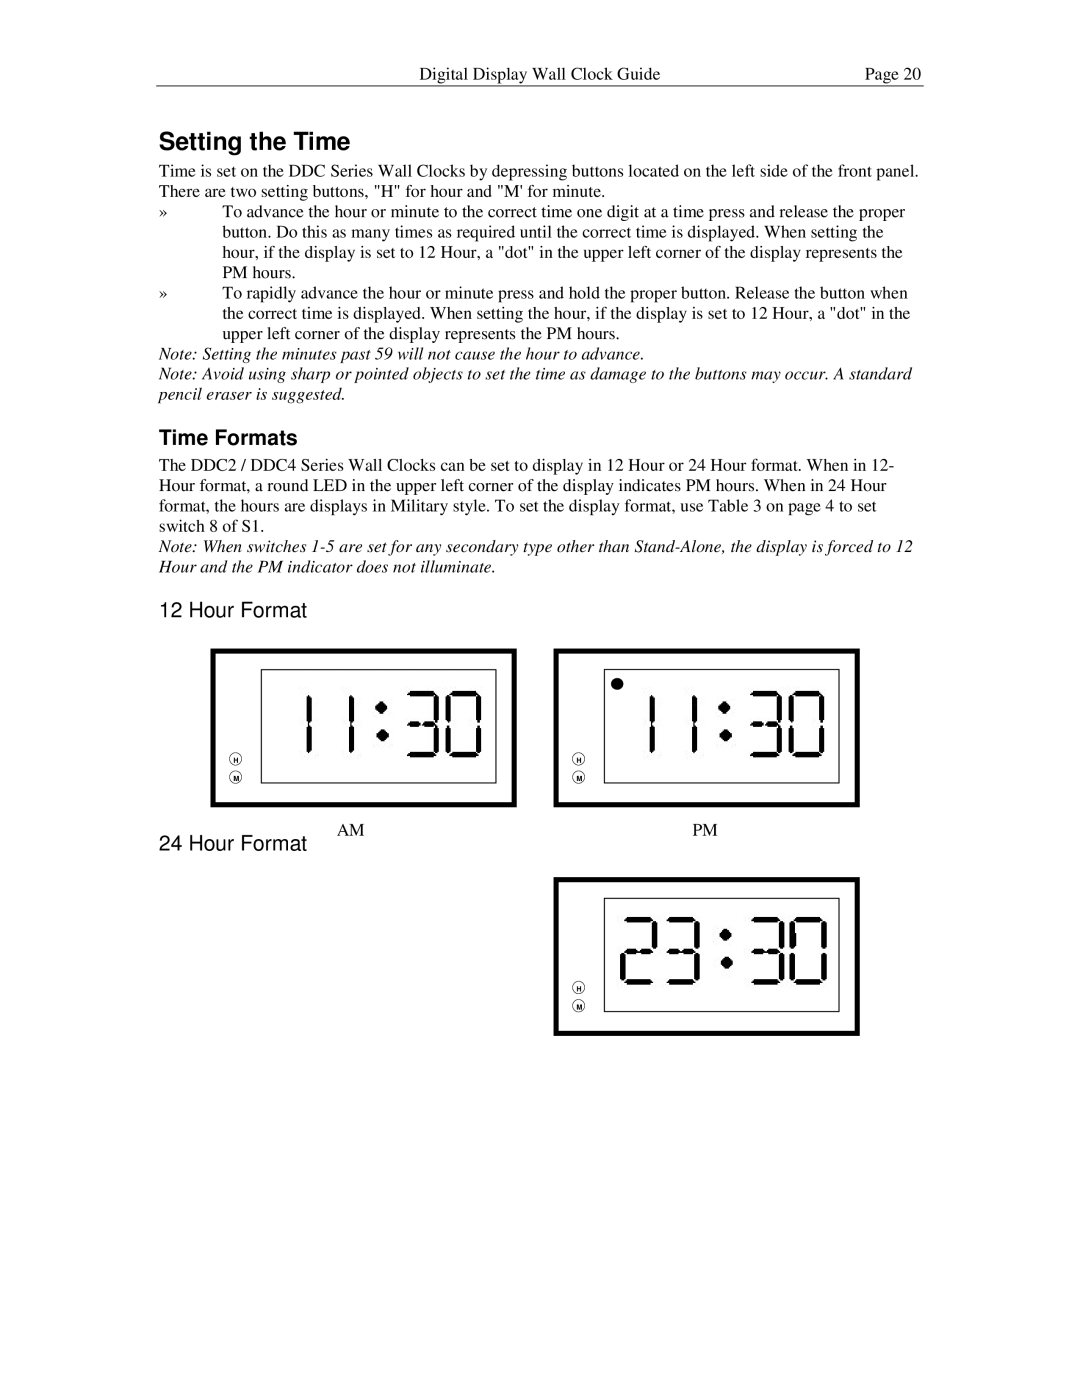
The DDC2 / DDC4 Series Wall Clocks can be set to display in 12 Hour or 24 Hour format. When in 12- Hour format, a round LED in the upper left corner of the display indicates PM hours. When in 24 Hour format, the hours are displays in Military style. To set the display format, use Table 3 on page 4 to set switch 8 of S1.
Note: When switches
12 Hour Format
H
M
24 Hour Format
AM
H
M
PM
H
M