As an aside procedure, during your first use of the telescope, you should check the calibration of the Declination setting circle (3, Fig. 1), located at the top of each side of the fork. After performing the polar alignment procedure, center the star Polaris in the telescope field. Remove the knurled central hub of the Declination setting circle and slightly loosen the two bolts located under the knob. Now turn the circle unit until it reads 89.2°, the Declination of Polaris, and then tighten down the two bolts and replace the knurled knob. Also realize, should you wish to use the manual setting circles, that the R.A. setting circle (10, Fig. 1) must be calibrated on the Right Ascension of a star (see APPENDIX C, page 31) manually every time the telescope is set up. The R.A. setting circle has two sets of numbers, the inner set is for Southern hemisphere use, while the other is for Northern hemisphere use.
Once the latitude angle of the wedge has been fixed and locked-in according to the above procedure, it is not necessary to repeat this operation each time the telescope is used, unless you move a considerable distance North or South from your original observing position. (Approximately 70 miles movement in North-South observing position is equivalent to 1° in latitude change). The wedge may be detached from the field tripod and, as long as the latitude angle setting is not altered and the field tripod is leveled, it will retain the correct latitude setting when replaced on the tripod.
3. Precise Polar Alignment
It should be emphasized that precise alignment of the telescope's polar axis to the celestial pole for casual visual observations is not necessary. Don't allow a time-consuming effort at lining up with the pole to interfere with your basic enjoyment of the telescope. For long-exposure photography, however, the ground rules are quite different, and precise polar alignment is not only advisable, but almost essential.
Notwithstanding the precision and sophistication of the drive system supplied with the Meade LX200 telescopes, the fewer tracking corrections required during the course of a long-exposure photograph, the better. (For our purposes, "long-exposure" means any photograph of about 10 minutes duration or longer). In particular, the number of Declination corrections required is a direct function of the precision of polar alignment.
Precise polar alignment requires the use of a crosshair eyepiece. The Meade Illuminated Reticle Eyepiece is well-suited in this application, but you will want to increase the effective magnification through the use of a 2X or 3X Barlow lens. Then either follow Refined Polar Alignment (page 17) or follow this procedure, sometimes better known as the "Drift" method (particularly if the pole star is not visible):
a.Obtain a rough polar alignment as described earlier. Place the illuminated reticle eyepiece (or eyepiece/Barlow combination) into the eyepiece holder of the telescope.
b.Point the telescope, with the motor drive running, at a moderately bright star near where the meridian (the North- South line passing through your local zenith) and the celestial equator intersect. For best results, the star
should be located within ±30 minutes in R.A. of the meridian and within ±5° of the celestial equator. (Pointing the telescope at a star that is straight up, with the Declination set to 0°, will point the telescope in the right direction.)
c.Note the extent of the star's drift in Declination (disregard drift in Right Ascension):
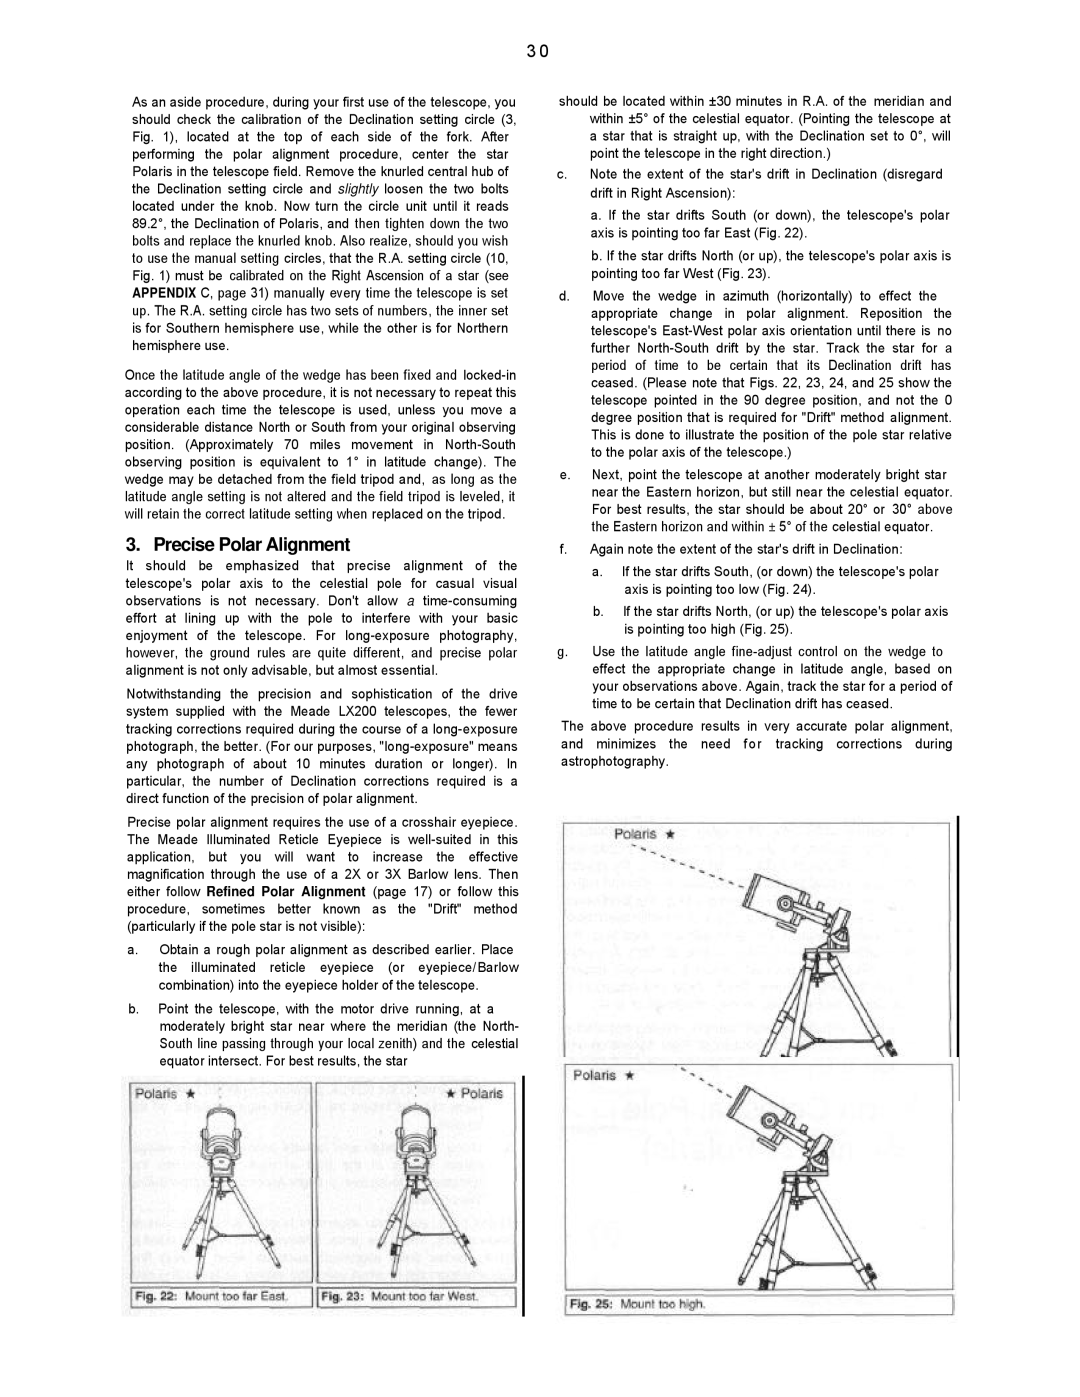
a.If the star drifts South (or down), the telescope's polar axis is pointing too far East (Fig. 22).
b.If the star drifts North (or up), the telescope's polar axis is pointing too far West (Fig. 23).
d.Move the wedge in azimuth (horizontally) to effect the appropriate change in polar alignment. Reposition the telescope's East-West polar axis orientation until there is no further North-South drift by the star. Track the star for a period of time to be certain that its Declination drift has ceased. (Please note that Figs. 22, 23, 24, and 25 show the telescope pointed in the 90 degree position, and not the 0 degree position that is required for "Drift" method alignment. This is done to illustrate the position of the pole star relative to the polar axis of the telescope.)
e.Next, point the telescope at another moderately bright star near the Eastern horizon, but still near the celestial equator. For best results, the star should be about 20° or 30° above the Eastern horizon and within ± 5° of the celestial equator.
f. Again note the extent of the star's drift in Declination:
a.If the star drifts South, (or down) the telescope's polar axis is pointing too low (Fig. 24).
b.If the star drifts North, (or up) the telescope's polar axis is pointing too high (Fig. 25).
g.Use the latitude angle fine-adjust control on the wedge to effect the appropriate change in latitude angle, based on your observations above. Again, track the star for a period of time to be certain that Declination drift has ceased.
The above procedure results in very accurate polar alignment, and minimizes the need for tracking corrections during astrophotography.