Installation and
Calibration
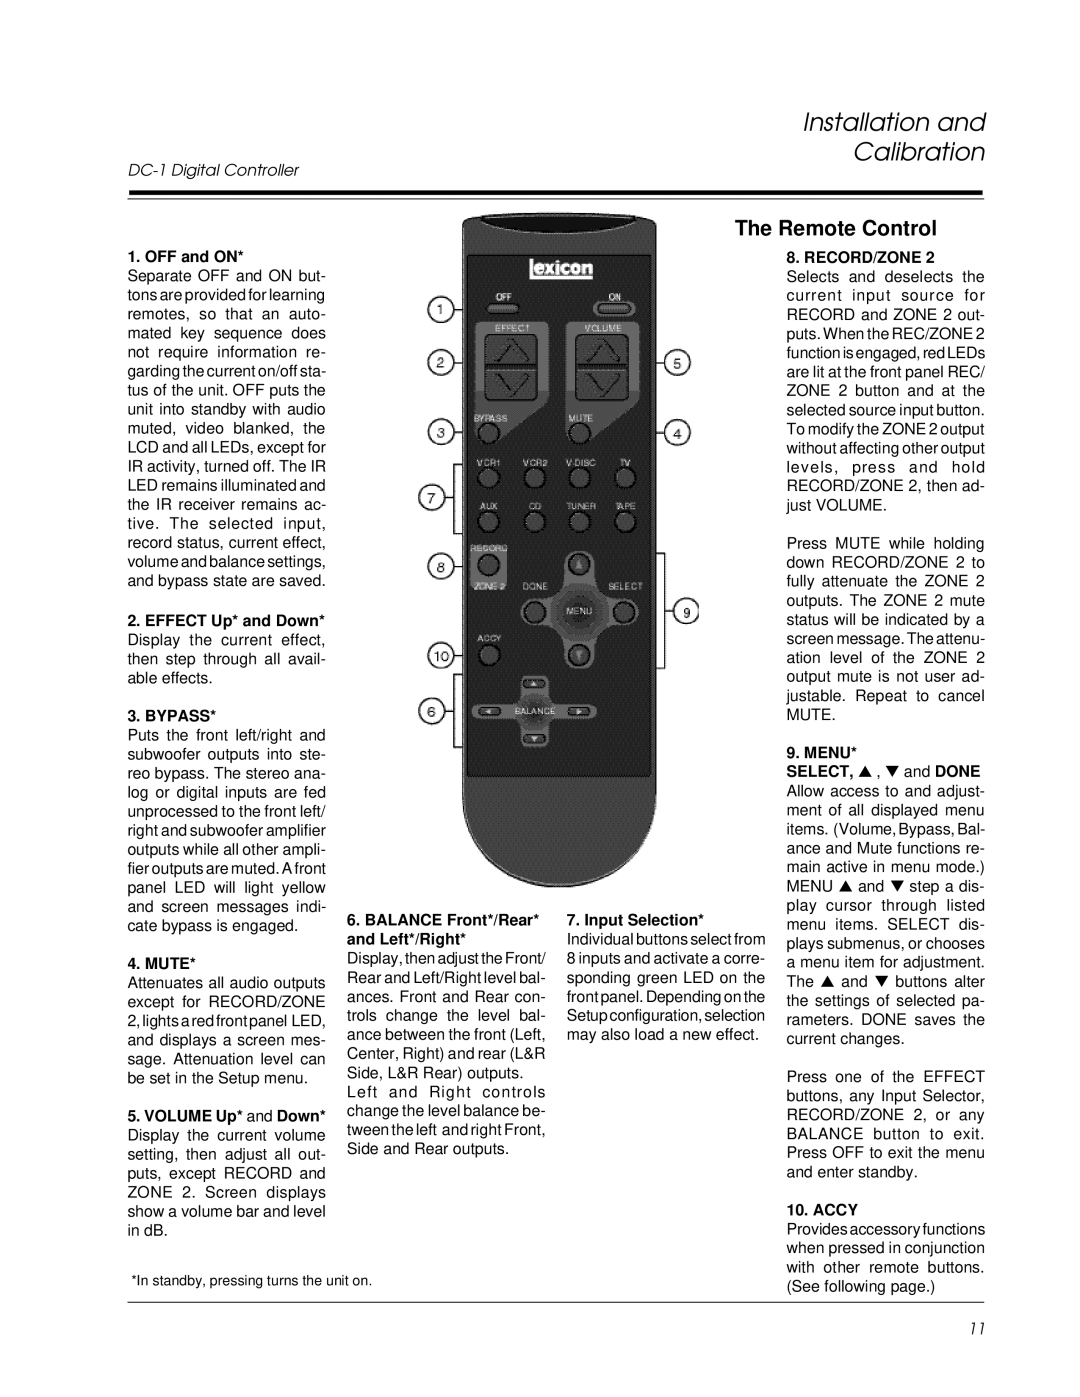
The Remote Control
1. OFF and ON*
Separate OFF and ON but- tons are provided for learning remotes, so that an auto- mated key sequence does not require information re- garding the current on/off sta- tus of the unit. OFF puts the unit into standby with audio muted, video blanked, the LCD and all LEDs, except for IR activity, turned off. The IR LED remains illuminated and the IR receiver remains ac- tive. The selected input, record status, current effect, volume and balance settings, and bypass state are saved.
2.EFFECT Up* and Down* Display the current effect, then step through all avail- able effects.
3.BYPASS*
Puts the front left/right and subwoofer outputs into ste- reo bypass. The stereo ana- log or digital inputs are fed unprocessed to the front left/ right and subwoofer amplifier outputs while all other ampli- fier outputs are muted. A front panel LED will light yellow and screen messages indi- cate bypass is engaged.
4. MUTE*
Attenuates all audio outputs except for RECORD/ZONE 2, lights a red front panel LED, and displays a screen mes- sage. Attenuation level can be set in the Setup menu.
5.VOLUME Up* and Down* Display the current volume setting, then adjust all out- puts, except RECORD and ZONE 2. Screen displays show a volume bar and level in dB.
6.BALANCE Front*/Rear* and Left*/Right*
Display, then adjust the Front/ Rear and Left/Right level bal- ances. Front and Rear con- trols change the level bal- ance between the front (Left, Center, Right) and rear (L&R Side, L&R Rear) outputs.
Left and Right controls change the level balance be- tween the left and right Front, Side and Rear outputs.
7.Input Selection* Individual buttons select from
8inputs and activate a corre- sponding green LED on the front panel. Depending on the Setup configuration, selection may also load a new effect.
8.RECORD/ZONE 2 Selects and deselects the current input source for RECORD and ZONE 2 out- puts. When the REC/ZONE 2 function is engaged, red LEDs are lit at the front panel REC/ ZONE 2 button and at the selected source input button. To modify the ZONE 2 output without affecting other output levels, press and hold RECORD/ZONE 2, then ad- just VOLUME.
Press MUTE while holding down RECORD/ZONE 2 to fully attenuate the ZONE 2 outputs. The ZONE 2 mute status will be indicated by a screen message. The attenu- ation level of the ZONE 2 output mute is not user ad- justable. Repeat to cancel MUTE.
9. MENU*
SELECT, ▲ , ▼ and DONE Allow access to and adjust- ment of all displayed menu items. (Volume, Bypass, Bal- ance and Mute functions re- main active in menu mode.) MENU ▲ and ▼ step a dis- play cursor through listed menu items. SELECT dis- plays submenus, or chooses a menu item for adjustment. The ▲ and ▼ buttons alter the settings of selected pa- rameters. DONE saves the current changes.
Press one of the EFFECT buttons, any Input Selector, RECORD/ZONE 2, or any BALANCE button to exit. Press OFF to exit the menu and enter standby.
10. ACCY
Provides accessory functions when pressed in conjunction with other remote buttons.
*In standby, pressing turns the unit on.
(See following page.)
11