Step 12: Installing memory, option, or interface cards
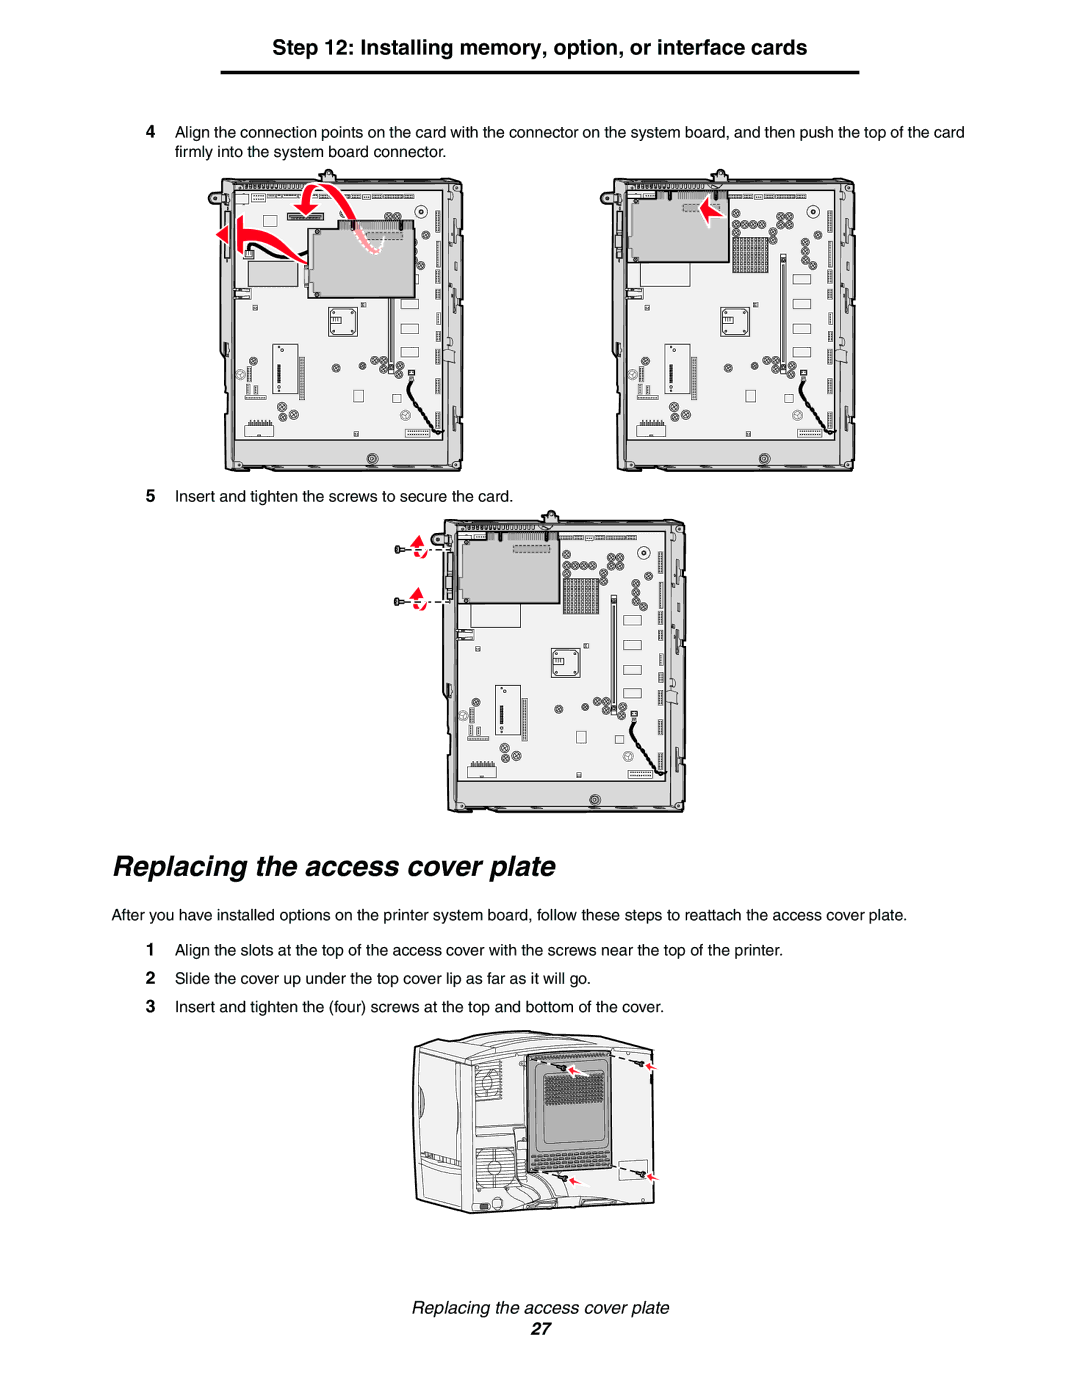
4Align the connection points on the card with the connector on the system board, and then push the top of the card firmly into the system board connector.
5Insert and tighten the screws to secure the card.
Replacing the access cover plate
After you have installed options on the printer system board, follow these steps to reattach the access cover plate.
1Align the slots at the top of the access cover with the screws near the top of the printer.
2Slide the cover up under the top cover lip as far as it will go.
3Insert and tighten the (four) screws at the top and bottom of the cover.
Replacing the access cover plate
27
