Disassembly

 Refrigerating
 Cycle
Cycle


12. Condenser
CAUTION: Discharge the refrigerant system using a FreonTM Recovery
System. If there is no valve to attach the recovery system, install one (such as a WATCO
1. Remove the cabinet. (Refer to section 2)
2. Remove the 4 screws that fasten the brace.(Refer to section 4)
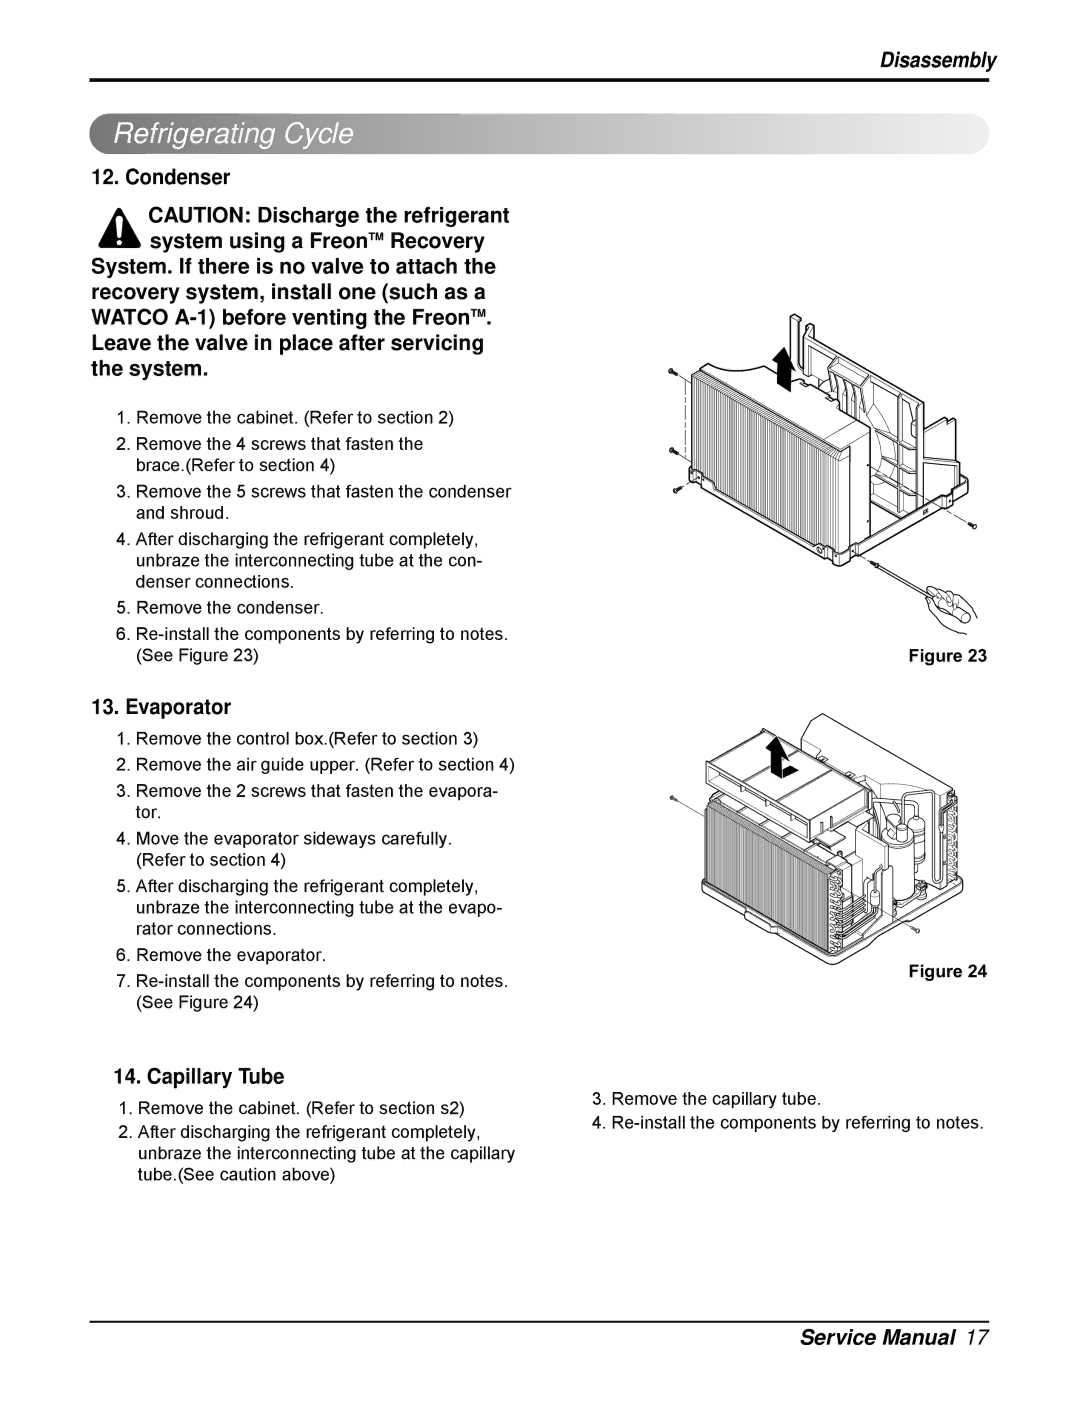
3. Remove the 5 screws that fasten the condenser and shroud.
4. After discharging the refrigerant completely, unbraze the interconnecting tube at the con- denser connections.
5. Remove the condenser.
6. |
|
(See Figure 23) | Figure 23 |
13. Evaporator
1. Remove the control box.(Refer to section 3)
2. Remove the air guide upper. (Refer to section 4)
3. Remove the 2 screws that fasten the evapora- tor.
4. Move the evaporator sideways carefully. (Refer to section 4)
5. After discharging the refrigerant completely, unbraze the interconnecting tube at the evapo- rator connections.
6. Remove the evaporator. | Figure 24 | |
7. | ||
| ||
(See Figure 24) |
|
14. Capillary Tube
1.Remove the cabinet. (Refer to section s2)
2.After discharging the refrigerant completely, unbraze the interconnecting tube at the capillary tube.(See caution above)
3.Remove the capillary tube.
4.
Service Manual 17
