6.5REMOVING THE ACCESSORY TRAYS
The accessory trays should be removed and cleaned periodically. See section 6.2, titled Preventive Maintenance Schedule. To remove a tray, press inward the clip at the rear of the tray, and pull the tray out. To reinsert the tray, line up the notch in front with small slit and snap the top edge back into locked position.
6.6HOW TO ADJUST AND TENSION THE STRIDING BELT
Do not move the treadmill or place hands under treadmill while it is plugged into an electrical outlet!
THE BELT TENSIONING BOLTS
A
NOTE: It is extremely important that the treadmill be correctly leveled prior to any tracking adjustments. An unstable unit may cause striding belt misalignment. See the topic titled How To Stabilize the Life Fitness Treadmill in Section 1.2, titled Set Up, prior to attempting any rear roller adjustments.
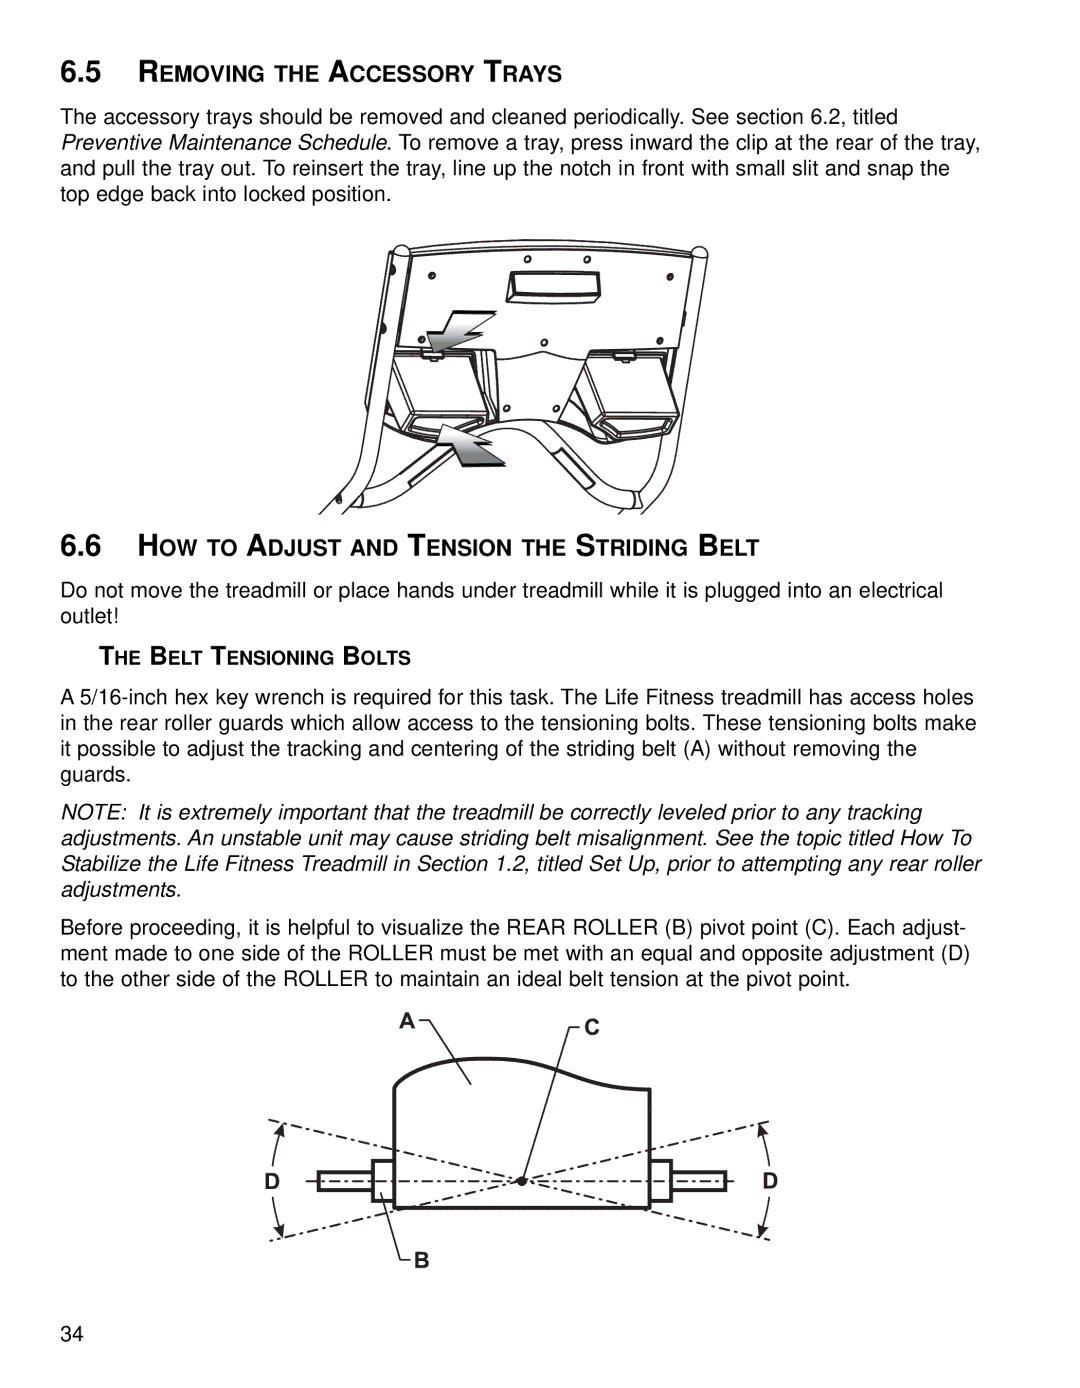
Before proceeding, it is helpful to visualize the REAR ROLLER (B) pivot point (C). Each adjust- ment made to one side of the ROLLER must be met with an equal and opposite adjustment (D) to the other side of the ROLLER to maintain an ideal belt tension at the pivot point.
34