|
|
|
|
| FIGURE 20 |
|
| 78 | 26 |
| 77 BLACK |
|
|
|
|
| |
| 9 | 41 |
|
| 73 |
|
|
|
| ||
|
|
|
| 76 | 75 |
3/8 X |
|
|
|
|
|
(67m) 64 |
| BLACK | 63 | 3/8 X | |
|
| 77 |
|
|
|
78 |
|
|
|
|
|
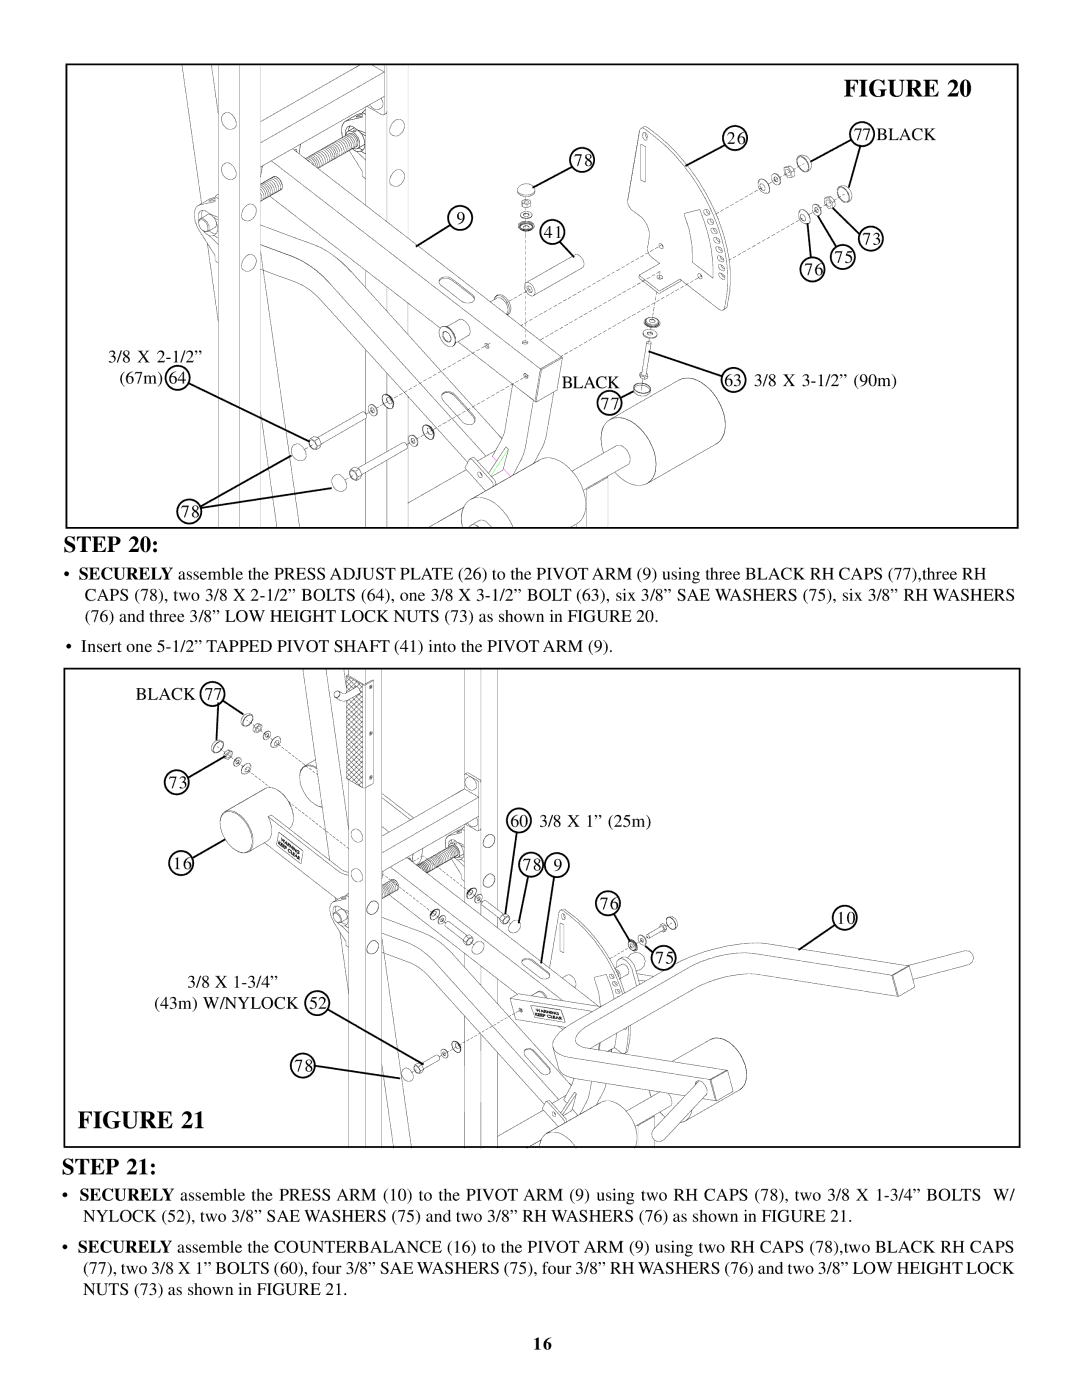
STEP 20:
•SECURELY assemble the PRESS ADJUST PLATE (26) to the PIVOT ARM (9) using three BLACK RH CAPS (77),three RH CAPS (78), two 3/8 X
•Insert one
BLACK 77 |
|
|
73 |
|
|
| 60 3/8 X 1” (25m) | |
16 | 78 | 9 |
|
| 76 |
|
| 10 |
|
| 75 |
3/8 X |
|
|
(43m) W/NYLOCK 52 |
|
|
78 |
|
|
FIGURE 21 |
|
|
STEP 21:
•SECURELY assemble the PRESS ARM (10) to the PIVOT ARM (9) using two RH CAPS (78), two 3/8 X
•SECURELY assemble the COUNTERBALANCE (16) to the PIVOT ARM (9) using two RH CAPS (78),two BLACK RH CAPS (77), two 3/8 X 1” BOLTS (60), four 3/8” SAE WASHERS (75), four 3/8” RH WASHERS (76) and two 3/8” LOW HEIGHT LOCK NUTS (73) as shown in FIGURE 21.
16
