3/8 X 3/4” 56 | 5 | | 78 |
| |
8 | | | 73 |
| | 76 75 |
| | 54 |
| | |
50 | | | |
| | | 44 |
TIGHTEN! | | 38 | |
| | |
| | 64 3/8 X 2-1/2” (67m) |
| 65 3/8 X 3” (73m) | | |
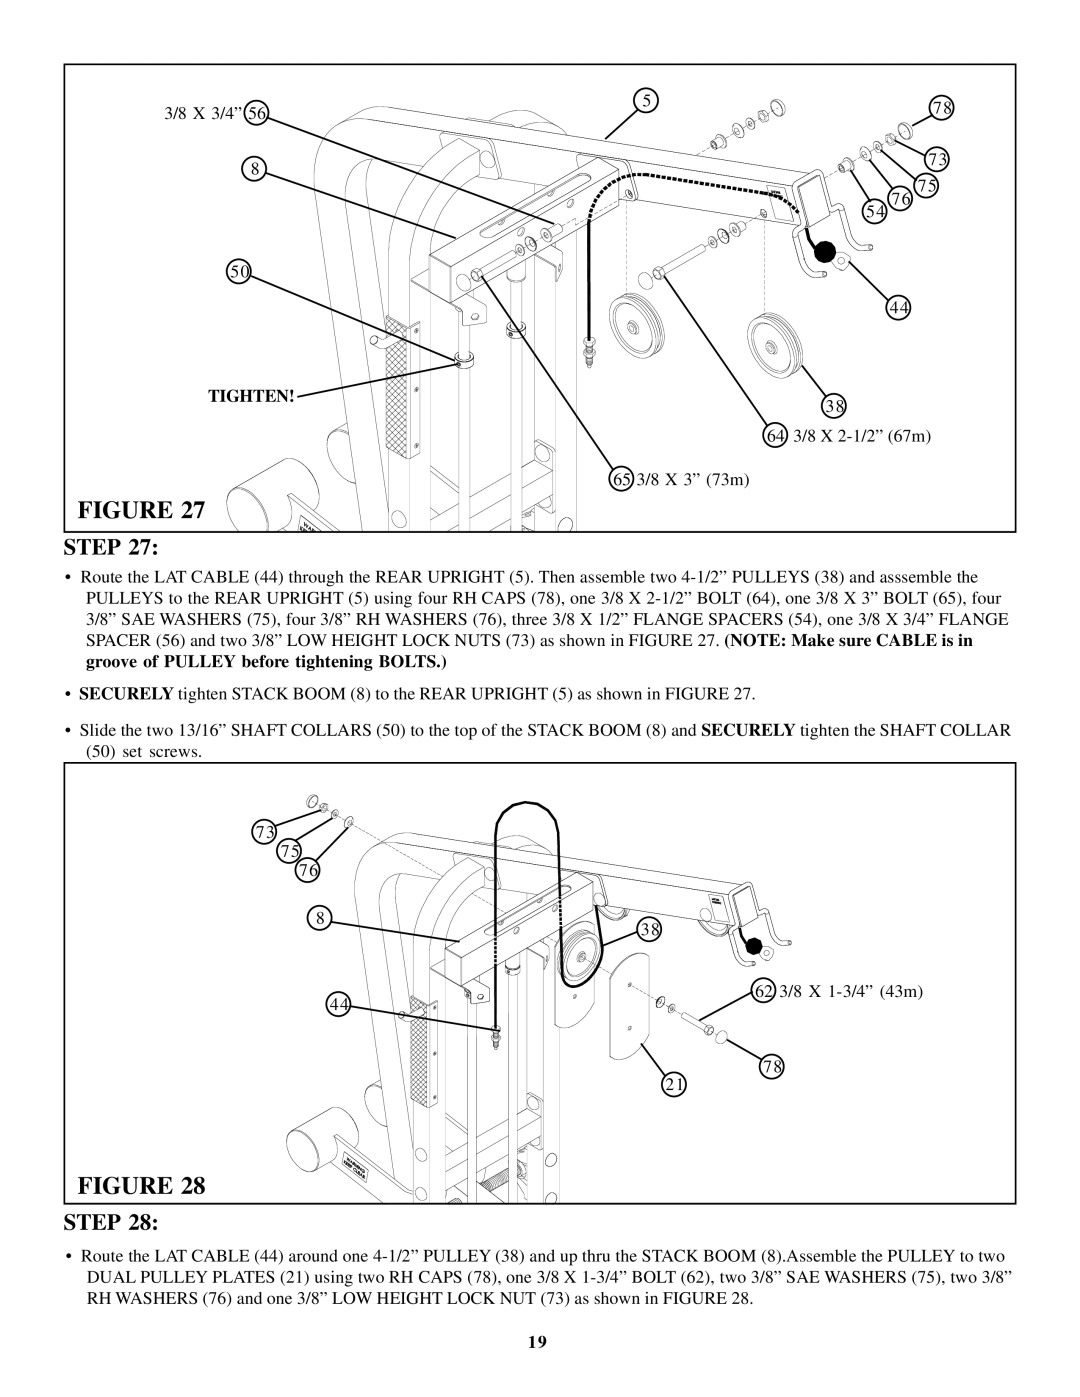
FIGURE 27 | | | |
STEP 27: | | | |
•Route the LAT CABLE (44) through the REAR UPRIGHT (5). Then assemble two 4-1/2” PULLEYS (38) and asssemble the PULLEYS to the REAR UPRIGHT (5) using four RH CAPS (78), one 3/8 X 2-1/2” BOLT (64), one 3/8 X 3” BOLT (65), four 3/8” SAE WASHERS (75), four 3/8” RH WASHERS (76), three 3/8 X 1/2” FLANGE SPACERS (54), one 3/8 X 3/4” FLANGE SPACER (56) and two 3/8” LOW HEIGHT LOCK NUTS (73) as shown in FIGURE 27. (NOTE: Make sure CABLE is in groove of PULLEY before tightening BOLTS.)
•SECURELY tighten STACK BOOM (8) to the REAR UPRIGHT (5) as shown in FIGURE 27.
•Slide the two 13/16” SHAFT COLLARS (50) to the top of the STACK BOOM (8) and SECURELY tighten the SHAFT COLLAR
(50)set screws.
73 | | |
75 | | |
76 | | |
8 | | 38 |
| |
| 44 | 62 3/8 X 1-3/4” (43m) |
| |
| | 78 |
| | 21 |
FIGURE 28 | | |
STEP 28:
•Route the LAT CABLE (44) around one 4-1/2” PULLEY (38) and up thru the STACK BOOM (8).Assemble the PULLEY to two DUAL PULLEY PLATES (21) using two RH CAPS (78), one 3/8 X 1-3/4” BOLT (62), two 3/8” SAE WASHERS (75), two 3/8” RH WASHERS (76) and one 3/8” LOW HEIGHT LOCK NUT (73) as shown in FIGURE 28.
19