8 |
|
| 74 |
| 71 3/8 X 1” (25m) |
24 | BUTTON HEAD |
| |
23 |
|
20 |
|
| SERIAL # |
| LOCATION |
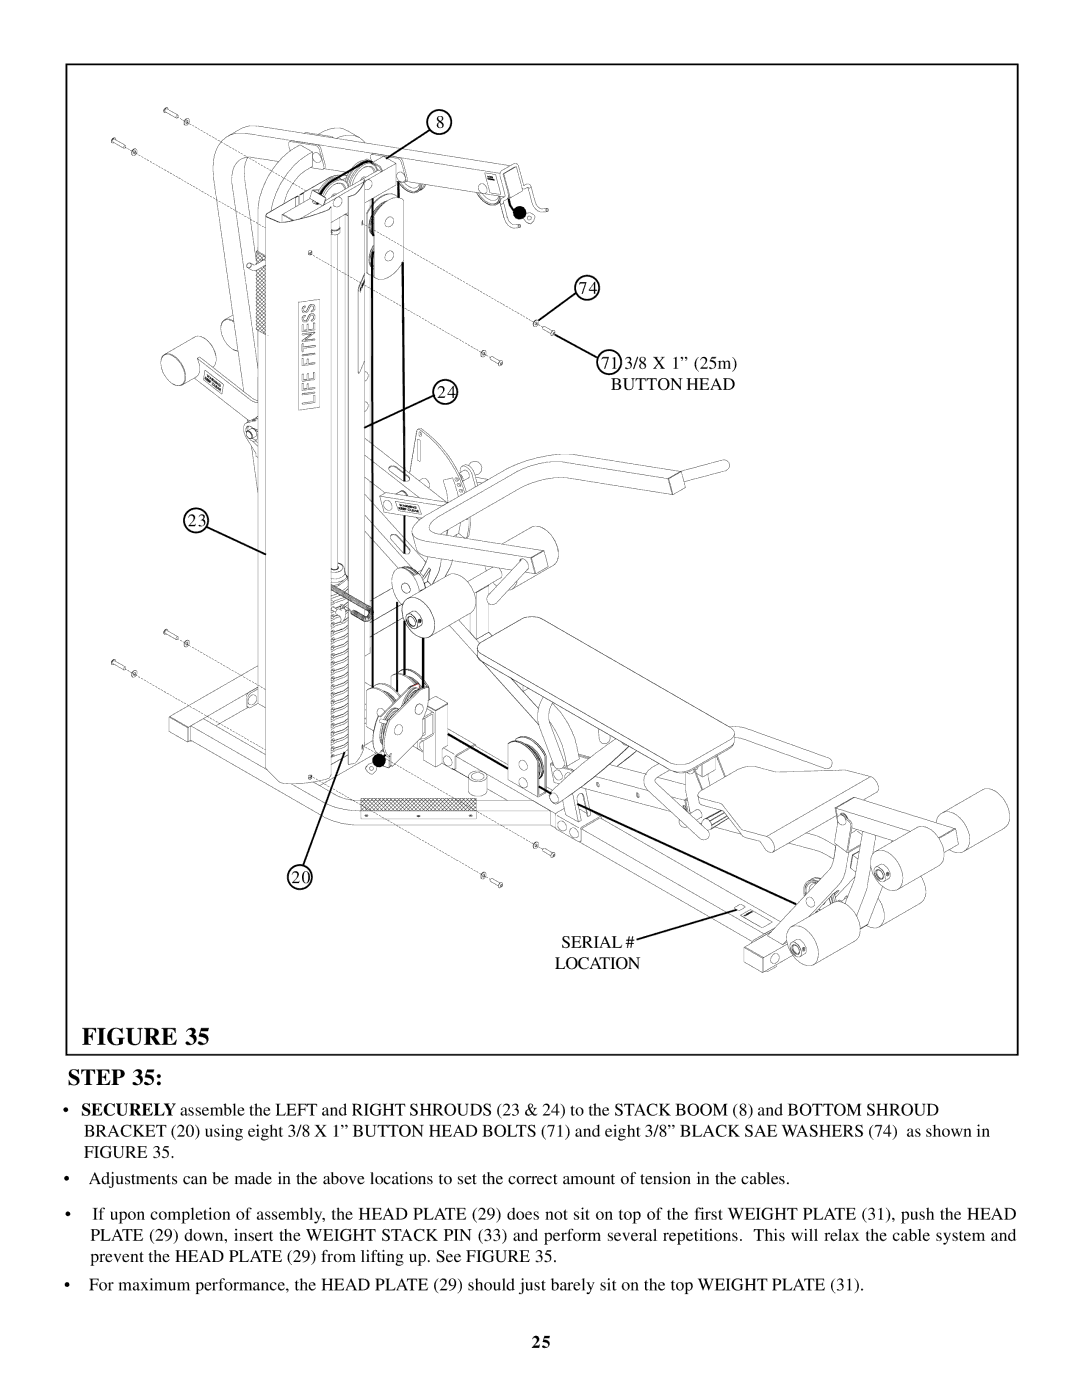
FIGURE 35 |
|
STEP 35:
•SECURELY assemble the LEFT and RIGHT SHROUDS (23 & 24) to the STACK BOOM (8) and BOTTOM SHROUD BRACKET (20) using eight 3/8 X 1” BUTTON HEAD BOLTS (71) and eight 3/8” BLACK SAE WASHERS (74) as shown in FIGURE 35.
•Adjustments can be made in the above locations to set the correct amount of tension in the cables.
•If upon completion of assembly, the HEAD PLATE (29) does not sit on top of the first WEIGHT PLATE (31), push the HEAD PLATE (29) down, insert the WEIGHT STACK PIN (33) and perform several repetitions. This will relax the cable system and prevent the HEAD PLATE (29) from lifting up. See FIGURE 35.
•For maximum performance, the HEAD PLATE (29) should just barely sit on the top WEIGHT PLATE (31).
25