Mounting the Camera
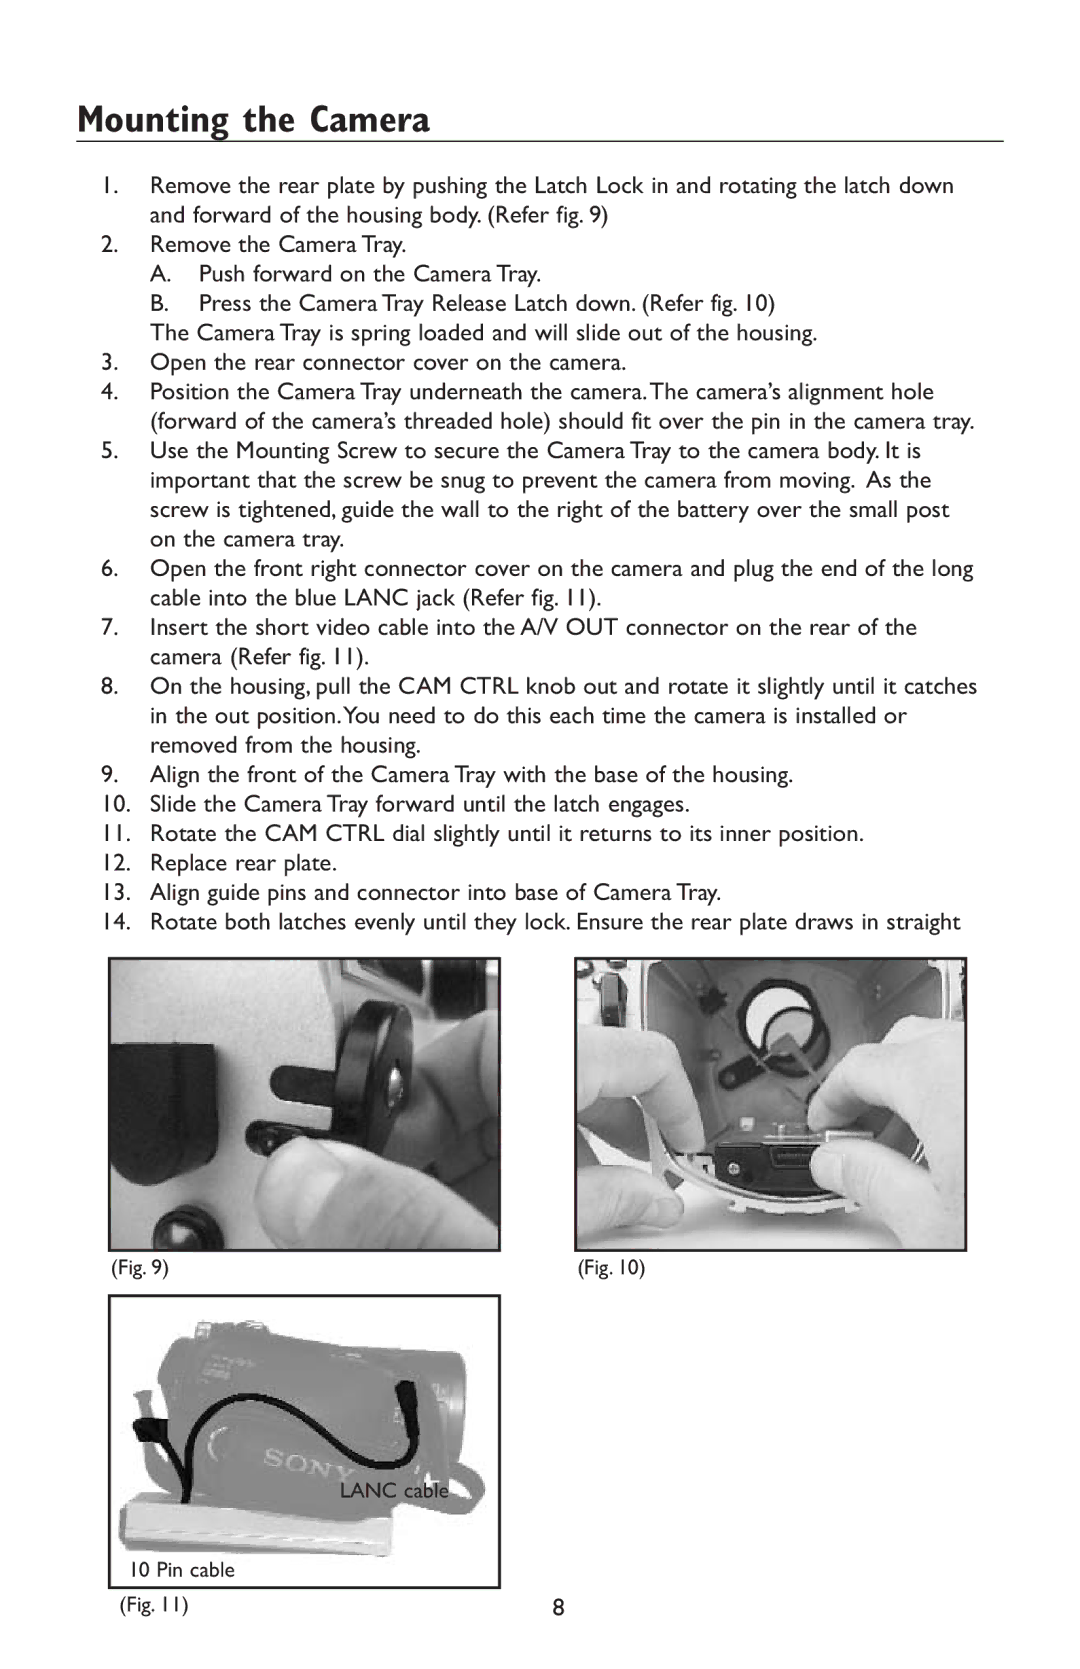
1.Remove the rear plate by pushing the Latch Lock in and rotating the latch down and forward of the housing body. (Refer fig. 9)
2.Remove the Camera Tray.
A.Push forward on the Camera Tray.
B.Press the Camera Tray Release Latch down. (Refer fig. 10)
The Camera Tray is spring loaded and will slide out of the housing.
3.Open the rear connector cover on the camera.
4.Position the Camera Tray underneath the camera.The camera’s alignment hole (forward of the camera’s threaded hole) should fit over the pin in the camera tray.
5.Use the Mounting Screw to secure the Camera Tray to the camera body. It is important that the screw be snug to prevent the camera from moving. As the screw is tightened, guide the wall to the right of the battery over the small post on the camera tray.
6.Open the front right connector cover on the camera and plug the end of the long cable into the blue LANC jack (Refer fig. 11).
7.Insert the short video cable into the A/V OUT connector on the rear of the camera (Refer fig. 11).
8.On the housing, pull the CAM CTRL knob out and rotate it slightly until it catches in the out position.You need to do this each time the camera is installed or removed from the housing.
9.Align the front of the Camera Tray with the base of the housing.
10.Slide the Camera Tray forward until the latch engages.
11.Rotate the CAM CTRL dial slightly until it returns to its inner position.
12.Replace rear plate.
13.Align guide pins and connector into base of Camera Tray.
14.Rotate both latches evenly until they lock. Ensure the rear plate draws in straight
(Fig. 9) | (Fig. 10) |
LANC cable
10 Pin cable
(Fig. 11) | 8 |