![]() +
+
L![]() R
R
OFF
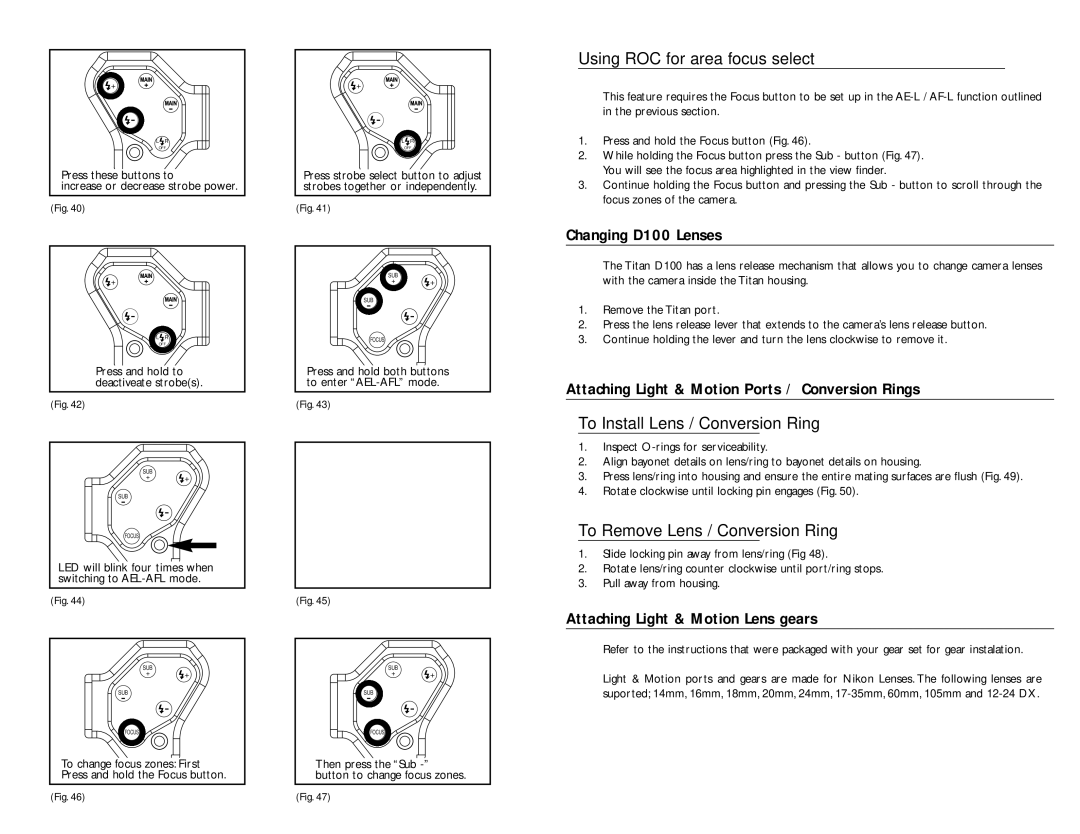
Press these buttons to
increase or decrease strobe power.
(Fig. 40)
![]() +
+
L![]() R
R
OFF
Press and hold to deactiveate strobe(s).
(Fig. 42)
SUB
+ ![]() +
+
SUB
FOCUS
LED will blink four times when switching to
(Fig. 44)
SUB |
|
+ | + |
SUB |
|
FOCUS
To change focus zones: First Press and hold the Focus button.
![]() +
+
L![]() R
R
OFF
Press strobe select button to adjust strobes together or independently.
(Fig. 41)
SUB
+ ![]() +
+
SUB
FOCUS
Press and hold both buttons to enter
(Fig. 43)
(Fig. 45)
SUB |
|
+ | + |
SUB |
|
FOCUS
Then press the “Sub
Using ROC for area focus select
This feature requires the Focus button to be set up in the
1.Press and hold the Focus button (Fig. 46).
2.While holding the Focus button press the Sub - button (Fig. 47). You will see the focus area highlighted in the view finder.
3.Continue holding the Focus button and pressing the Sub - button to scroll through the focus zones of the camera.
Changing D100 Lenses
The Titan D100 has a lens release mechanism that allows you to change camera lenses with the camera inside the Titan housing.
1.Remove the Titan port.
2.Press the lens release lever that extends to the camera’s lens release button.
3.Continue holding the lever and turn the lens clockwise to remove it.
Attaching Light & Motion Ports / Conversion Rings
To Install Lens / Conversion Ring
1.Inspect
2.Align bayonet details on lens/ring to bayonet details on housing.
3.Press lens/ring into housing and ensure the entire mating surfaces are flush (Fig. 49).
4.Rotate clockwise until locking pin engages (Fig. 50).
To Remove Lens / Conversion Ring
1.Slide locking pin away from lens/ring (Fig 48).
2.Rotate lens/ring counter clockwise until port/ring stops.
3.Pull away from housing.
Attaching Light & Motion Lens gears
Refer to the instructions that were packaged with your gear set for gear instalation.
Light & Motion ports and gears are made for Nikon Lenses. The following lenses are suported; 14mm, 16mm, 18mm, 20mm, 24mm,
(Fig. 46) | (Fig. 47) |
