(Fig. 48)
(Fig. 50)
(Fig. 52)
(Fig. 49)
(Fig. 51)
(Fig. 53)
Installing Mod Light
Installing Sunray Mod Light (Optional)
1.Identify the appropriate parts in the Titan mounting kit included with the Mod Light.
2.Titan Kit includes the following.
Hex screw, split washer, metal washer, 1/2” hexogonal base piece, and hex key.
3.Place the hex screw through the split washer and metal washer.
4.Place both the hex screw and both metal washers together through the round end of the base piece (Fig. 51).
5.Place the base assembly over the accessory hole of the Titan.
6.Orient the base piece so the hexogonal shape of the base piece matches the hexogonal detail of the Titan and so the hex screw rests on top of the accessory mount.
7.Tighten the entire assembly by tightening the hex screw into the Tetra’s accessory hole
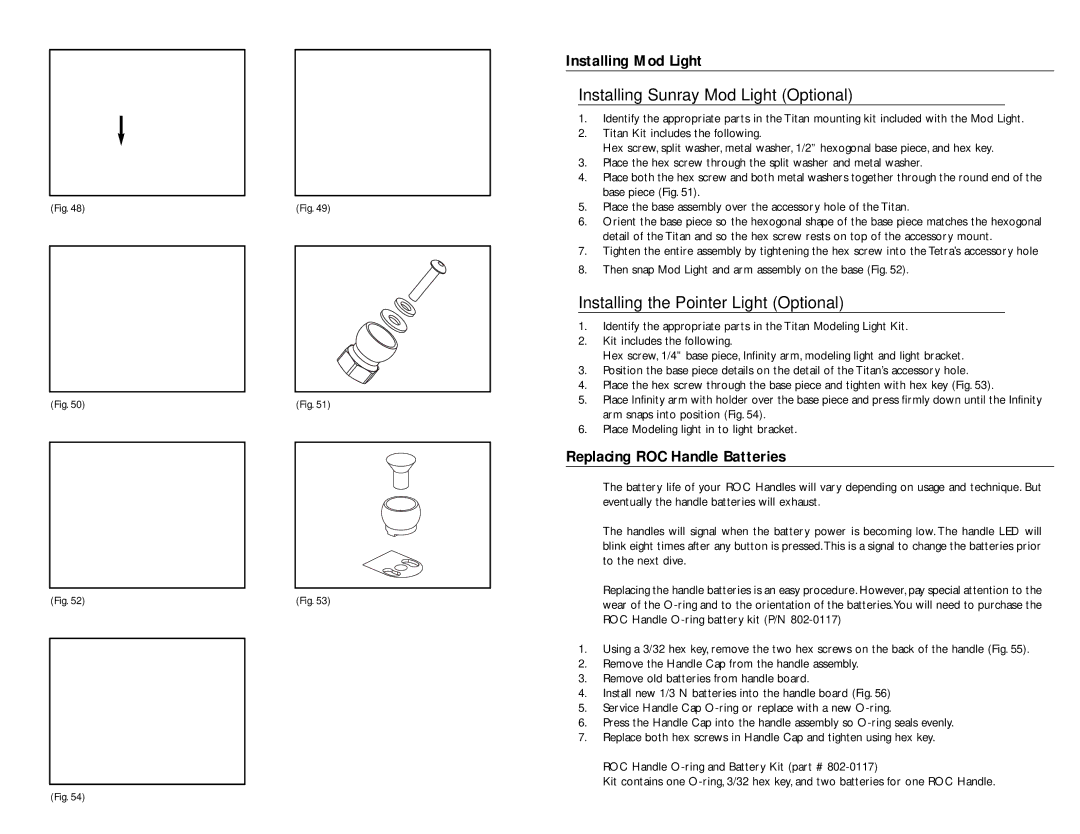
8.Then snap Mod Light and arm assembly on the base (Fig. 52).
Installing the Pointer Light (Optional)
1.Identify the appropriate parts in the Titan Modeling Light Kit.
2.Kit includes the following.
Hex screw, 1/4” base piece, Infinity arm, modeling light and light bracket.
3.Position the base piece details on the detail of the Titan’s accessory hole.
4.Place the hex screw through the base piece and tighten with hex key (Fig. 53).
5.Place Infinity arm with holder over the base piece and press firmly down until the Infinity arm snaps into position (Fig. 54).
6.Place Modeling light in to light bracket.
Replacing ROC Handle Batteries
The battery life of your ROC Handles will vary depending on usage and technique. But eventually the handle batteries will exhaust.
The handles will signal when the battery power is becoming low. The handle LED will blink eight times after any button is pressed.This is a signal to change the batteries prior to the next dive.
Replacing the handle batteries is an easy procedure. However, pay special attention to the wear of the
1.Using a 3/32 hex key, remove the two hex screws on the back of the handle (Fig. 55).
2.Remove the Handle Cap from the handle assembly.
3.Remove old batteries from handle board.
4.Install new 1/3 N batteries into the handle board (Fig. 56)
5.Service Handle Cap
6.Press the Handle Cap into the handle assembly so
7.Replace both hex screws in Handle Cap and tighten using hex key.
ROC Handle
Kit contains one
(Fig. 54)