Instant Wireless® Series
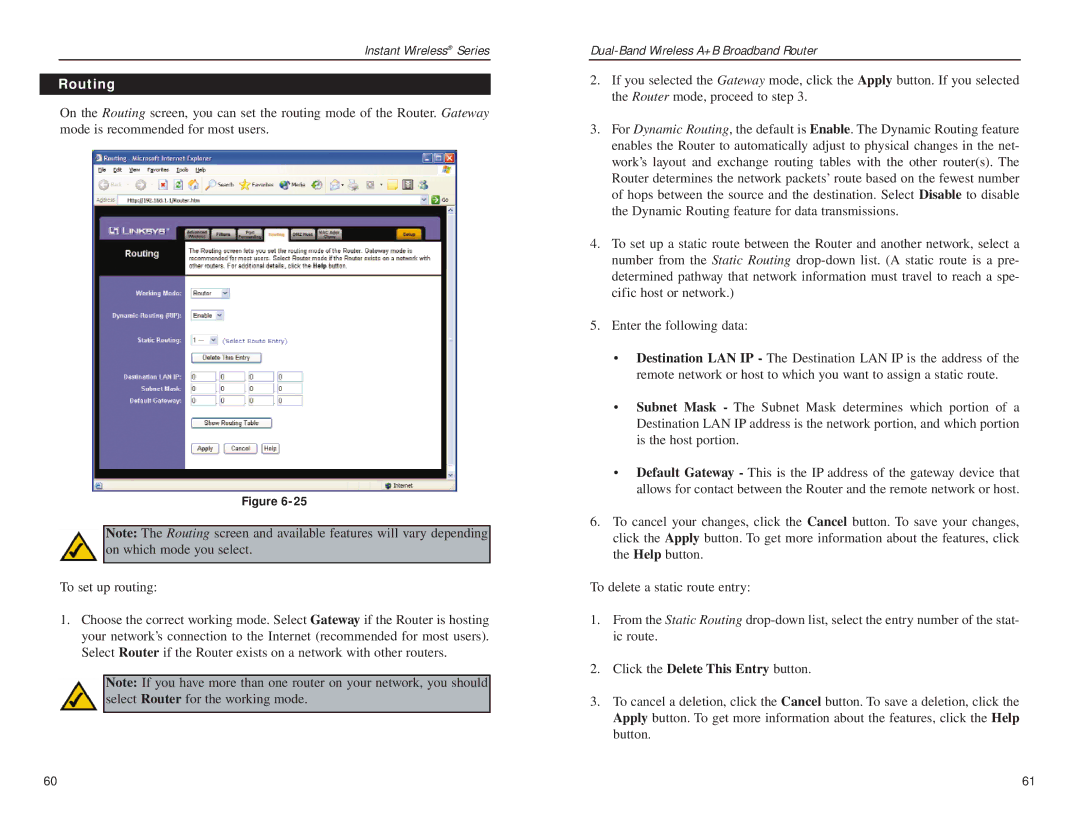
Routing
On the Routing screen, you can set the routing mode of the Router. Gateway mode is recommended for most users.
Figure
Note: The Routing screen and available features will vary depending on which mode you select.
To set up routing:
1.Choose the correct working mode. Select Gateway if the Router is hosting your network’s connection to the Internet (recommended for most users). Select Router if the Router exists on a network with other routers.
Note: If you have more than one router on your network, you should select Router for the working mode.
2.If you selected the Gateway mode, click the Apply button. If you selected the Router mode, proceed to step 3.
3.For Dynamic Routing, the default is Enable. The Dynamic Routing feature enables the Router to automatically adjust to physical changes in the net- work’s layout and exchange routing tables with the other router(s). The Router determines the network packets’ route based on the fewest number of hops between the source and the destination. Select Disable to disable the Dynamic Routing feature for data transmissions.
4.To set up a static route between the Router and another network, select a number from the Static Routing
5.Enter the following data:
•Destination LAN IP - The Destination LAN IP is the address of the remote network or host to which you want to assign a static route.
•Subnet Mask - The Subnet Mask determines which portion of a Destination LAN IP address is the network portion, and which portion is the host portion.
•Default Gateway - This is the IP address of the gateway device that allows for contact between the Router and the remote network or host.
6.To cancel your changes, click the Cancel button. To save your changes, click the Apply button. To get more information about the features, click the Help button.
To delete a static route entry:
1.From the Static Routing
2.Click the Delete This Entry button.
3.To cancel a deletion, click the Cancel button. To save a deletion, click the Apply button. To get more information about the features, click the Help button.
60 | 61 |