
LA-123 90, LA-161, LT-803-072, LR-200-072, LP-3CV-072 specifications
Listen Technologies offers a range of innovative assistive listening solutions tailored to improve the audio experience for individuals in various settings. Among its popular devices are the LR-200-072, LP-3CV-072, LA-161, LA-123 90, and LT-803-072. Each of these products features advanced technology designed to enhance auditory comprehension, ensuring that all users can fully participate in events or activities.The LR-200-072 is a lightweight, portable, and easy-to-use portable receiver. Its digital tuning provides clear sound reproduction, while the wide frequency response ensures that users hear every detail. The LR-200-072 supports multiple channels, allowing users to easily switch between audio sources in environments such as auditoriums and theaters. With its long-lasting battery, this receiver is ideal for extended use in any setting.
The LP-3CV-072, on the other hand, is a powerful transmitter that excels in broadcasting audio to multiple receivers, such as the LR-200-072. Featuring adjustable transmission power, the LP-3CV-072 ensures a strong and reliable signal, even in challenging environments. Its compact design and robust construction make it suitable for various applications, including conferences, language interpretation, and public announcements.
The LA-161 is a high-performance antenna that enhances the range and signal quality of Listen Technologies’ systems. This antenna is specifically designed to work seamlessly with the LR-200-072 and LP-3CV-072, optimizing the performance of the entire system. Its durable construction ensures reliability under various environmental conditions, while its design facilitates effortless installation.
For individuals who require additional assistance, the LA-123 90 is a versatile loop hearing device that helps users with hearing aids or cochlear implants. The LA-123 90 generates an electromagnetic field, allowing compatible devices to capture sound via the telecoil. This device ensures unobtrusive and clear audio transmission, significantly enhancing communication and understanding.
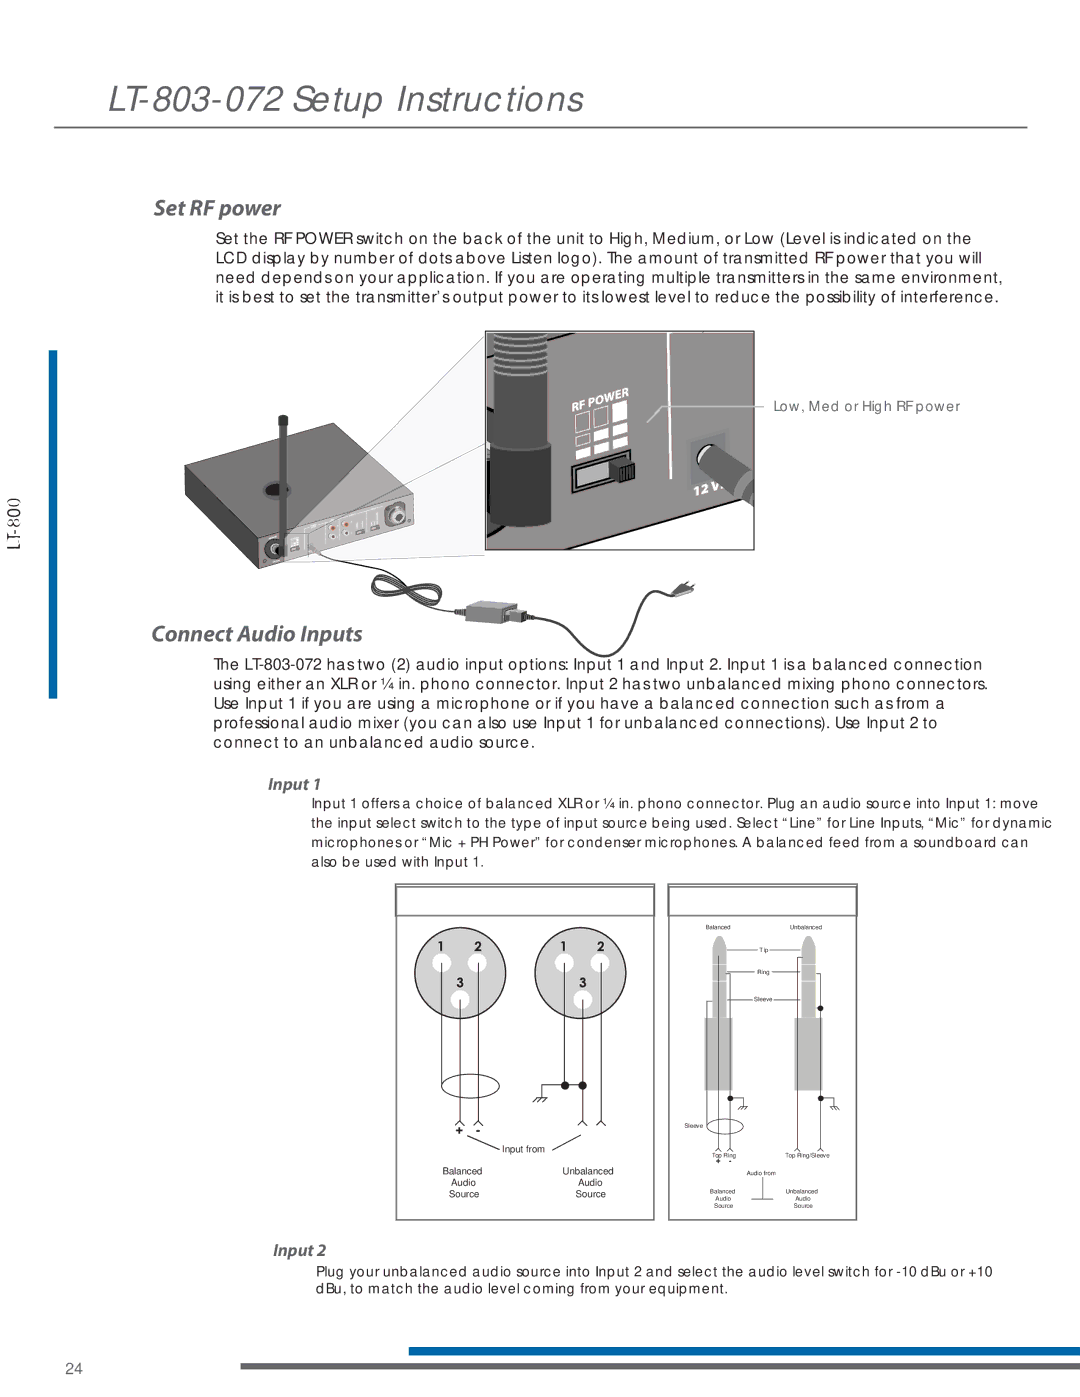
Lastly, the LT-803-072 is a robust and effective transmitter that offers multiple channels and a wide frequency range. This device is designed for compatibility with various Listen Technologies receivers, ensuring users can enjoy uninterrupted audio experiences. The LT-803-072 is particularly useful in settings like educational institutions, conferences, and places of worship, where clear audio is essential for engagement.
Together, these devices from Listen Technologies demonstrate a commitment to improving accessibility and enhancing the audio experience for individuals in various environments. Their advanced features, reliable technologies, and user-friendly designs set them apart as leaders in assistive listening solutions.