
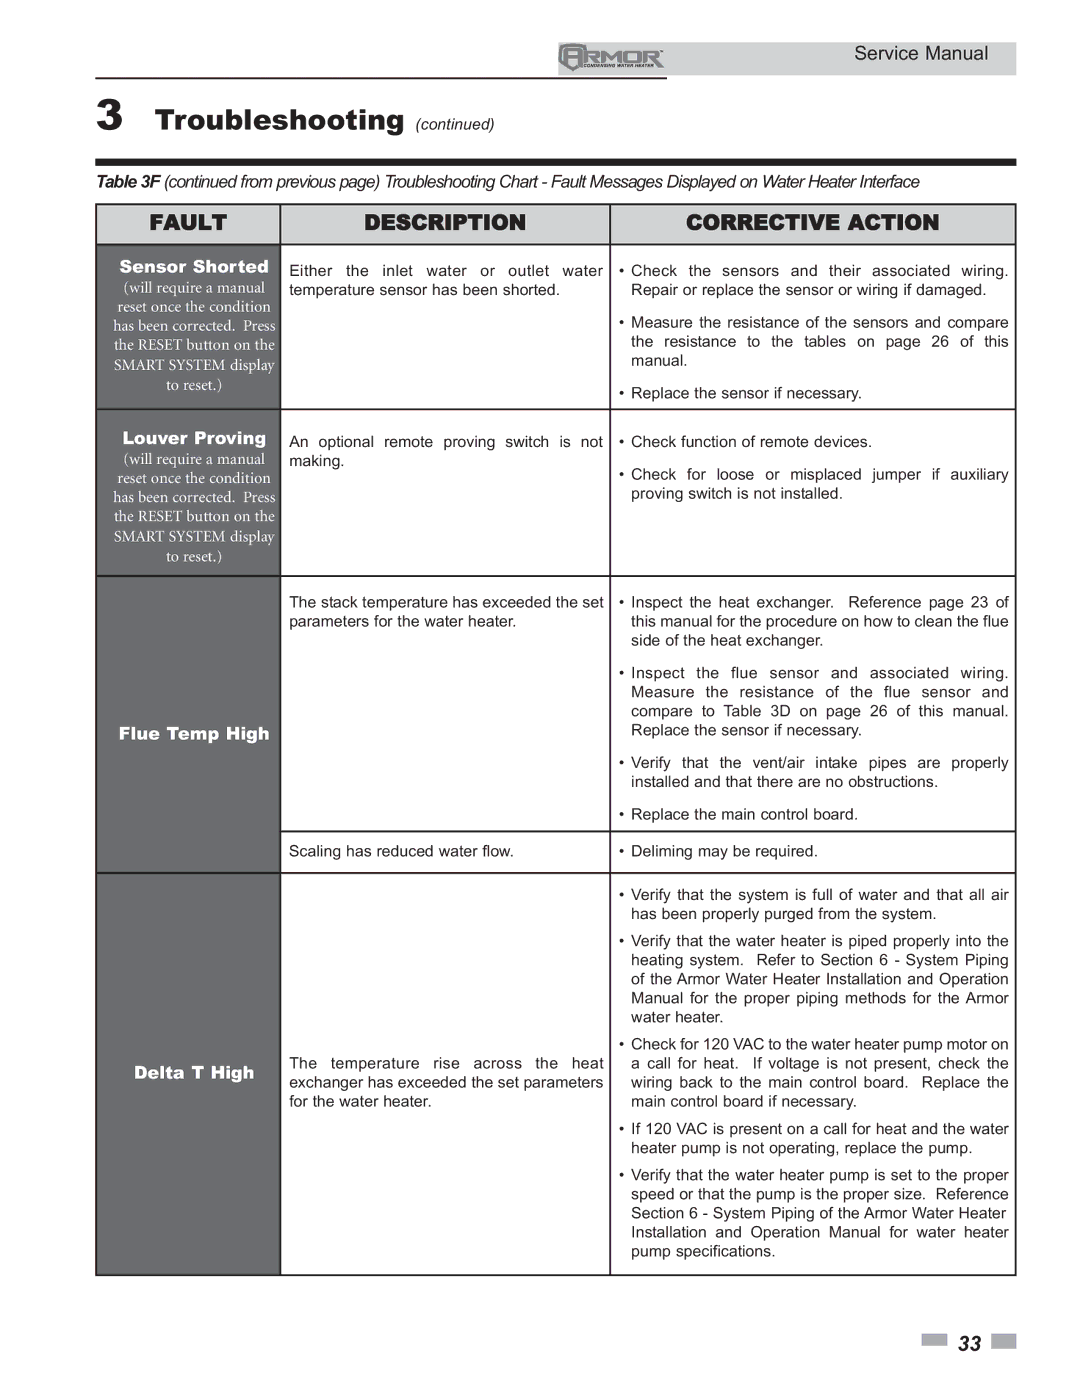
151 - 801 specifications
Lochinvar 151 - 801 is a high-efficiency commercial water heater designed to meet the demanding needs of various applications in the hospitality, healthcare, and educational sectors. This advanced system provides reliable hot water with enhanced performance while promoting energy conservation and sustainability.One of the standout features of the Lochinvar 151 - 801 is its powerful heating capability. With a robust heating input of up to 150,000 BTU per hour, it ensures a steady supply of hot water even during peak demand times. The efficient heat exchanger design optimizes thermal performance, allowing for quicker recovery rates, which is essential for facilities requiring substantial hot water usage.
This model integrates cutting-edge technologies to maximize energy efficiency. Utilized in the Lochinvar 151 - 801 is the Smart System control technology, which provides precise temperature management and diagnostics. This feature not only enhances operation efficiency but simplifies service and maintenance by providing real-time data and alerts, leading to reduced downtime.
Additionally, the Lochinvar 151 - 801 employs a stainless-steel tank construction that promotes durability and robustness. The tank is adequately insulated to minimize heat loss, thus keeping energy costs down. Its compact design also allows for easy installation in various spaces, including those with limited footprints.
Moreover, the unit features advanced combustion technology, including a modulating gas valve that adjusts the flame size according to demand, promoting even greater efficiency. This ensures that the water heater operates at optimum performance levels, reducing fuel consumption while ensuring a consistent supply of hot water.
Safety is a primary concern for Lochinvar, and the 151 - 801 model includes several integrated safety features, such as an ignition safety shutoff and a temperature/pressure relief valve. These systems work together to provide peace of mind while ensuring the unit operates safely within its designated parameters.
In conclusion, the Lochinvar 151 - 801 is an exemplary choice for commercial applications, offering powerful performance, efficient technologies, durable construction, and enhanced safety features. With its combination of high output and advanced monitoring capabilities, it stands as a reliable solution for organizations seeking an effective hot water heating solution.