Optional Equipment | 39 |
Rear Blower Installation (Part number 99000138)
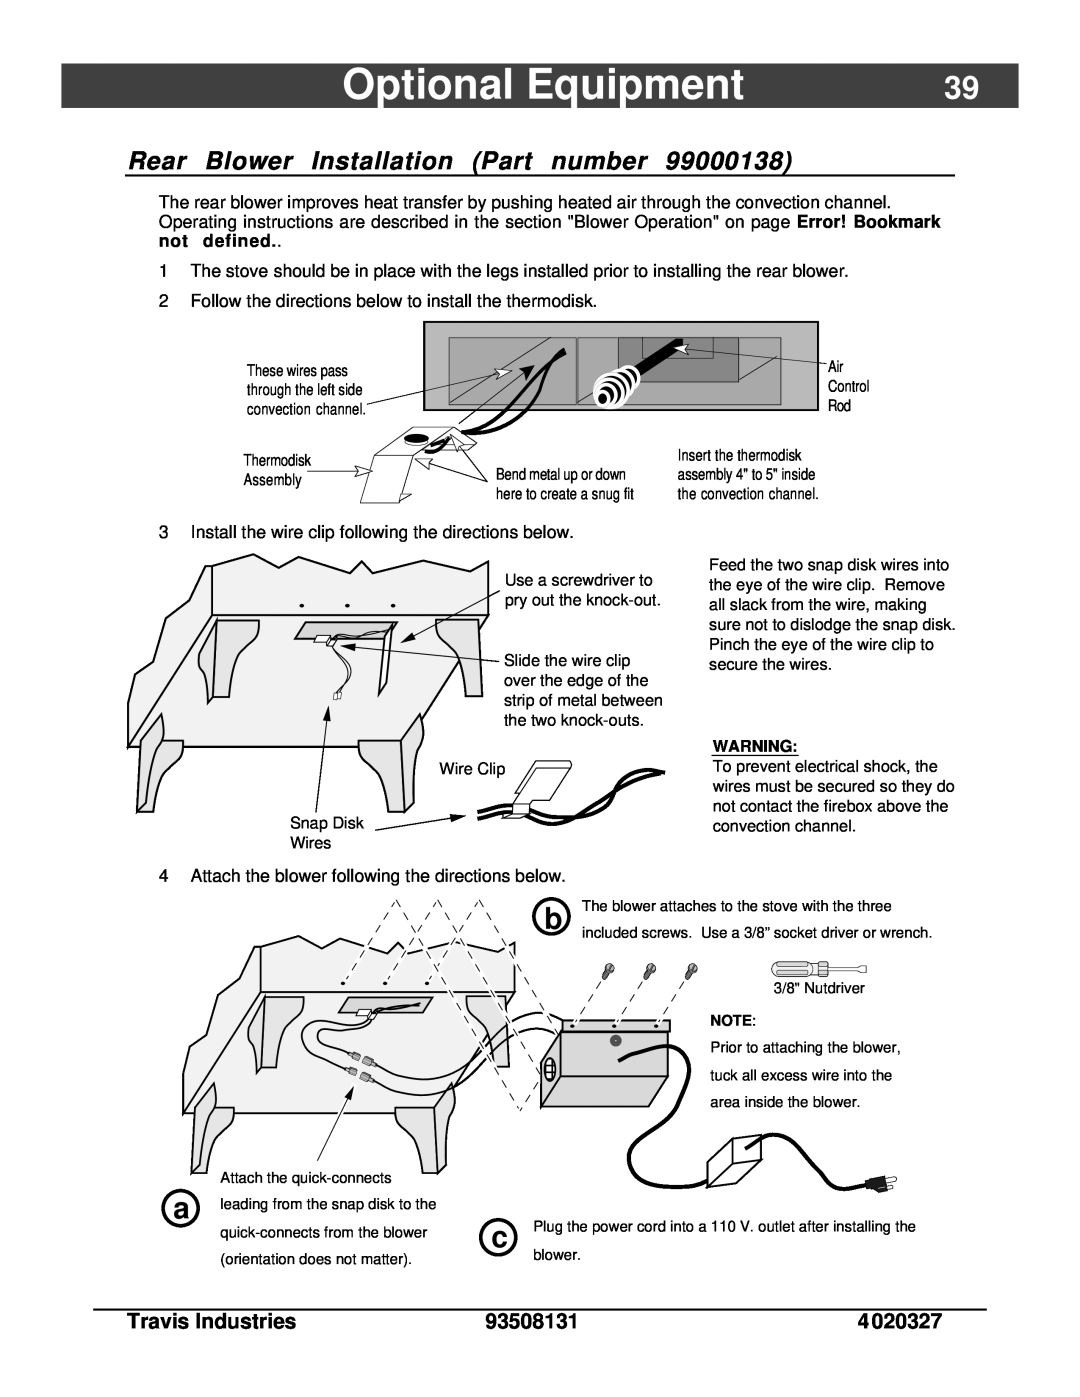
The rear blower improves heat transfer by pushing heated air through the convection channel. Operating instructions are described in the section "Blower Operation" on page Error! Bookmark not defined..
1The stove should be in place with the legs installed prior to installing the rear blower.
2Follow the directions below to install the thermodisk.
These wires pass through the left side convection channel.
Air |
Control |
Rod |
Thermodisk Assembly
| Insert the thermodisk |
Bend metal up or down | assembly 4" to 5" inside |
here to create a snug fit | the convection channel. |
3 Install the wire clip following the directions below.
Use a screwdriver to pry out the
![]() Slide the wire clip over the edge of the strip of metal between the two
Slide the wire clip over the edge of the strip of metal between the two
Wire Clip
Snap Disk
Wires
Feed the two snap disk wires into the eye of the wire clip. Remove all slack from the wire, making sure not to dislodge the snap disk. Pinch the eye of the wire clip to secure the wires.
WARNING:
To prevent electrical shock, the wires must be secured so they do not contact the firebox above the convection channel.
4 Attach the blower following the directions below.
Attach the
a leading from the snap disk to the
b | The blower attaches to the stove with the three |
| included screws. Use a 3/8” socket driver or wrench. |
| 3/8" Nutdriver |
NOTE:
Prior to attaching the blower, tuck all excess wire into the area inside the blower.
c | Plug the power cord into a 110 V. outlet after installing the |
| blower. |
Travis Industries | 93508131 | 4 020327 |