30 | Optional Equipment |
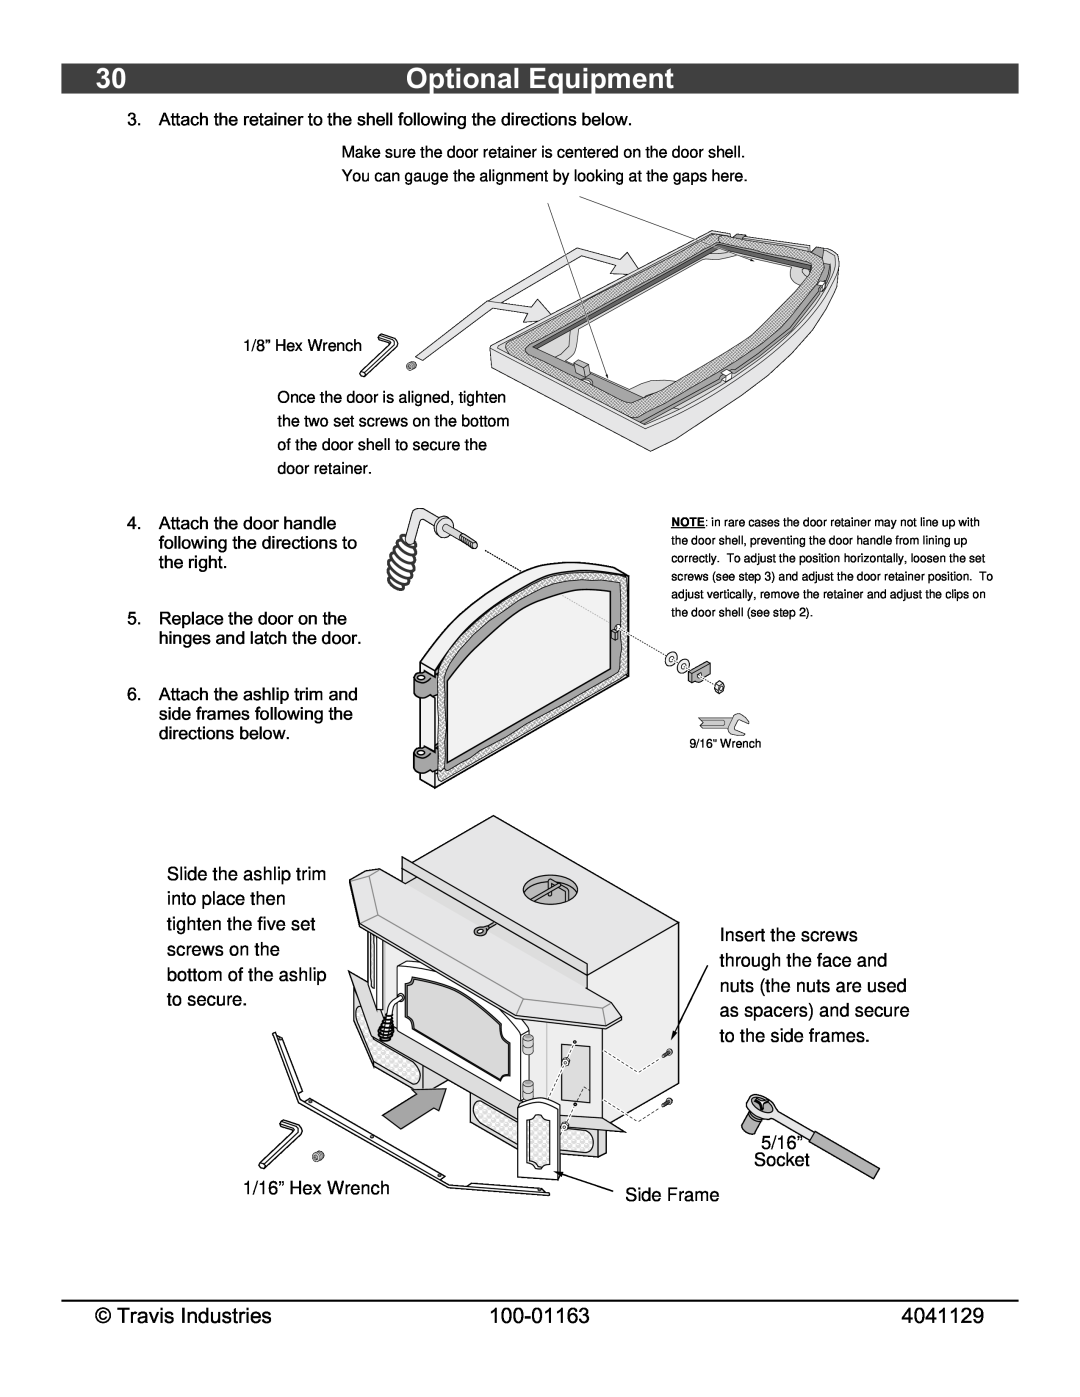
3. Attach the retainer to the shell following the directions below.
Make sure the door retainer is centered on the door shell.
You can gauge the alignment by looking at the gaps here.
1/8” Hex Wrench ![]()
Once the door is aligned, tighten the two set screws on the bottom of the door shell to secure the door retainer.
4.Attach the door handle following the directions to the right.
5.Replace the door on the hinges and latch the door.
6.Attach the ashlip trim and side frames following the directions below.
NOTE: in rare cases the door retainer may not line up with the door shell, preventing the door handle from lining up correctly. To adjust the position horizontally, loosen the set screws (see step 3) and adjust the door retainer position. To adjust vertically, remove the retainer and adjust the clips on the door shell (see step 2).
9/16" Wrench
Slide the ashlip trim into place then tighten the five set screws on the bottom of the ashlip to secure.
1/16” Hex Wrench
Insert the screws through the face and nuts (the nuts are used as spacers) and secure to the side frames.
5/16” Socket
Side Frame
© Travis Industries | 4041129 |