lection
This view shows all echoes in the traditional sonar graph display.You can view echoes from any two 384 kHz transducer elements, or the 192 kHz transducer. (Note: 192 kHz operation requires an optional 192 kHz trans- ducer.) To select the transducer element and place the
If you want to use only the cen- ter two transducer elements, simply press the CLR key to switch to the 2D chart display.
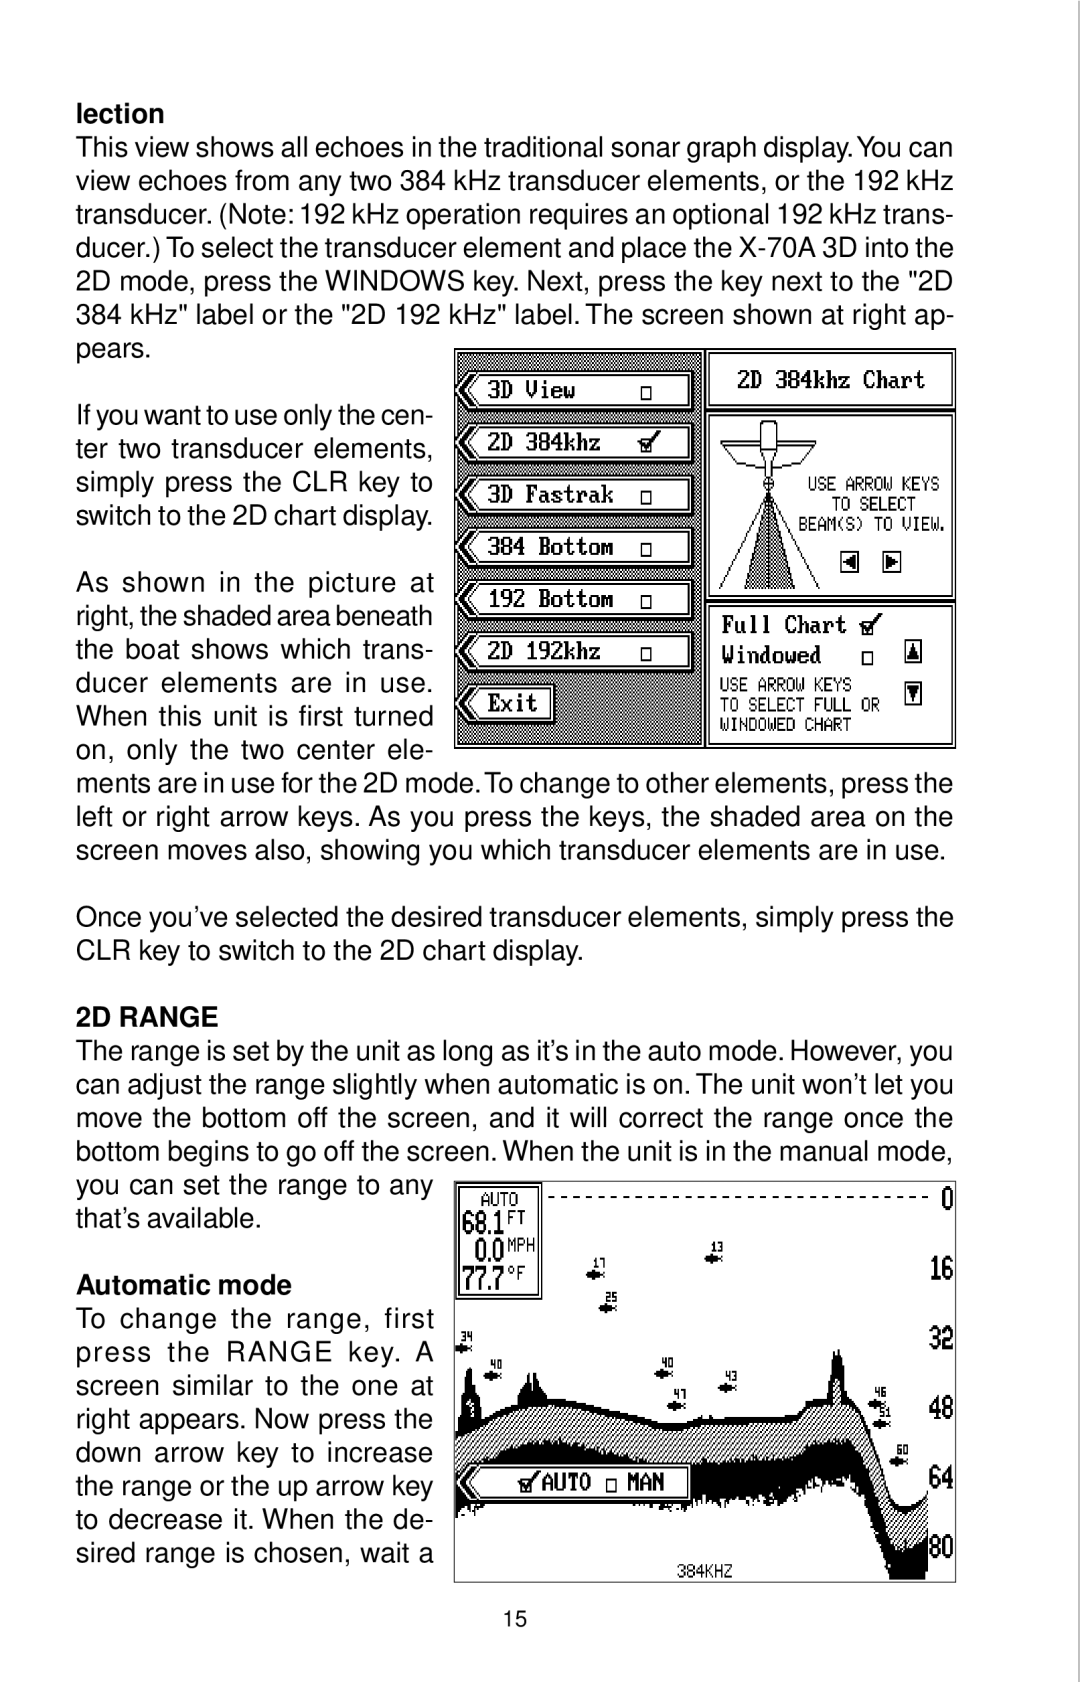
As shown in the picture at right, the shaded area beneath the boat shows which trans- ducer elements are in use. When this unit is first turned on, only the two center ele-
ments are in use for the 2D mode.To change to other elements, press the left or right arrow keys. As you press the keys, the shaded area on the screen moves also, showing you which transducer elements are in use.
Once you’ve selected the desired transducer elements, simply press the CLR key to switch to the 2D chart display.
2D RANGE
The range is set by the unit as long as it’s in the auto mode. However, you can adjust the range slightly when automatic is on. The unit won’t let you move the bottom off the screen, and it will correct the range once the bottom begins to go off the screen. When the unit is in the manual mode, you can set the range to any
that’s available.
Automatic mode
To change the range, first press the RANGE key. A screen similar to the one at right appears. Now press the down arrow key to increase the range or the up arrow key to decrease it. When the de- sired range is chosen, wait a
15