Transducer Assembly and Mounting
The best way to install this transducer is to loosely assemble all of the parts first, place the transducer’s bracket against the transom and see if you can move the transducer so that it’s parallel with the ground.
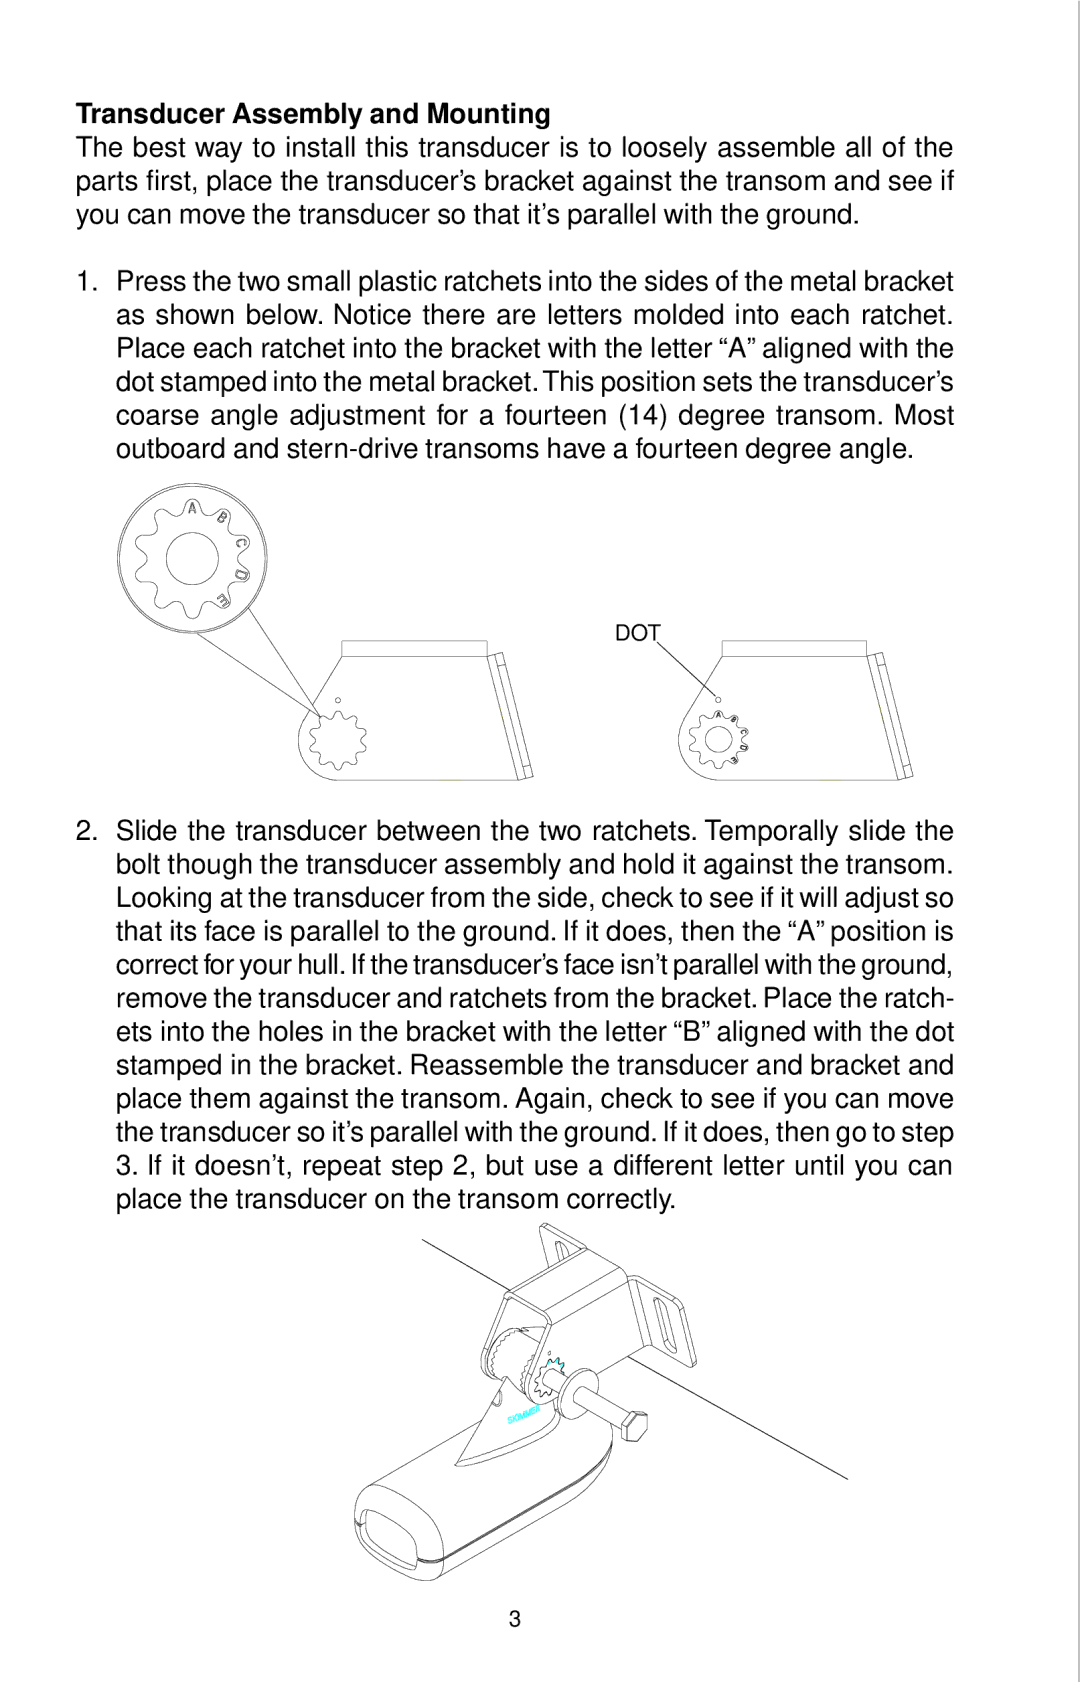
1.Press the two small plastic ratchets into the sides of the metal bracket as shown below. Notice there are letters molded into each ratchet. Place each ratchet into the bracket with the letter “A” aligned with the dot stamped into the metal bracket.This position sets the transducer’s coarse angle adjustment for a fourteen (14) degree transom. Most outboard and
DOT
2.Slide the transducer between the two ratchets. Temporally slide the bolt though the transducer assembly and hold it against the transom. Looking at the transducer from the side, check to see if it will adjust so that its face is parallel to the ground. If it does, then the “A” position is correct for your hull. If the transducer’s face isn’t parallel with the ground, remove the transducer and ratchets from the bracket. Place the ratch- ets into the holes in the bracket with the letter “B” aligned with the dot stamped in the bracket. Reassemble the transducer and bracket and place them against the transom. Again, check to see if you can move the transducer so it’s parallel with the ground. If it does, then go to step 3. If it doesn’t, repeat step 2, but use a different letter until you can place the transducer on the transom correctly.
3