Operating Your Camera
 Camera ID
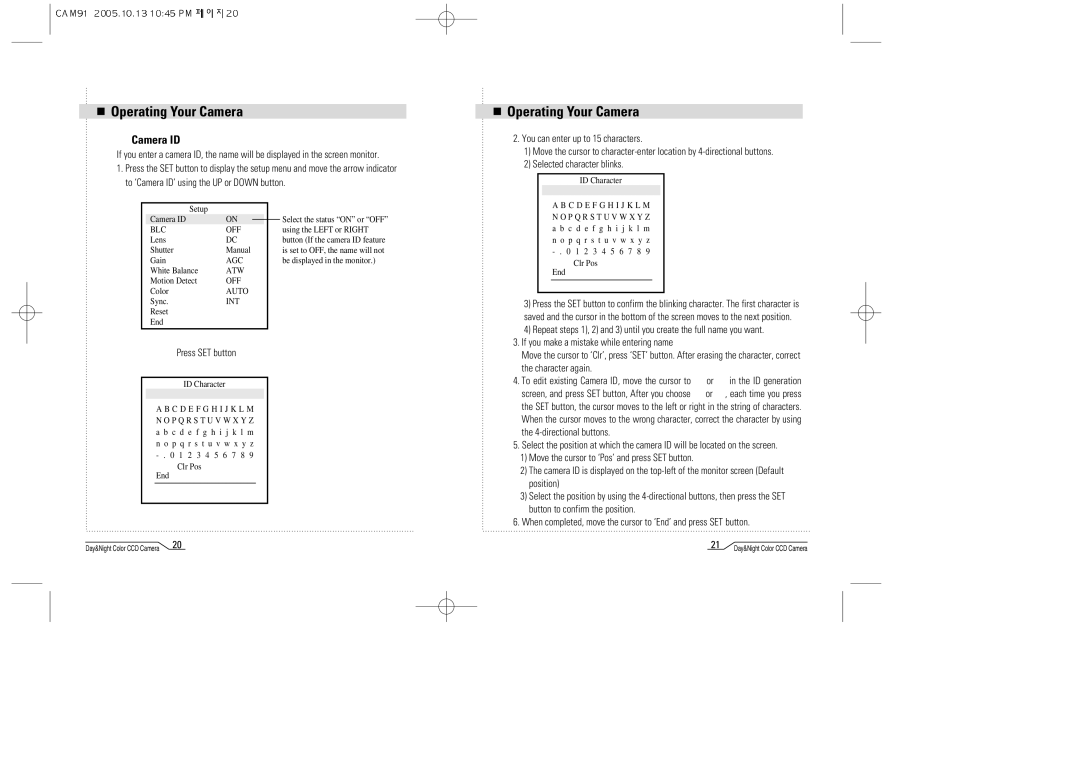
If you enter a camera ID, the name will be displayed in the screen monitor.
1.Press the SET button to display the setup menu and move the arrow indicator to ‘Camera ID’ using the UP or DOWN button.
| Setup |
|
|
|
|
|
| Camera ID | ON |
|
|
| Select the status “ON” or “OFF” |
|
|
|
| |||
| BLC | OFF |
| using the LEFT or RIGHT | ||
| Lens | DC |
| button (If the camera ID feature | ||
| Shutter | Manual |
| is set to OFF, the name will not | ||
| Gain | AGC |
| be displayed in the monitor.) | ||
| White Balance | ATW |
|
| ||
| Motion Detect | OFF |
|
| ||
| Color | AUTO |
|
| ||
| Sync. | INT |
|
| ||
| Reset |
|
|
|
|
|
| End |
|
|
|
|
|
|
|
|
|
|
|
|
Press SET button
ID Character
A B C D E F G H I J K L M N O P Q R S T U V W X Y Z a b c d e f g h i j k l m n o p q r s t u v w x y z
Clr Pos
End
Day&Night Color CCD Camera | 20 |
Operating Your Camera
2.You can enter up to 15 characters.
1)Move the cursor to
2)Selected character blinks.
ID Character
A B C D E F G H I J K L M N O P Q R S T U V W X Y Z a b c d e f g h i j k l m n o p q r s t u v w x y z
Clr Pos
End
3)Press the SET button to confirm the blinking character. The first character is saved and the cursor in the bottom of the screen moves to the next position.
4)Repeat steps 1), 2) and 3) until you create the full name you want.
3.If you make a mistake while entering name
Move the cursor to ‘Clr’, press ‘SET’ button. After erasing the character, correct the character again.
4.To edit existing Camera ID, move the cursor to ![]() or
or ![]() in the ID generation screen, and press SET button, After you choose
in the ID generation screen, and press SET button, After you choose ![]() or
or ![]() , each time you press the SET button, the cursor moves to the left or right in the string of characters. When the cursor moves to the wrong character, correct the character by using the
, each time you press the SET button, the cursor moves to the left or right in the string of characters. When the cursor moves to the wrong character, correct the character by using the
5.Select the position at which the camera ID will be located on the screen.
1)Move the cursor to ‘Pos’ and press SET button.
2)The camera ID is displayed on the
3)Select the position by using the
6.When completed, move the cursor to ‘End’ and press SET button.
21 | Day&Night Color CCD Camera |
