
MC 1 specifications
Magnat Audio MC 1 is a remarkable multimedia speaker system that stands out in the crowded audio market. Designed for both audiophiles and casual listeners, the MC 1 combines cutting-edge technology with exceptional build quality to deliver an unparalleled listening experience.One of the key features of the Magnat Audio MC 1 is its powerful sound performance. Equipped with two 3” full-range drivers and a robust 5.25” bass driver, this speaker system ensures a well-balanced sound reproduction across the entire audio spectrum. The MC 1’s 2-way design allows for precise sound staging, making it perfect for music enthusiasts who appreciate clarity in their audio playback.
Innovation plays a significant role in the MC 1's design. The speaker employs advanced technologies, such as the proprietary Wave Guide technology, which enhances the dispersion of sound. This means listeners can enjoy consistent audio quality, regardless of their position in relation to the speakers. The incorporation of high-quality crossover components further ensures seamless integration between the drivers, resulting in a smooth and cohesive sound profile.
The aesthetics of the Magnat Audio MC 1 are as impressive as its performance. Its sleek and modern design is highlighted by a premium wood finish, making it an elegant addition to any living space. The compact dimensions of the MC 1 make it versatile and easy to position, whether on a bookshelf or table.
Connectivity options are abundant in the MC 1, catering to a variety of audio sources. It features Bluetooth compatibility, allowing users to stream music directly from their smartphones, tablets, or computers without the hassle of wired connections. Additionally, the speaker system includes RCA and AUX inputs, making it suitable for connecting to vintage audio equipment or modern devices.
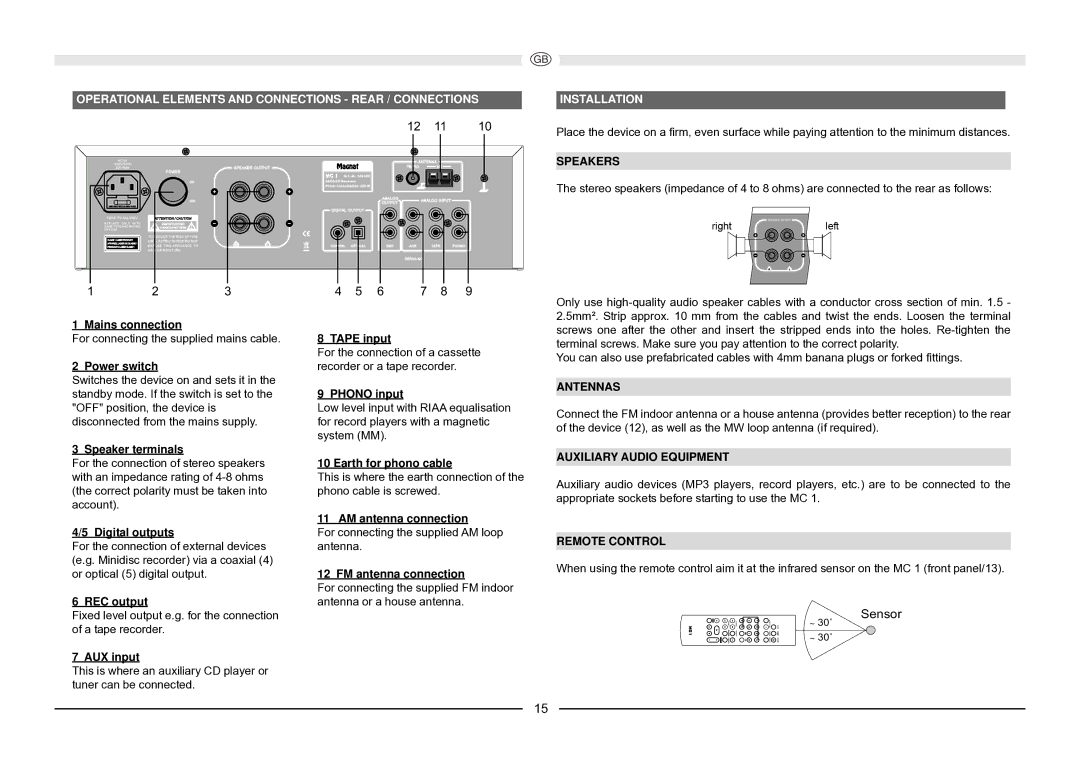
In terms of usability, the Magnat Audio MC 1 is designed to be user-friendly. It comes with an intuitive remote control that allows for easy operation from a distance. The ability to adjust volume levels, change inputs, and even toggle between sound modes provides flexibility tailored to personal preferences.
Durability is another hallmark of the Magnat MC 1, built with high-quality materials designed to withstand daily use while maintaining its acoustic performance over time.
In conclusion, the Magnat Audio MC 1 excels in delivering high-quality sound, innovative technologies, and an attractive design, making it a top choice for anyone seeking an impressive audio experience. Whether it’s for casual listening or enjoying high-fidelity sound, the MC 1 stands ready to accommodate diverse audio needs.