P 4/ 8
 Repair
[2]ASSEMBLY/ DISASSEMBLY
[2]-2. Motor section
REPLACING
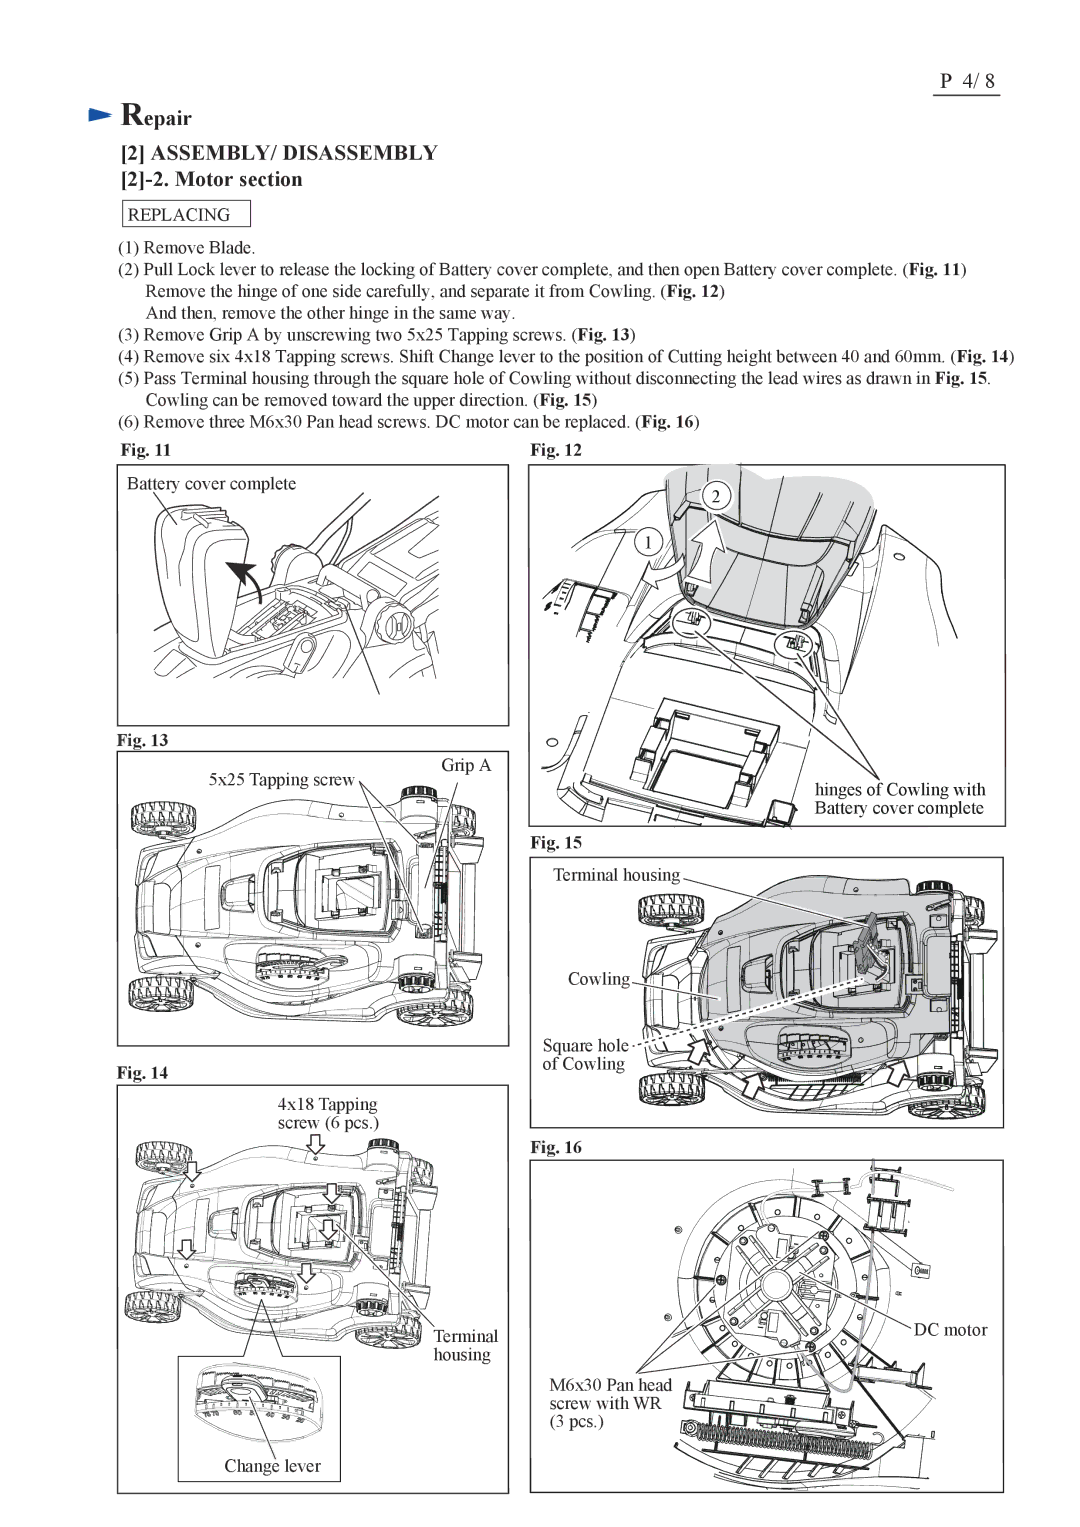
(1)Remove Blade.
(2)Pull Lock lever to release the locking of Battery cover complete, and then open Battery cover complete. (Fig. 11) Remove the hinge of one side carefully, and separate it from Cowling. (Fig. 12)
And then, remove the other hinge in the same way.
(3)Remove Grip A by unscrewing two 5x25 Tapping screws. (Fig. 13)
(4)Remove six 4x18 Tapping screws. Shift Change lever to the position of Cutting height between 40 and 60mm. (Fig. 14)
(5)Pass Terminal housing through the square hole of Cowling without disconnecting the lead wires as drawn in Fig. 15. Cowling can be removed toward the upper direction. (Fig. 15)
(6)Remove three M6x30 Pan head screws. DC motor can be replaced. (Fig. 16)
Fig. 11
Battery cover complete
Fig. 13
5x25 Tapping screw
Fig. 14
4x18 Tapping screw (6 pcs.)
Change lever
Fig. 12
2
1
Grip A
hinges of Cowling with Battery cover complete
Fig. 15
Terminal housing
Cowling
Square hole of Cowling
Fig. 16
Terminal | DC motor |
housing |
|
| M6x30 Pan head |
| screw with WR |
| (3 pcs.) |