Repair
P 17/ 22
[4]DISASSEMBLY/ASSEMBLY
[4]-13. Engine block
DISASSEMBLING
(1)It is highly recommended to drain the oil system of Engine block before starting disassembling because the oil remaining there will drip out to delay your operation.
(2)From the engine section, remove the following parts):
Ignition coil, Flywheel complete, Rocker cover inner, Rocker cover outer, Rocker arm assembly (2 pcs),
Rod 2.5 (2 pcs), Cam lifter (2 pcs), Cam gear assembly, Insulator complete, Cleaner plate assembly, Carburetor, Spark plug, Exhaust muffler.
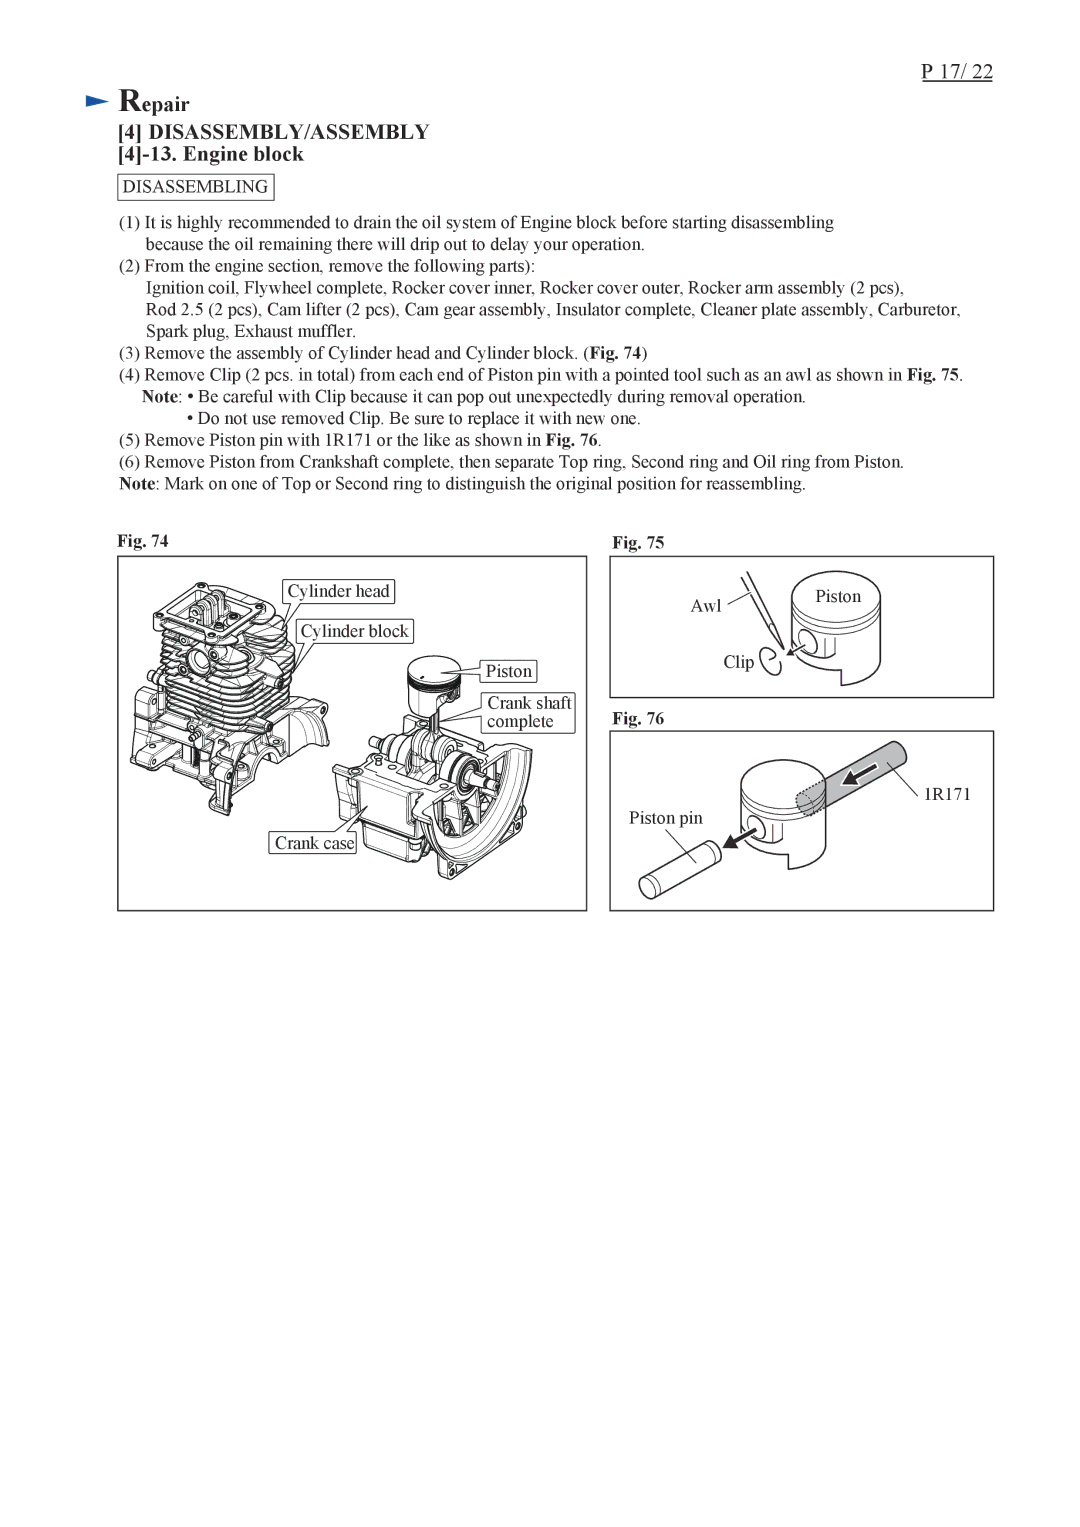
(3)Remove the assembly of Cylinder head and Cylinder block. (Fig. 74)
(4)Remove Clip (2 pcs. in total) from each end of Piston pin with a pointed tool such as an awl as shown in Fig. 75. Note: • Be careful with Clip because it can pop out unexpectedly during removal operation.
•Do not use removed Clip. Be sure to replace it with new one.
(5)Remove Piston pin with 1R171 or the like as shown in Fig. 76.
(6)Remove Piston from Crankshaft complete, then separate Top ring, Second ring and Oil ring from Piston.
Note: Mark on one of Top or Second ring to distinguish the original position for reassembling.
Fig. 74
Cylinder head |
Cylinder block |
Piston |
Crank shaft |
complete |
Crank case |
Fig. 75
Awl ![]() Piston
Piston
Clip ![]()
![]()
Fig. 76
![]() 1R171
1R171
Piston pin