ESU EROFE B P F O E MAN STRA CI SAB AREPO N IO T
SETUP
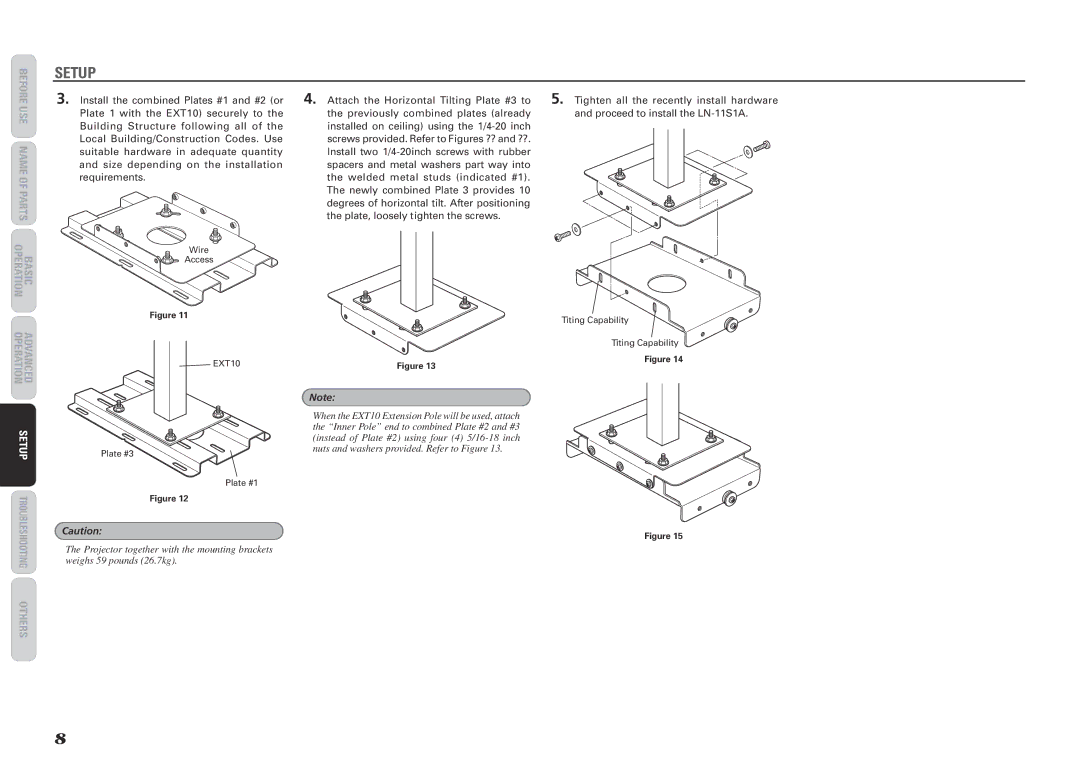
3. Install the combined Plates #1 and #2 (or Plate 1 with the EXT10) securely to the Building Structure following all of the Local Building/Construction Codes. Use suitable hardware in adequate quantity and size depending on the installation requirements.
Wire
Access
4. Attach the Horizontal Tilting Plate #3 to the previously combined plates (already installed on ceiling) using the
5. Tighten all the recently install hardware and proceed to install the
VDEARCELLNOART NOC ET O MER
PUTEGS IN T OOHSEL BUORT AREPO N IO T AREPO N IO T
SRE HT O
Figure 11
EXT10
Plate #3
Plate #1
Figure 12
Caution:
The Projector together with the mounting brackets weighs 59 pounds (26.7kg).
Figure 13
Note:
When the EXT10 Extension Pole will be used, attach the “Inner Pole” end to combined Plate #2 and #3 (instead of Plate #2) using four (4)
Titing Capability
Titing Capability
Figure 14
Figure 15
8