SR4500 specifications
The Marantz SR4500 is a high-performance AV receiver that has earned a reputation for its exceptional sound quality, user-friendly interface, and versatile connectivity options. Designed for both home theater enthusiasts and casual listeners, the SR4500 brings together advanced technologies and a variety of features to enhance the audio and visual experience.One of the main highlights of the SR4500 is its powerful amplification system. It delivers up to 100 watts per channel, which is sufficient to fill even large rooms with rich, dynamic sound. The receiver employs a discrete output stage, ensuring that each channel operates independently for improved sound clarity and precision. This means that whether you're enjoying a high-octane action movie or a soothing classical performance, the audio reproduction remains true to the original recording.
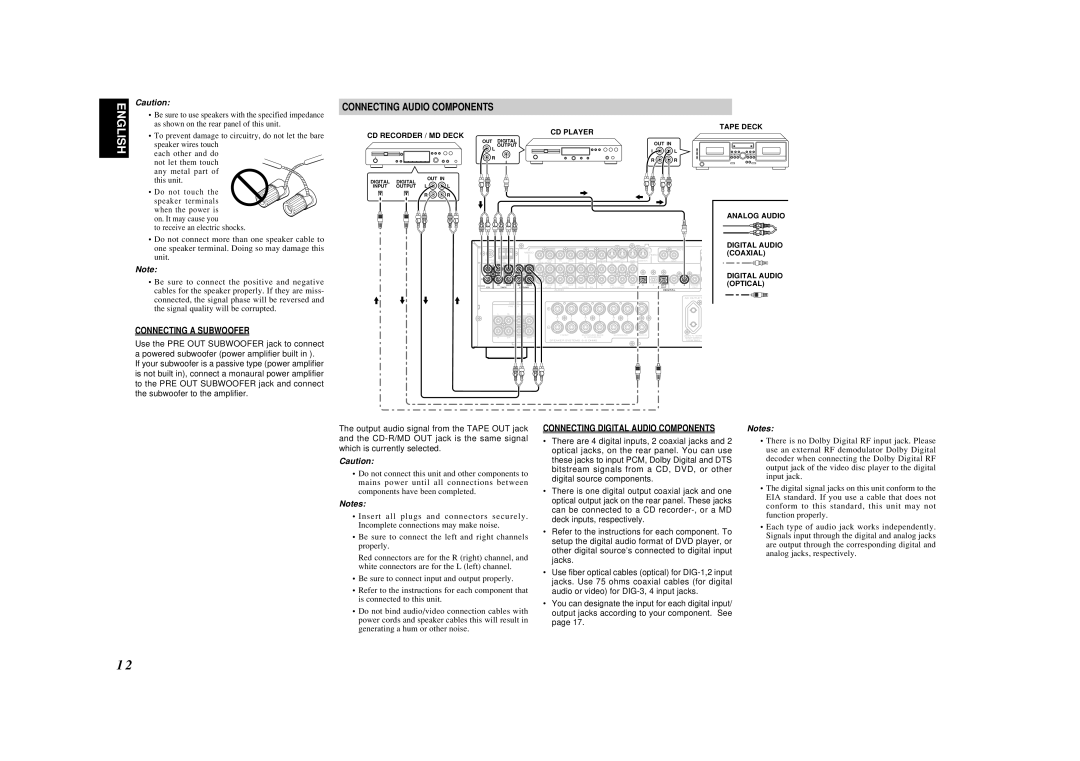
In terms of connectivity, the SR4500 is equipped with an array of inputs and outputs. It features multiple HDMI ports that support both video and audio signals, allowing for seamless integration with modern devices such as Blu-ray players, gaming consoles, and streaming devices. The receiver also supports various audio formats, including Dolby Digital and DTS, providing immersive surround sound experiences.
Marantz is renowned for its audio processing capabilities, and the SR4500 is no exception. It utilizes the latest DSP technology to decode surround sound formats and provides multiple listening modes to suit the content being played. This ensures that whether you are watching films, listening to music, or playing video games, you can select the optimal audio setting for the best experience.
Another characteristic of the SR4500 is its user-friendly interface. The receiver features an intuitive on-screen menu that makes it easy to navigate through settings and options. Additionally, it comes equipped with an efficient auto-calibration system that adjusts speaker settings based on your room's acoustics, ensuring optimal sound performance without the need for complex manual adjustments.
The Marantz SR4500 also emphasizes build quality and aesthetic appeal. The solid chassis and premium components contribute to its durability and reliability, while the elegant design fits seamlessly into any home entertainment setup.
Overall, the Marantz SR4500 is an outstanding choice for anyone looking to enhance their audio and video experience. With its powerful amplification, extensive connectivity options, advanced processing features, user-friendly interface, and stylish design, it stands out as a versatile and high-quality AV receiver that caters to a wide range of home entertainment needs.