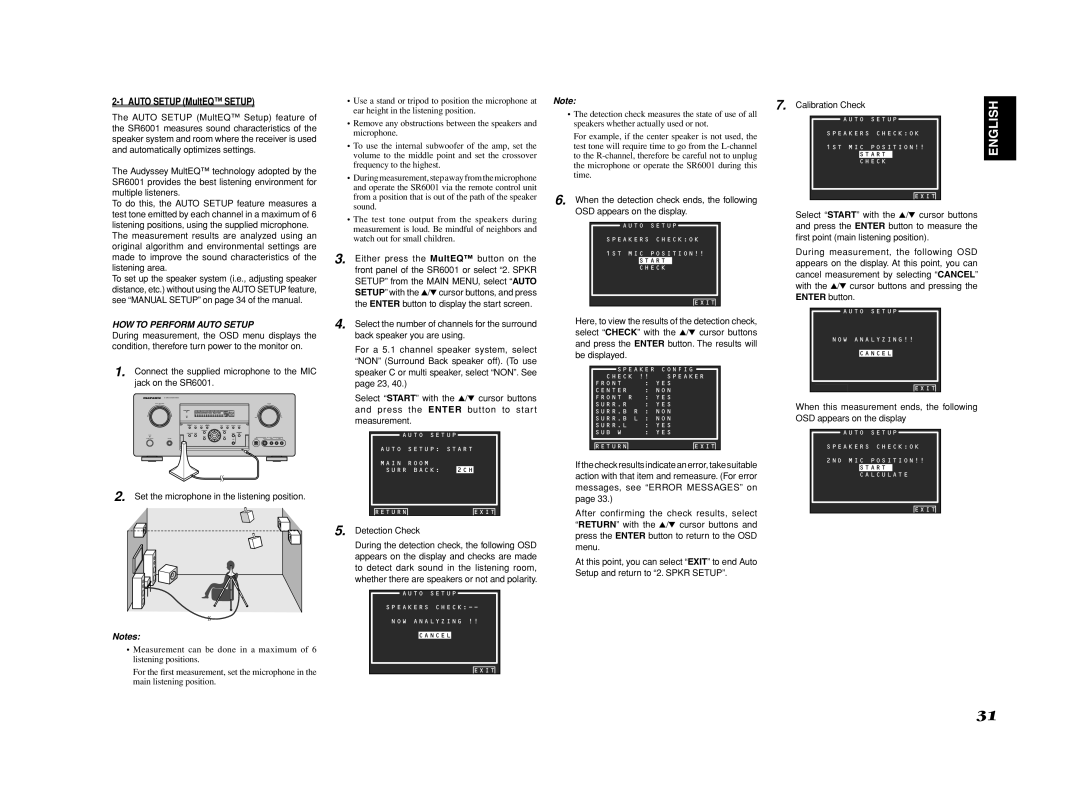
2-1 AUTO SETUP (MultEQ™ SETUP)

The AUTO SETUP (MultEQ™ Setup) feature of the SR6001 measures sound characteristics of the speaker system and room where the receiver is used and automatically optimizes settings.

The Audyssey MultEQ™ technology adopted by the SR6001 provides the best listening environment for multiple listeners.

To do this, the AUTO SETUP feature measures a test tone emitted by each channel in a maximum of 6 listening positions, using the supplied microphone.

The measurement results are analyzed using an original algorithm and environmental settings are made to improve the sound characteristics of the listening area.

To set up the speaker system (i.e., adjusting speaker distance, etc.) without using the AUTO SETUP feature, see “MANUAL SETUP” on page 34 of the manual.

HOW TO PERFORM AUTO SETUP

During measurement, the OSD menu displays the condition, therefore turn power to the monitor on.

1. Connect the supplied microphone to the MIC jack on the SR6001.

2. Set the microphone in the listening position.

Notes:

Measurement can be done in a maximum of 6 listening positions.

For the first measurement, set the microphone in the main listening position.

Use a stand or tripod to position the microphone at ear height in the listening position.

Remove any obstructions between the speakers and microphone.

To use the internal subwoofer of the amp, set the volume to the middle point and set the crossover frequency to the highest.

Duringmeasurement,stepawayfromthemicrophone and operate the SR6001 via the remote control unit from a position that is out of the path of the speaker sound.

The test tone output from the speakers during measurement is loud. Be mindful of neighbors and watch out for small children.

3.Either press the MultEQ™ button on the front panel of the SR6001 or select “2. SPKR SETUP” from the MAIN MENU, select “AUTO SETUP” with the 3/4 cursor buttons, and press the ENTER button to display the start screen.

4.Select the number of channels for the surround back speaker you are using.

For a 5.1 channel speaker system, select “NON” (Surround Back speaker off). (To use speaker C or multi speaker, select “NON”. See page 23, 40.)

Select “START” with the 3/4 cursor buttons and press the ENTER button to start measurement.

AUTO SETUP

AUTO SETUP: START

MAIN ROOM

SURR BACK: 2CH

RETURNEXIT

5. Detection Check

During the detection check, the following OSD appears on the display and checks are made to detect dark sound in the listening room, whether there are speakers or not and polarity.

AUTO SETUP

SPEAKERS CHECK: --

NOW ANALYZING !!

CANCEL

EXIT

Note:


7.

Calibration Check


• The detection check measures the state of use of all

AUTO

SETUP

speakers whether actually used or not.


For example, if the center speaker is not used, the

SPEAKERS

CHECK:OK


test tone will require time to go from the L-channel

1ST MIC

POSITION!!

to the R-channel, therefore be careful not to unplug

START

the microphone or operate the SR6001 during this

CHECK


time.


6. When the detection check ends, the following


EXIT


OSD appears on the display.

Select “START” with the 3/4 cursor buttons


and press the ENTER button to measure the


AUTO

SETUP


SPEAKERS

CHECK:OK


first point (main listening position).


1ST MIC

POSITION!!


During measurement, the following OSD


START


appears on the display. At this point, you can


CHECK


cancel measurement by selecting “CANCEL


with the 3/4 cursor buttons and pressing the


EXIT


ENTER button.


AUTO

SETUP

Here, to view the results of the detection check,


select “CHECK” with the 3/4 cursor buttons

NOW ANALYZING!!

and press the ENTER button. The results will


be displayed.


CANCEL


SPEAKER

CONFIG


CHECK !!

SPEAKER


FRONT

: YES


EXIT


CENTER

: NON


FRONT R

: YES


SURR . R

: YES


When this measurement ends, the following


SURR . B R : NON


OSD appears on the display


SURR . B L : NON


SURR . L

: YES


SUB W

: YES


AUTO

SETUP


RETURN


EXIT


SPEAKERS

CHECK:OK

Ifthecheckresultsindicateanerror,takesuitable

2ND MIC

POSITION!!

START

action with that item and remeasure. (For error

CALCULATE


messages, see “ERROR MESSAGES” on


page 33.)


After confirming the check results, select


EXIT


RETURN” with the 3/4 cursor buttons and


press the ENTER button to return to the OSD


menu.


At this point, you can select “EXIT” to end Auto


Setup and return to “2. SPKR SETUP”.


ENGLISH

31

Page 35
Image 35
Marantz SR6001 manual HOW to Perform Auto Setup, Detection Check

SR6001 specifications

The Marantz SR6001 is a high-performance audio/video receiver that was designed for home theater enthusiasts seeking an immersive cinematic experience. As part of Marantz's esteemed lineup, the SR6001 showcases a blend of advanced technologies and elegant design, making it an attractive choice for audio aficionados.

At the heart of the SR6001 is a robust amplifier section capable of delivering 90 watts per channel across seven channels, ensuring that your movies and music come to life with powerful clarity. This receiver supports a wide range of audio formats, including Dolby Digital, DTS, and PCM, allowing for a rich sound experience. The inclusion of Dolby Pro Logic II is a notable feature, offering enhanced sound staging and a more realistic audio environment.

One of the standout technologies in the SR6001 is its implementation of HDMI 1.1 ports, allowing for high-definition video and multi-channel audio transmission. This feature ensures that users can connect their latest Blu-ray players and gaming consoles to enjoy stunning visuals alongside breathtaking sound. The receiver also includes multiple inputs and outputs, enabling seamless integration with various components in your home theater setup.

Another key characteristic of the Marantz SR6001 is its advanced room calibration system, which helps to optimize audio performance based on your specific room acoustics. This technology, known as Audyssey MultEQ, analyzes the sound and makes adjustments to deliver the best possible listening experience regardless of your room's shape or furnishings.

Moreover, the SR6001 sports an elegant design, complemented by a front panel that features a sleek display and intuitive controls. Its user-friendly interface makes it easy to navigate through settings and options, ensuring that users can quickly access their favorite features without confusion.

In terms of connectivity, the Marantz SR6001 is equipped with a variety of inputs, including composite, component, and digital audio inputs, providing flexibility in connecting to different sources. Its built-in AM/FM tuner also allows users to enjoy radio broadcasts in high quality.

With its powerful performance, advanced technologies, and stylish design, the Marantz SR6001 finishes as a formidable choice for anyone looking to elevate their home entertainment experience.