SR6009
Connections
Playing an iPod
Listening to music on a Bluetooth device
Basic operation
Playing a USB memory device
Viewing photographs on the Flickr site
Listening to Internet Radio
Playing back files stored on a PC and NAS
AirPlay function 101
Hdmi control function 130
Selecting a sound mode 116
Sleep timer function 131
Smart select function 133
Limiting the operating zone with the remote control 215
Speakers 179 Audyssey Setup
Manual Setup 189
Inputs 175
Tips 217 Troubleshooting 219 Resetting factory settings 237
251
FM indoor antenna
Accessories
Cable labels
RC025SR
Put the rear cover back on
Operating range of the remote control unit
Inserting the batteries
R03/AAA batteries
High performance
Features
High quality sound
8In /Out2
Equipped with Hdmi ZONE2 output v p
Playback of DSD and Flac files via USB and networks
Energy-saving design
Easy operation
Multi-Room audio v p
Part names and functions
Front panel
Remote control sensor
Power operation button
Power indicator
Volume knob
With the door open
AUX1-HDMI connector
Headphones jack Phones
Setup MIC jack
AUX1 Input connectors
Standard display
Volume indicator Input source indicator
Display
Tuner display
This lights when the sleep mode is selected. v p
Sleep timer indicator
ZONE2 power on display
Rear panel
LQ2 MQ3 Q4N Q5O PQ6
RS-232C connector Flasher in jack
Bluetooth/wireless LAN antenna connectors
Digital audio connectors Digital Audio
Network connector
Hdmi connectors
Remote Control jacks
Video connectors Video
Analog audio connectors Audio
Remote control unit
Remote control signal transmitter
Tuning up / Tuning down buttons Tune +
Sound Mode buttons
System buttons
Volume buttons df
Power button
ECO Mode button G
Setup button
Contents
Cables used for connections
FL/FR Front
Connecting speakers
Speaker installation
FHL/FHR Front
Front Speaker Point slightly Front wide
GViewed from the side H
Surround
Z1 Recommended for Dolby Pro Logic gz
Z122 30 z290 110 z3135
Z122 30 z222 45 z390
Z122 30 z2120
When 5.1-channel speakers are installed
Z1 22 30 z2 55 60 z3 90
Speaker connection
4ohms
Turn the speaker terminal counterclockwise to loosen it
Connecting the speaker cables
Connecting the subwoofer
How to attach the speaker cable label H
Speaker terminals
Channel Not used
Speaker configuration and Amp Assign settings
Playback speaker and zone Amp Assign settings Connection
Channel + front speaker of second unit Not used Front B
Standard configuration and connection n 5.1-channel
Channel surround back
Channel front height
Channel front wide
SR SL
Channel + front speaker of second unit
Channel Main Zone + 2-channel ZONE2
Connecting an external power amplifier
Subwoofer Power amplifiers Primary Secondary
Connecting a TV
Hdmi ARC
OUT Optical Hdmi
Connection 3 TV equipped without an Hdmi connector
Connecting a playback device
Connecting a DVD player or Blu-ray Disc player
Connecting a set-top box Satellite tuner/cable TV
Connecting a video camcorder or game console
Connecting a turntable
Connecting a device with a multi-channel output connector
External decoder etc
Connecting an iPod or USB memory device to the USB port
USB memory Device IPod
Supported iPod/iPhone models
IPod classic IPod nano IPod touch IPhone
Connecting an FM/AM antenna
Black
Suspending on a wall
Using the AM loop antenna
AM loop antenna assembly
Standing alone
Connecting to a home network LAN
Wired LAN
Wireless LAN
Router with access point
Remotely connecting Marantz devices
Connecting an external control device
Remote Control jacks
DC OUT jacks
DC/150 mA trigger-compatible device
Connecting the power cord
Contents Basic operation
Playback a device
Basic operation
Turning the power on
Press Power X to turn on power to the unit
Selecting the input source
Turning off the sound temporarily Muting
Adjusting the volume
Playback a DVD player/Blu-ray Disc player
Surround playback v p
Playing an iPod
Back
Operations accessible through the option menu
Listening to music on an iPod
Select iPod Browse Mode, then press Enter
IPod Browse Mode settings
Press Option when the input source is iPod/USB
Use o p to select On-Screen, then press Enter
Operations accessible through the option menu
Performing random playback
Press Option with iPod Browse Mode set to On- Screen
Performing repeat playback
Press Enter
Playing a USB memory device
MP3
Playing files stored on USB memory devices
Operations accessible through the option menu
Listening to music on a Bluetooth device
Enter
Pairing with a Bluetooth device
Press Bluetooth to switch the input source to Bluetooth
Control of this unit
Playing a Bluetooth device
Start playing the Bluetooth device
Operation buttons Function
Operations accessible through the option menu
Use ui to select Pairing Mode, then press Enter
Pairing with the Pairing Mode
Press Option when the input source is Bluetooth
Pair a Bluetooth device with this unit
Listening to FM/AM broadcasts
CH/PAGE df
Use ui to select FM/AM, then press Enter
Listening to FM/AM broadcasts
Press Option
TV screen H
Operations accessible through the option menu
Tuning in by entering the frequency Direct Tune
RDS search
PTY search begins automatically
PTY search
Use ui to select PTY Search, then press Enter
Use ui to select TP Search, then press Enter Press Enter
TP search
Radio Text
Auto
Changing the tune mode Tune Mode
Use ui to select Auto Preset Memory, then press
Use ui to select Preset Memory, then press Enter
Presetting the current broadcast station Preset Memory
Listening to preset stations
Use CH/PAGE df to select the desired preset channel
Use ui to select a name label, then press Enter
Specify a name for the preset broadcast station Preset Name
Use ui to select Preset Name, then press Enter
Enter the characters, then press OK
Preset Skip screen is displayed
Skipping preset broadcast stations Preset Skip
Use ui to select Preset Skip, then press Enter
To set the stations you want to skip by groups
Cancelling Preset Skip
Skip is cancelled
Listening to Internet Radio
Enter Back
Use uio p to select Internet Radio, then press
Listening to Internet Radio
Press Online Music
Press Internet Radio
Playing the last played Internet Radio station
Use ui p to select the station, then press Enter
Playback / Stop
Using vTuner to add Internet Radio stations to favorites
Check the MAC address of this unit. Information v p
Playing back files stored on a PC and NAS
When using Windows Media Player
Applying media sharing settings
When using Windows Media Player 12 Windows 7 / Windows
Sharing media stored in NAS
Playing back files stored on a PC
NAS
Operations accessible through the option menu
Viewing photographs on the Flickr site
After inputting the Contact, press OK
Viewing photographs shared by particular users
Use ui to select Add Flickr Contact, then press
Use ui to select the folder, then press Enter
Use ui p to select the photograph, then press Enter
Viewing all photographs on Flickr
AirPlay function
Play the song on your iPhone, iPod touch or iPad
Playing songs from your iPhone, iPod touch or iPad
Playing iTunes music with this unit
Tap the AirPlay icon
Selecting multiple speakers devices
Spotify App
Spotify Connect function
Playing Spotify music with this unit
Convenience functions
Online Music
Supported input sources USB / Media Server / Bluetooth
While content is playing, press Option
Registering to Favorites
Playing back content added to the Save to Favorites
Use ui to select the content you want to play, then
Use ui to select Save to Favorites, then press
While the content is playing, press Option
Deleting content added to favorites
Searching content with keywords Text Search
Use ui to select Remove from Favorites, then press
Play back a still picture
Use ui to select Slideshow, then press Enter
Use ui to select Slideshow Interval, then press
Setting the Slideshow Interval
While the list is displayed, press Option
Use o p to set the display time
DB +12.0 dB Default 0.0 dB
Use ui to select Channel Level Adjust, then press
Channel level adjust screen is displayed
Use ui to select Tone, then press Enter
Adjusting the tone Tone
Use o p to adjust the tone, then press Enter
Use o p to set the tone control function to on/off
Press Option during audio playback
Vivid
Press Option during video playback
Movie
ISF Day
During playback in All Zone Stereo mode, press
Stopping the All Zone Stereo mode
Playing the same music in all zones All Zone Stereo
Selecting a sound mode
Pure Game
Press MOVIE, Music or Game to select a sound mode
Selecting a sound mode
Switching the sound mode
Press Pure to select Direct
Direct playback
Pure Direct playback
Press Pure to select Pure Direct
Auto surround playback begins
Auto surround playback
Press Pure to select Auto
Description of sound mode types
Dolby sound mode Sound mode type Description
Sources as a maximum of 7.1-channel surround sound
DTS sound mode Sound mode type Description
DTS NeoX
122
Original sound mode Sound mode type Description
Auto sound mode Sound mode type Description
Direct sound mode Sound mode type Description
Sound mode that can be selected for each input signal
Movie Music Game
126
127
128
Case of the Dolby Digital Plus decoder, Y is displayed
Views on the display
Shows a decoder to be used
Shows a decoder that creates sound output
Hdmi control function
Setting procedure
Enable the Hdmi control function of this unit
Set Hdmi Control to On. v p
Sleep timer function
Sleep
Checking the remaining time
Using the sleep timer
To cancel the sleep timer
Press Sleep and display the time you want to set
Smart select function
Smart Select
Press Main or ZONE2 to select the operating zone with
Calling up the settings
Remote control
Press Smart Select
Changing the Smart Select Name
Changing the settings
Set the items below to the settings you want to register
Controlling the unit from a web control
Switch the IP Control setting to Always On
Web control function
Check the IP address of this unit with Information
Enterbox. the IP address of this unit in browser’s address
Disabling all button operations except
Panel lock function
Disabling all key button operations
Panel lock function is canceled
Canceling the Panel lock function
Currently set mode
Enabling the remote sensor function
Disabling the sensor function of the remote control unit
Remote lock function
CH +
Playback in ZONE2 Separate room
Connecting ZONE2
Connection 1 Connection through the Hdmi ZONE2 connector
Connection 3 Connection using an external amplifier
Power amplifier
Playback in ZONE2
Press Power X to turn on the ZONE2 power
ZONE2 power indicator on the display lights
ZONE2 button lights
Adjusting the volume
Turning off the sound temporarily Muting
Menu map
202
Service technician or custom installation professional
Information Displays network information 197 Connection
203
Speaker Calibration Network Setup Input Setup
ECO
Main button lights
Press Setup
Menu operations
Menu is displayed on the TV screen
Inputting characters
Select a character to be input with uio p then press
Using the keyboard screen
Display the screen for inputting characters
GExampleH Source Rename screen
Audio
Dialog Level Adjust
Subwoofer Level Adjust
Loudness Management
Off Cinema EQ is not used Default
Surround Parameter
Cinema EQ
Center Gain
Dynamic Compression
Low Frequency Effects
Panorama
Default Standard sound volume High
Dimension
Low Reduce the front height channel volume Normal
Height Gain
Subwoofer
Set Defaults
Speaker Select
Subwoofer is used
Mode
Low
Audio Delay
Volume
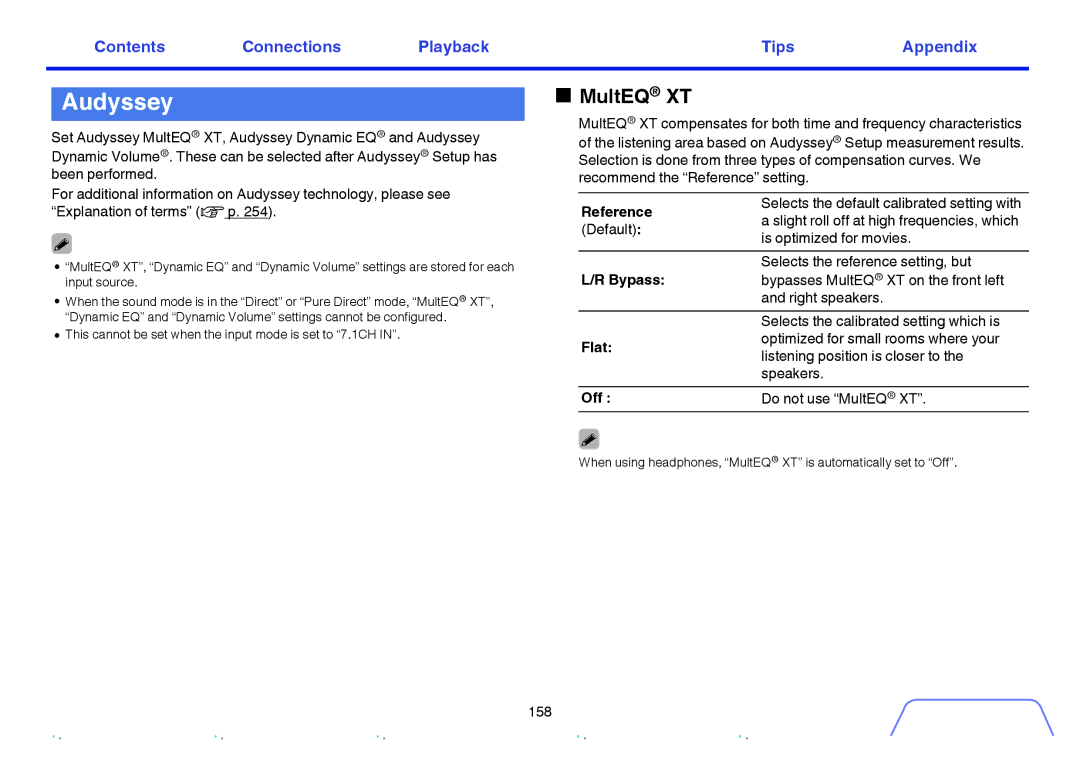
Reference
Audyssey
MultEQ XT
Bypass
Dynamic EQ
Reference Level Offset
Heavy
Dynamic Volume
Audyssey DSX
Medium
Stage Height
Graphic EQ
Stage Width
Graphic EQ
Curve Copy
Adjust EQ
Speaker Selection
Video
Picture Adjust
Picture Mode
Saturation
Contrast
Brightness
Enhancer
Hdmi Setup
Noise Reduction
Auto Lip Sync
Hdmi Audio Out
Hdmi Pass Through
Pass Through Source
Off Do not use Hdmi control function Default
Hdmi Control
Use Hdmi control function
Video
TV Audio Switching
Power Off Control
Game
Output Settings
Video Mode
Video Conversion
P Scaler
Off Do not use i/p scaler function
Resolution
Use i/p scaler function
480p/576p
Aspect Ratio
Progressive Mode
169 Output at 169 aspect ratio Default
Video and Film
Info
Volume
On Screen Display
Now Playing
Select PAL output
TV Format
Format
Select Ntsc output
Blu-ray Game Media Player TV Audio
Inputs
Input Assign
Front
Analog
Hdmi
Digital
Video
Source Rename
Show Use this source Default Hide Do not use this source
DB +12 dB Default 0 dB
Hide Sources
Input Select
Input Mode
Decode Mode
Digital
Audyssey Setup
Speakers
About the main listening position
Finish
Procedure for speaker settings Audyssey Setup
Check
Channel Select
Start the measurement of the first position
Measurement requires several minutes
Stopping Audyssey Setup
185
186
There is too much noise in the room
Error messages
Examples Error details Measures
Check the polarity of the displayed speaker
Retrieving Audyssey Setup settings
Amp Assign
Manual Setup
Assign Mode
Main Speakers
Surround
Speaker Config
Front
Center
Front Wide
Surr. Back
Front Height
Spkrs
Step
Distances
Unit
Set the distance
Test Tone Start
Levels settings are returned to the default settings
Levels
Individual
Crossovers
Set the crossover frequency
LPF for LFE
Subwoofer Mode
Bass
LFE+Main
Front speaker a is used
Set the front speaker A/B to use for every sound mode
Front Speaker
Front speaker B is used
Information
Connect Using
Network
Connection
Use iOS Device
Wi-Fi Setup
Scan Networks
Manual
Password
WPS Router
Security
Settings
Port
IP Control
Proxy
Off In Standby
Diagnostics
Friendly Name
Maintenance Mode
Language
ECO Mode
General
Auto Standby
Power On Default
On Screen Display
ZONE2 Setup
Power On Volume
Volume Level
Volume Limit
60 -20 dB / 70 -10 dB / 80 0 dB Default 70 -10 dB
Smart Select Names
Activate trigger on this mode
Zone Rename
Trigger Out
Audio
Front Display
Dimmer
Format
Firmware
Notifications
Zone
Usage Data
Firmware
Update
Update
Check for
Status Upgrade
Add New Feature
Upgrade Display the items to be upgraded Package
Off Turn protection off Default
Setup Lock
Protect settings from inadvertent changes
Lock
Press and hold ZONE2 and Setup
Limiting the operating zone with the remote control
Canceling the settings
One
Want the volume not to become too loud by mistake 217
218
Want to combine a desired video with the current music 218
Want to have the subwoofer always output audio
Want the volume not to become too loud by mistake
Tips
Want to make human voices in the movies clearer
Want to combine a desired video with the current music
Want to delete unused input sources
Troubleshooting
If a problem should arise, first check the following
205
Power does not turn on / Power is turned off
Symptom Cause / Solution
263
Display on this unit shows nothing
No sound comes out
Desired sound does not come out
224
Sound is interrupted or noise occurs
No video is shown on the TV
227
Menu screen is not displayed on the TV
IPod cannot be played back
243
USB memory devices cannot be played back
No connection is
Device cannot be played
Bluetooth cannot be played back
246
Internet radio cannot be played back
List of broadcasting
Various online services cannot be played
Music files on PC or NAS cannot be played back
Hdmi control function does not work
199
Cannot connect to a wireless LAN network
Cannot connect to
Points
236
Resetting factory settings
DAX ZONE2 Source
About Hdmi
Hdmi Control
Auto Lip Sync
Hdmi Pass Through
ARC Audio Return Channel
Channel 5.1-channel, 2.8224 MHz
Supported video signals
Supported audio formats
Copyright protection system
Video signal
Video conversion function
Input signal Output signal
Bit rate
Playing back a USB memory devices
Compatible formats
Maximum number of playable files and folder
Playing back a Bluetooth device
About Bluetooth communications
Media USB memory device
Specifications of supported files
Playing back a file saved on a PC or NAS
Personal memory plus function
Playable broadcast station specifications
Playing back Internet Radio
Last function memory
Sound modes and channel output
Sound modes and surround parameters
249
250
Types of input signals, and corresponding sound modes
252
253
Explanation of terms
Audyssey
Dolby
Dolby TrueHD
DTS
Dolby Pro Logic gz
DTS 96/24
DTS-ES Matrix
DTS-HD High Resolution Audio
DTS-ES Discrete
DTS Express
MP3 Mpeg Audio Layer-3
Alac Apple Lossless Audio Codec
Flac Free Lossless Audio Codec
Sampling frequency
Mpeg Moving Picture Experts Group, MPEG-2, MPEG-4
WMA Windows Media Audio
Speaker impedance
AES Advanced Encryption Standard
Network
Progressive sequential scanning
AirPlay
WPA2 Wi-Fi Protected Access
Wi-Fi
WPA Wi-Fi Protected Access
WPS Wi-Fi Protected Setup
Modem
Media player
Network Names Ssid Security Set Identifier
ITunes
Others
Room where this unit is placed is called the Main Zone
Pairing
App Store
Trademark information
265
Specifications
Audio section
Phono equalizer Input sensitivity Riaa deviation
Digital Output
Digital input
Distortion factor
Video section
Tuner section
No. of channels
Wireless LAN section
Radio frequency
Bluetooth section
General
Dimensions Unit mm
Index
Numerics
251
Pairing a Bluetooth device
Sound mode
149
219
170
Expat
License
Boost
FastDelegate
276
277
Tremolo
Libogg
Libvorbis
Tremor
OMersenne Twister
Ares
Zlib
CURL
License information for the software used in the unit
Holdings Inc 10353 01AM