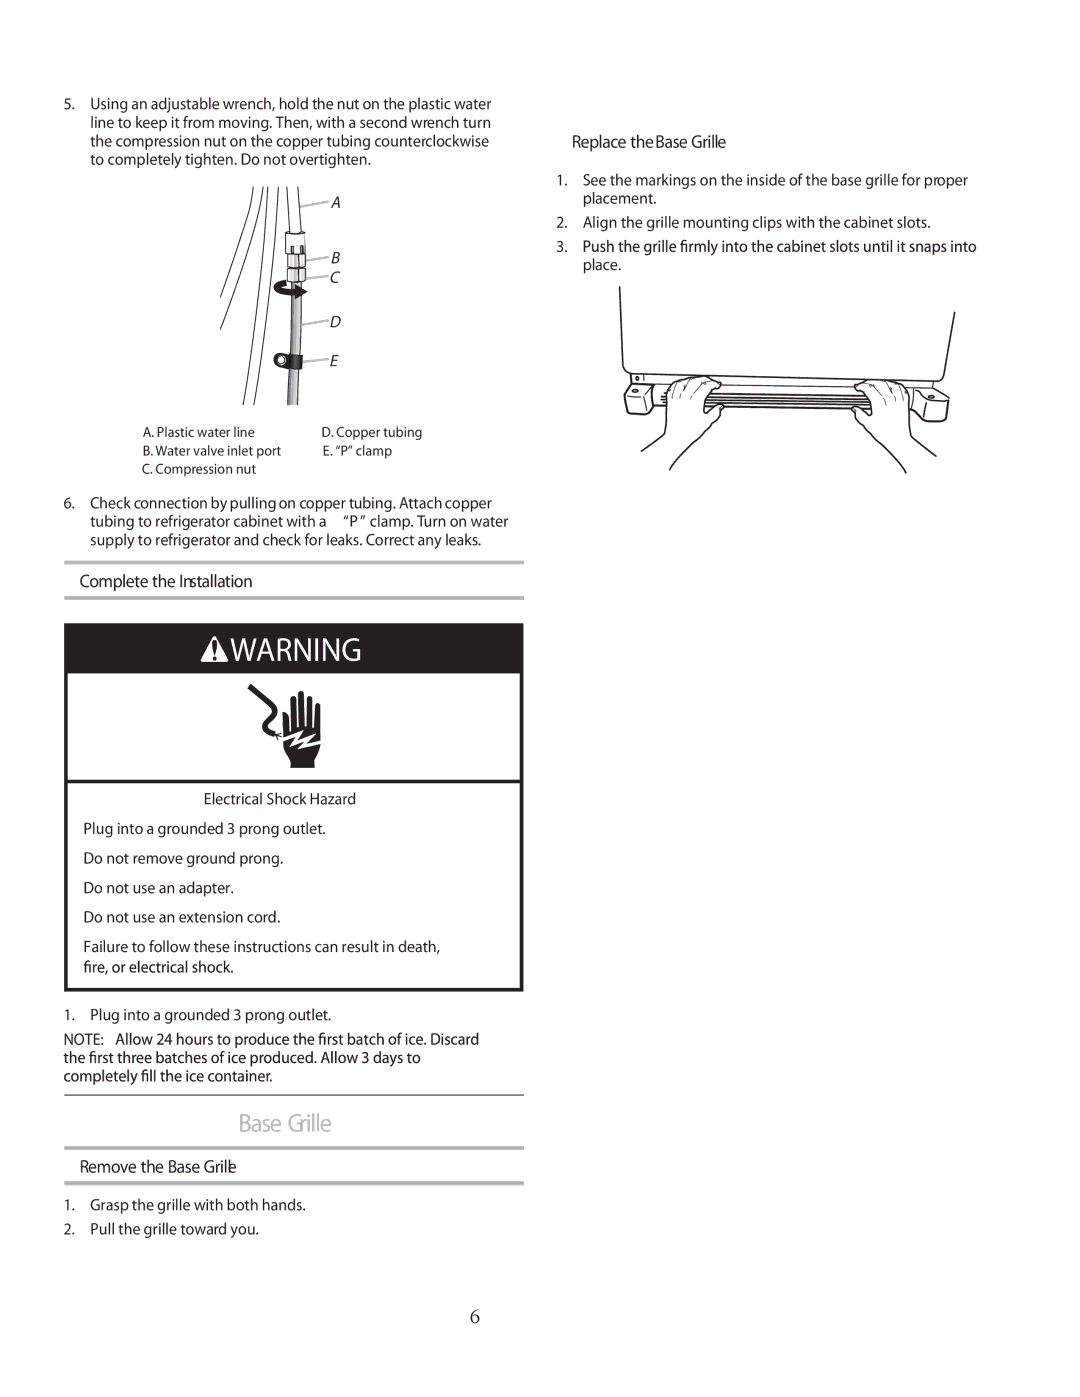
5.Using an adjustable wrench, hold the nut on the plastic water line to keep it from moving. Then, with a second wrench turn the compression nut on the copper tubing counterclockwise to completely tighten. Do not overtighten.
| A |
| B |
| C |
| D |
| E |
A. Plastic water line | D. Copper tubing |
B. Water valve inlet port | E. “P” clamp |
C. Compression nut |
|
6. Check connection by pulling on copper tubing. Attach copper tubing to refrigerator cabinet with a “P” clamp. Turn on water supply to refrigerator and check for leaks. Correct any leaks.
Complete the Installation
![]() WARNING
WARNING
Electrical Shock Hazard
Plug into a grounded 3 prong outlet. Do not remove ground prong.
Do not use an adapter.
Do not use an extension cord.
Failure to follow these instructions can result in death,
1. Plug into a grounded 3 prong outlet. NOTE:
Base Grille
Remove the Base Grille
1.Grasp the grille with both hands.
2.Pull the grille toward you.
Replace theBase Grille
1.See the markings on the inside of the base grille for proper placement.
2.Align the grille mounting clips with the cabinet slots.
3.![]()
![]()
![]()
![]()
![]()
![]()
![]()
![]()
![]()
![]()
![]()
![]()
![]()
![]()
![]()
![]()
![]()
![]()
![]()
![]()
![]()
![]()
![]()
![]()
![]()
![]()
![]()
![]()
![]()
![]()
![]()
![]()
![]()
![]()
![]()
![]()
![]()
![]()
![]()
![]()
![]()
![]()
![]()
![]()
![]()
![]()
![]()
![]()
![]()
![]()
![]()
![]()
![]()
place.
6
