Groove![]()
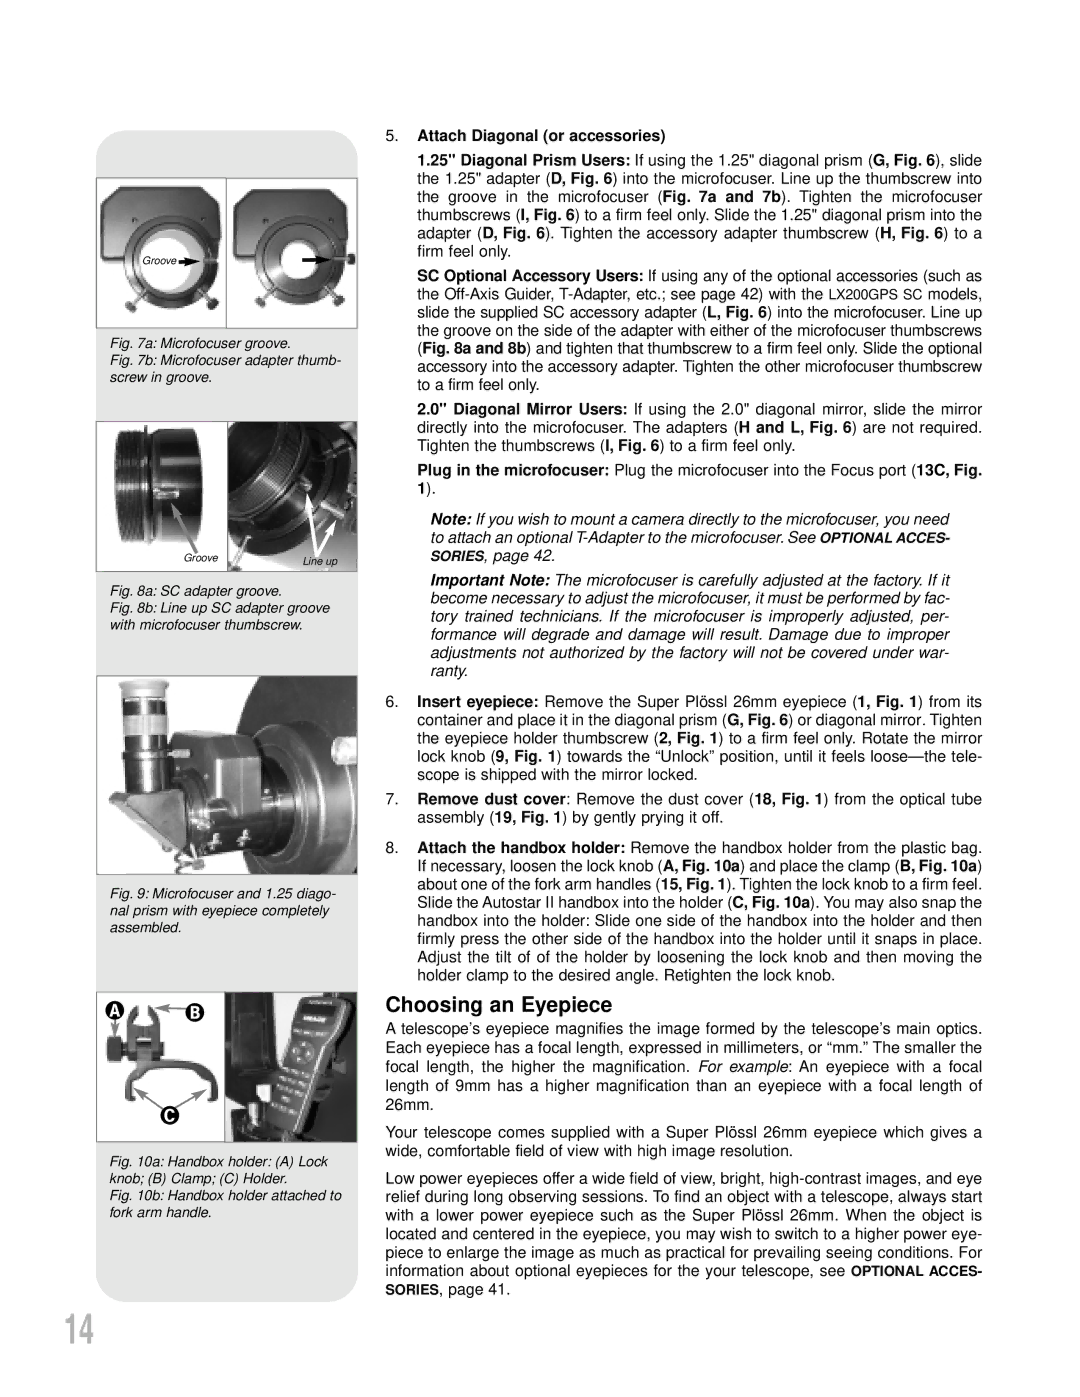
Fig. 7a: Microfocuser groove.
Fig. 7b: Microfocuser adapter thumb- screw in groove.
Groove | Line up |
|
Fig. 8a: SC adapter groove.
Fig. 8b: Line up SC adapter groove with microfocuser thumbscrew.
Fig. 9: Microfocuser and 1.25 diago- nal prism with eyepiece completely assembled.
Fig. 10a: Handbox holder: (A) Lock knob; (B) Clamp; (C) Holder.
Fig. 10b: Handbox holder attached to fork arm handle.
5.Attach Diagonal (or accessories)
1.25" Diagonal Prism Users: If using the 1.25" diagonal prism (G, Fig. 6), slide the 1.25" adapter (D, Fig. 6) into the microfocuser. Line up the thumbscrew into the groove in the microfocuser (Fig. 7a and 7b). Tighten the microfocuser thumbscrews (I, Fig. 6) to a firm feel only. Slide the 1.25" diagonal prism into the adapter (D, Fig. 6). Tighten the accessory adapter thumbscrew (H, Fig. 6) to a firm feel only.
SC Optional Accessory Users: If using any of the optional accessories (such as the
2.0" Diagonal Mirror Users: If using the 2.0" diagonal mirror, slide the mirror directly into the microfocuser. The adapters (H and L, Fig. 6) are not required. Tighten the thumbscrews (I, Fig. 6) to a firm feel only.
Plug in the microfocuser: Plug the microfocuser into the Focus port (13C, Fig. 1).
Note: If you wish to mount a camera directly to the microfocuser, you need to attach an optional
Important Note: The microfocuser is carefully adjusted at the factory. If it become necessary to adjust the microfocuser, it must be performed by fac- tory trained technicians. If the microfocuser is improperly adjusted, per- formance will degrade and damage will result. Damage due to improper adjustments not authorized by the factory will not be covered under war- ranty.
6.Insert eyepiece: Remove the Super Plössl 26mm eyepiece (1, Fig. 1) from its container and place it in the diagonal prism (G, Fig. 6) or diagonal mirror. Tighten the eyepiece holder thumbscrew (2, Fig. 1) to a firm feel only. Rotate the mirror lock knob (9, Fig. 1) towards the “Unlock” position, until it feels
7.Remove dust cover: Remove the dust cover (18, Fig. 1) from the optical tube assembly (19, Fig. 1) by gently prying it off.
8.Attach the handbox holder: Remove the handbox holder from the plastic bag. If necessary, loosen the lock knob (A, Fig. 10a) and place the clamp (B, Fig. 10a) about one of the fork arm handles (15, Fig. 1). Tighten the lock knob to a firm feel. Slide the Autostar II handbox into the holder (C, Fig. 10a). You may also snap the handbox into the holder: Slide one side of the handbox into the holder and then firmly press the other side of the handbox into the holder until it snaps in place. Adjust the tilt of of the holder by loosening the lock knob and then moving the holder clamp to the desired angle. Retighten the lock knob.
Choosing an Eyepiece
A telescope’s eyepiece magnifies the image formed by the telescope’s main optics. Each eyepiece has a focal length, expressed in millimeters, or “mm.” The smaller the focal length, the higher the magnification. For example: An eyepiece with a focal length of 9mm has a higher magnification than an eyepiece with a focal length of 26mm.
Your telescope comes supplied with a Super Plössl 26mm eyepiece which gives a wide, comfortable field of view with high image resolution.
Low power eyepieces offer a wide field of view, bright,
14