12
!CAUTION
To reduce the risk of a laceration hazard:
• Wear protective gloves when installing warming rack. Hood and Bowl edges could be sharp.
Step 11
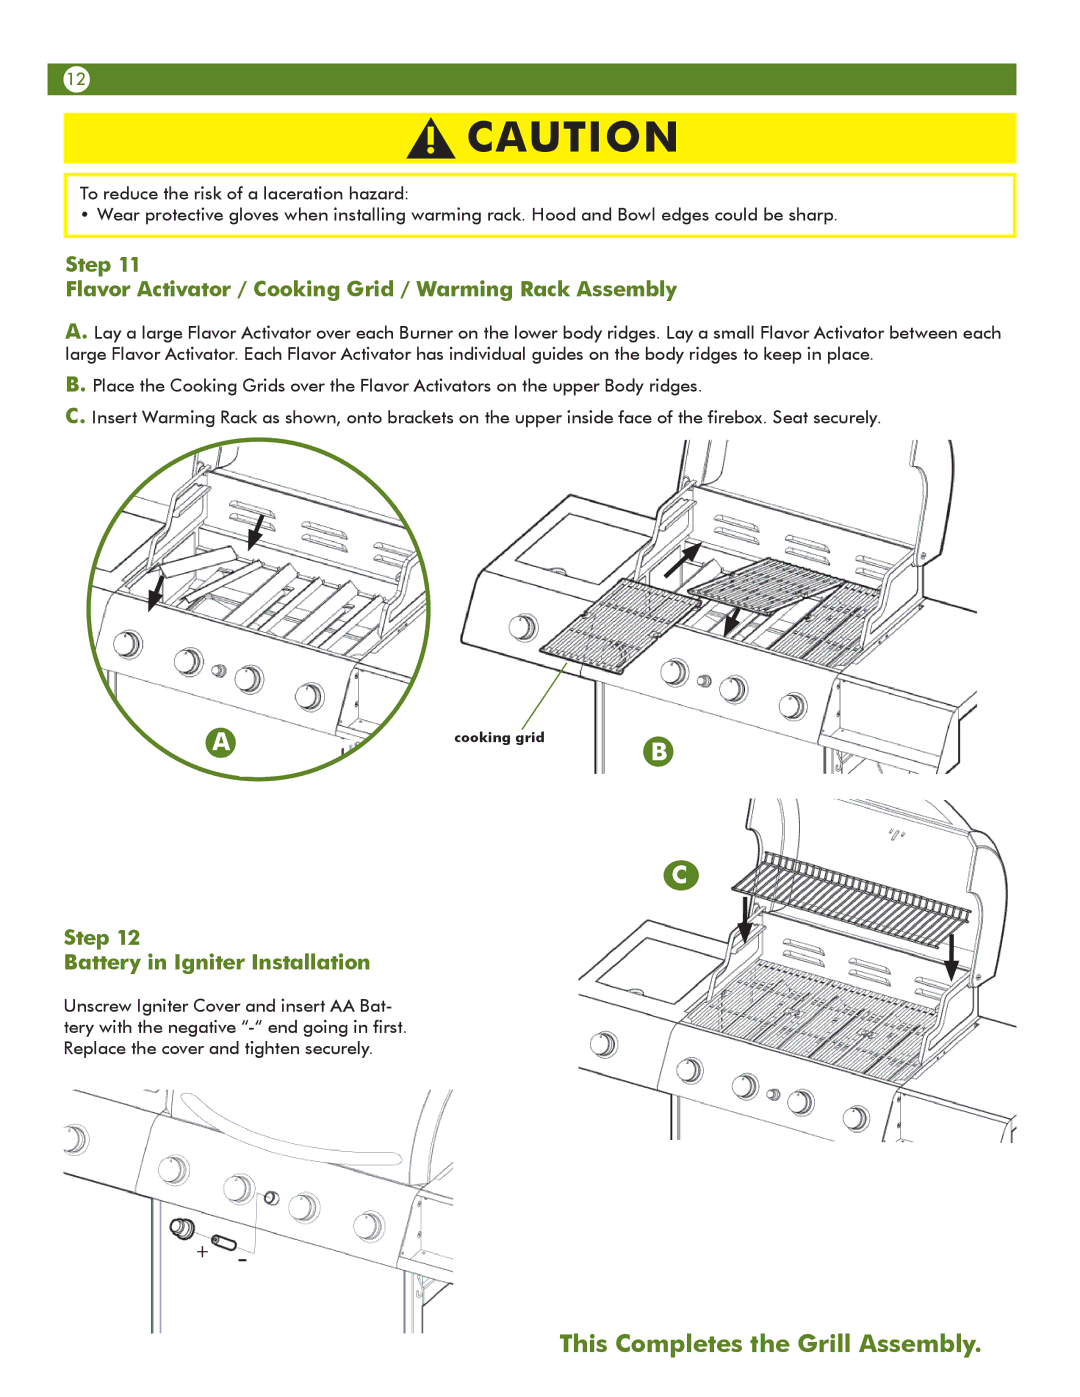
Flavor Activator / Cooking Grid / Warming Rack Assembly
A. Lay a large Flavor Activator over each Burner on the lower body ridges. Lay a small Flavor Activator between each large Flavor Activator. Each Flavor Activator has individual guides on the body ridges to keep in place.
B. Place the Cooking Grids over the Flavor Activators on the upper Body ridges.
C. Insert Warming Rack as shown, onto brackets on the upper inside face of the firebox. Seat securely.
A | cooking grid |
|
Step 12
Battery in Igniter Installation
Unscrew Igniter Cover and insert AA Bat- tery with the negative
B
C
+-
This Completes the Grill Assembly.