Insert the AC plug (with the 2 blades) into a conveniently located AC outlet having 120V, 60Hz.

NOTE: The AC plug supplied with the unit is polarized to help minimize the possibility

AC Outlet

of electric shock. If the AC plug does not fit into a nonpolarized AC outlet, do not file


or cut the wide blade. It is the user’s responsibility to have an electrician replace the

AC Plug

obsolete outlet.


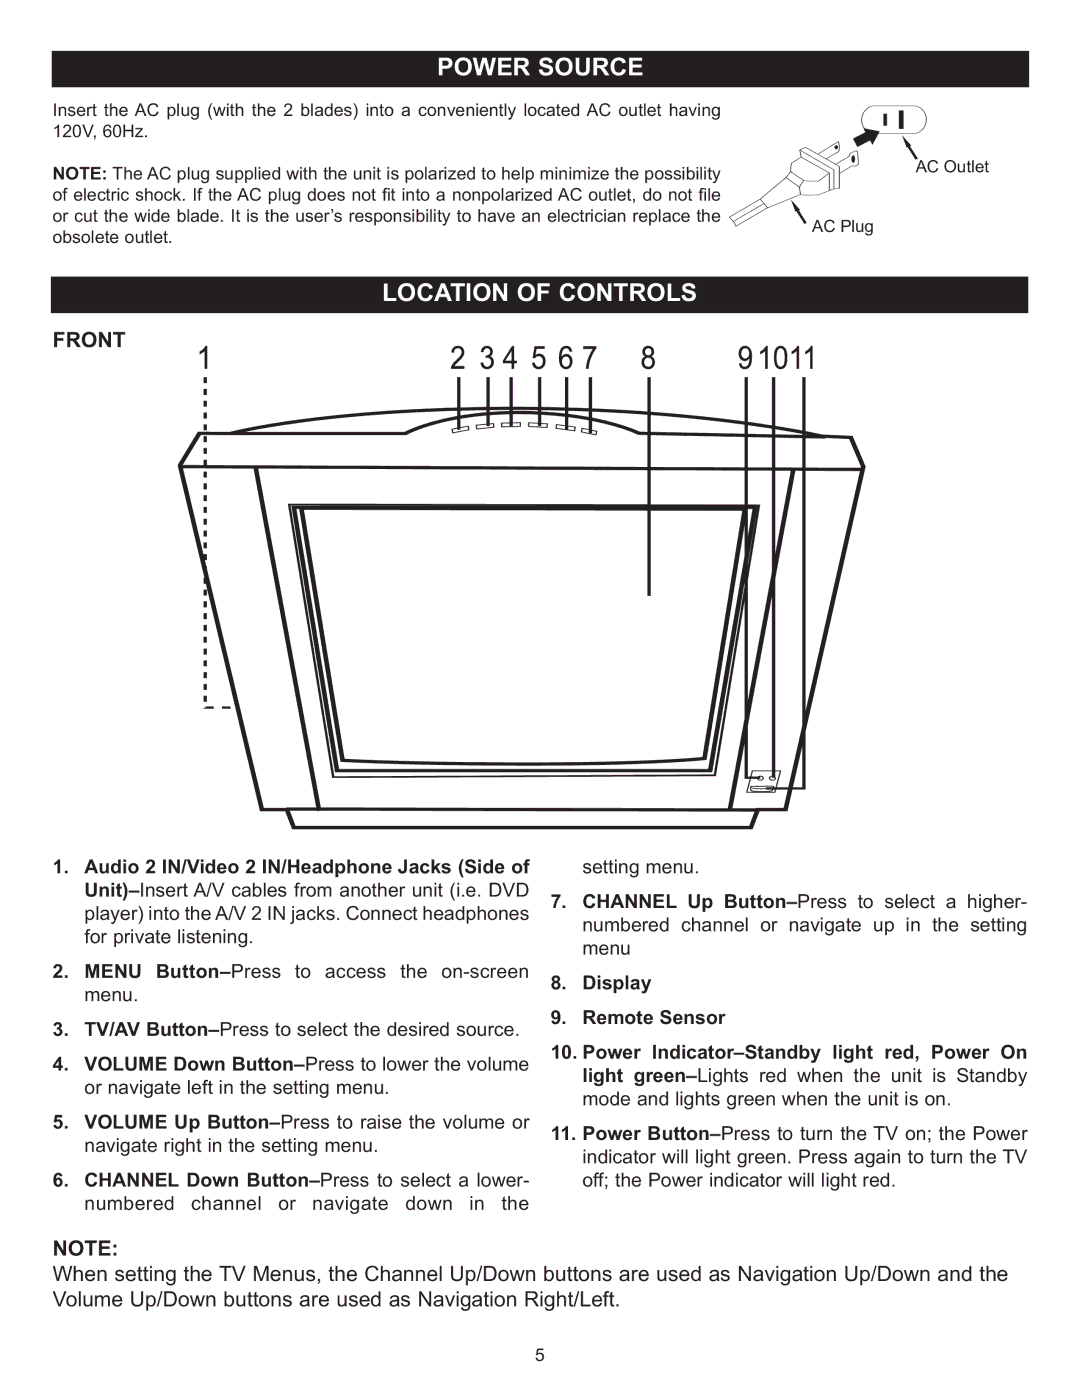
FRONT

1.Audio 2 IN/Video 2 IN/Headphone Jacks (Side of Unit)–Insert A/V cables from another unit (i.e. DVD player) into the A/V 2 IN jacks. Connect headphones for private listening.

2.MENU Button–Press to access the on-screen menu.

3.TV/AV Button–Press to select the desired source.

4.VOLUME Down Button–Press to lower the volume or navigate left in the setting menu.

5.VOLUME Up Button–Press to raise the volume or navigate right in the setting menu.

6.CHANNEL Down Button–Press to select a lower- numbered channel or navigate down in the

setting menu.

7. CHANNEL Up Button–Press to select a higher- numbered channel or navigate up in the setting menu

8. Display

9. Remote Sensor

10. Power Indicator–Standby light red, Power On light green–Lights red when the unit is Standby mode and lights green when the unit is on.

11. Power Button–Press to turn the TV on; the Power indicator will light green. Press again to turn the TV off; the Power indicator will light red.

NOTE:

When setting the TV Menus, the Channel Up/Down buttons are used as Navigation Up/Down and the Volume Up/Down buttons are used as Navigation Right/Left.

5
Page 6
Image 6
Memorex MT2025D manual Front, Display Remote Sensor