REAR |
| LOCATION OF CONTROLS (CONTINUED) | |||||||
|
|
|
|
|
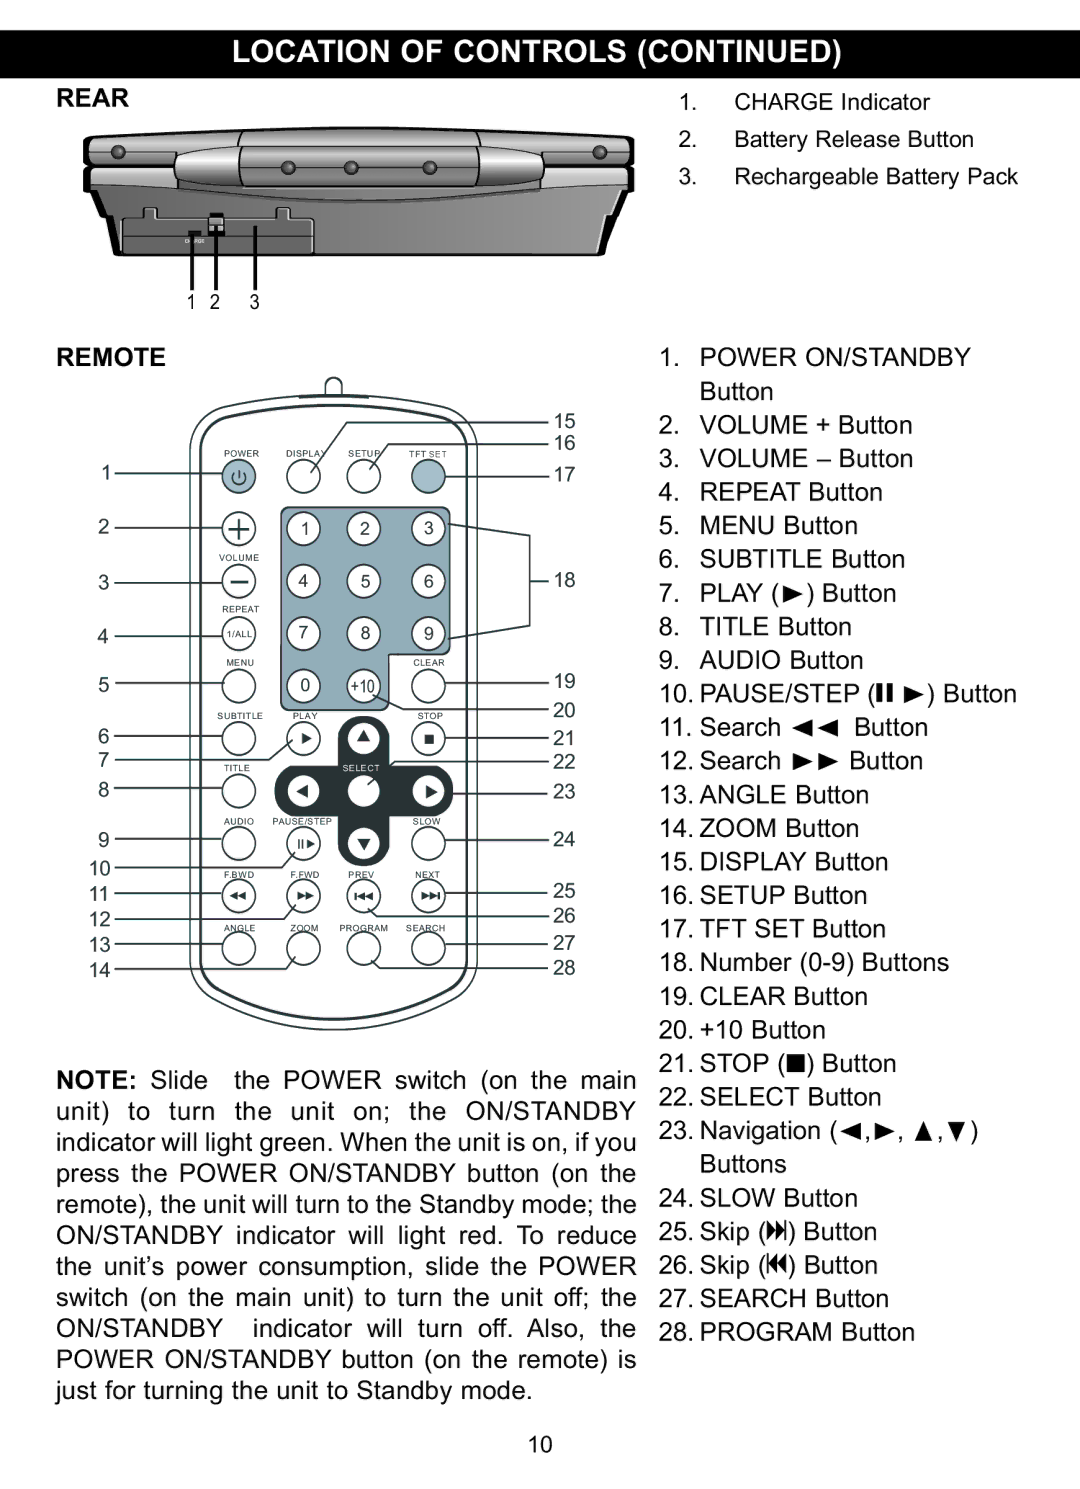
| 1. | CHARGE Indicator | ||
|
|
|
|
|
|
| 2. | Battery Release Button | |
|
|
|
|
|
|
| 3. | Rechargeable Battery Pack | |
1 | 2 | 3 |
|
|
|
|
|
|
|
REMOTE |
|
|
|
|
|
| 1. | POWER ON/STANDBY | |
|
|
|
|
|
| 15 | 2. | Button |
|
|
|
|
|
|
| VOLUME + Button | |||
1 |
| POWER | DISPLAY | SETUP | TFT SET | 16 | 3. | VOLUME – Button | |
|
| 1 | 2 | 3 | 17 | 4. | REPEAT Button | ||
2 |
|
|
| 5. | MENU Button | ||||
3 | VOLUME |
|
|
| 18 | 6. | SUBTITLE Button | ||
REPEAT | 4 | 5 | 6 | 7. | PLAY (®) Button | ||||
4 |
| 1/ALL | 7 | 8 | 9 |
| 8. | TITLE Button | |
5 |
| MENU | 0 | +10 | CLEAR | 19 | 9. | AUDIO Button | |
|
|
| 10. PAUSE/STEP (p®) Button | ||||||
6 | SUBTITLE | PLAY |
| STOP | 20 | ||||
|
|
|
|
| 21 | 11. Search | √√ Button | ||
7 |
| TITLE |
| SELECT |
| 22 | 12. Search | ®® Button | |
8 |
|
|
|
|
| 23 | 13. ANGLE Button | ||
9 |
| AUDIO | PAUSE/STEP |
| SLOW | 24 | 14. ZOOM Button | ||
|
|
|
|
| |||||
10 |
| F.BWD | F.FWD | PREV | NEXT | 25 | 15. DISPLAY Button | ||
11 |
|
|
|
|
| 16. SETUP Button | |||
12 |
| ANGLE | ZOOM | PROGRAM | SEARCH | 26 | 17. TFT SET Button | ||
13 |
|
|
|
|
| 27 | |||
14 |
|
|
|
|
| 28 | 18. Number | ||
|
|
|
|
|
|
| 19. CLEAR Button | ||
NOTE: Slide |
| the POWER switch (on the main | 20. | +10 Button | |||||
| 21. STOP (■) Button | ||||||||
unit) to turn the unit on; the ON/STANDBY | 22. SELECT Button | ||||||||
indicator will light green. When the unit is on, if you | 23. Navigation (√,®, π,†) | ||||||||
press the POWER ON/STANDBY button (on the |
| Buttons |
| ||||||
remote), the unit will turn to the Standby mode; the | 24. SLOW Button | ||||||||
ON/STANDBY indicator will light red. To reduce | 25. Skip (n) Button | ||||||||
the unit’s power consumption, slide the POWER | 26. Skip (o) Button | ||||||||
switch (on the main unit) to turn the unit off; the | 27. SEARCH Button | ||||||||
ON/STANDBY | indicator will | turn | off. Also, the | 28. PROGRAM Button | |||||
POWER ON/STANDBY button (on the remote) is | |||||||||
just for turning the unit to Standby mode. |
|
|
| ||||||
10