PICTURE CD OPERATION
1 ![]()
![]()
![]() 2
2
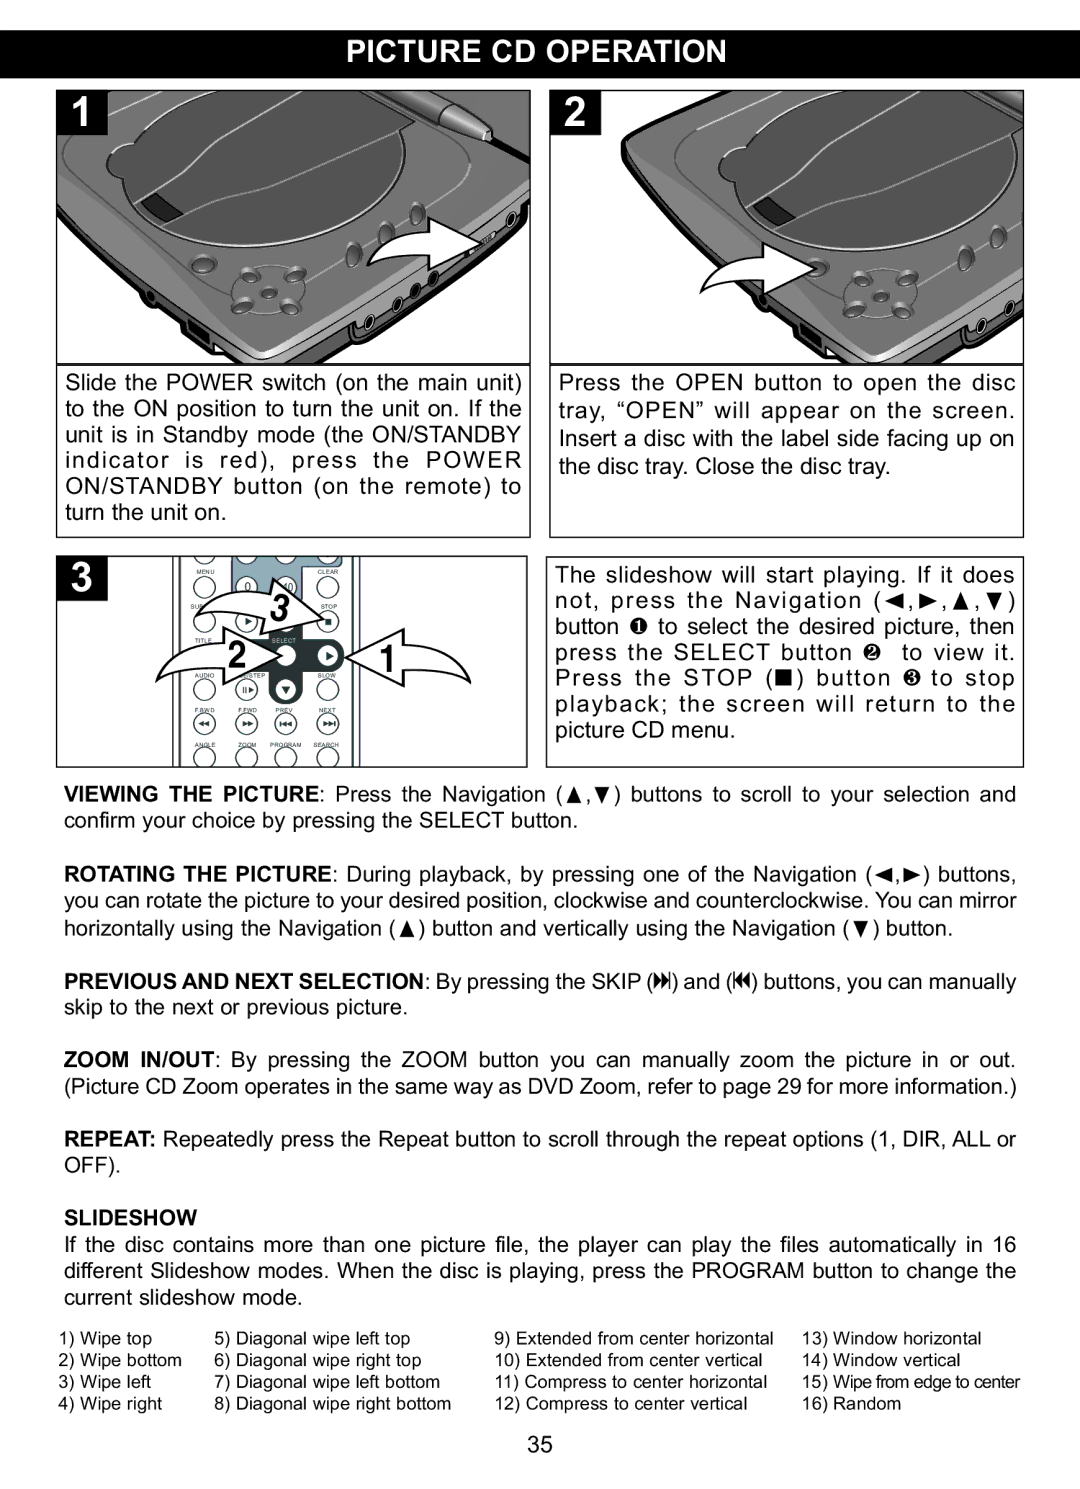
Slide the POWER switch (on the main unit) | Press the OPEN button to open the disc | |||||
to the ON position to turn the unit on. If the | tray, “OPEN” will appear on the screen. | |||||
unit is in Standby mode (the ON/STANDBY | Insert a disc with the label side facing up on | |||||
indicator is red), press the POWER | the disc tray. Close the disc tray. |
| ||||
ON/STANDBY button (on the remote) to |
| |||||
turn the unit on. |
|
|
|
|
| |
3 | MENU | 0 |
| CLEAR | The slideshow will start playing. If it does | |
SUBTITLE | PLAY | +10 | STOP | not, press the Navigation (√,®,π,†) | ||
| TITLE | 2 | SELECT |
| button 1 to select the desired picture, then | |
|
|
| SLOW1 | press the SELECT button 2 | to view it. | |
| AUDIO | PAUSE/STEP |
| Press the STOP (■ ) button | 3 to stop | |
| F.BWD | F.FWD | PREV | NEXT | playback; the screen will return to the | |
| ANGLE | ZOOM | PROGRAM | SEARCH | picture CD menu. |
|
VIEWING THE PICTURE: Press the Navigation ( , ) buttons to scroll to your selection and confirm your choice by pressing the SELECT buttonπ. †
ROTATING THE PICTURE: During playback, by pressing one of the Navigation ( , ) buttons, you can rotate the picture to your desired position, clockwise and counterclockwise. √You®can mirror horizontally using the Navigation (π) button and vertically using the Navigation (†) button.
PREVIOUS AND NEXT SELECTION: By pressing the SKIP ( ) and ( ) buttons, you can manually
skip to the next or previous picture.n o
ZOOM IN/OUT: By pressing the ZOOM button you can manually zoom the picture in or out. (Picture CD Zoom operates in the same way as DVD Zoom, refer to page 29 for more information.) REPEAT: Repeatedly press the Repeat button to scroll through the repeat options (1, DIR, ALL or OFF).
SLIDESHOW
If the disc contains more than one picture file, the player can play the files automatically in 16 different Slideshow modes. When the disc is playing, press the PROGRAM button to change the current slideshow mode.
1) | Wipe top | 5) | Diagonal wipe left top | 9) Extended from center horizontal | 13) | Window horizontal | |
2) | Wipe bottom | 6) | Diagonal wipe right top | 10) | Extended from center vertical | 14) | Window vertical |
3) | Wipe left | 7) | Diagonal wipe left bottom | 11) Compress to center horizontal | 15) | Wipe from edge to center | |
4) | Wipe right | 8) | Diagonal wipe right bottom | 12) | Compress to center vertical | 16) | Random |
|
|
|
|
| 35 |
|
|
