PIP-Bild (Bild-im-Bild)

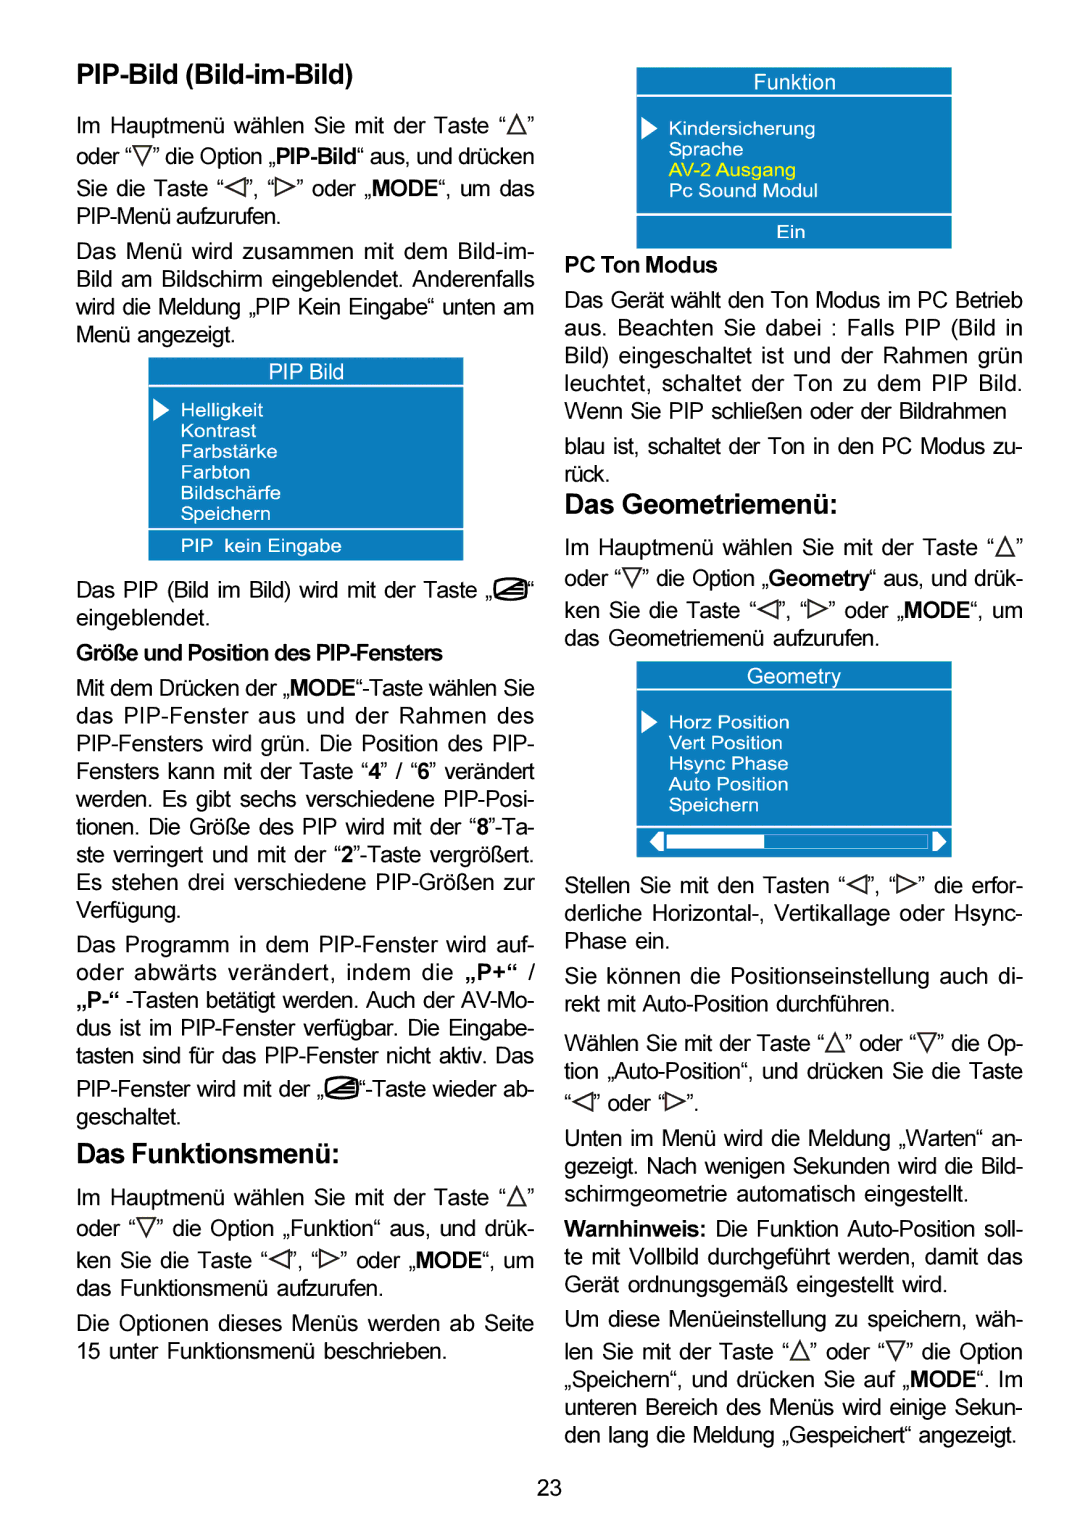
Im Hauptmenü wählen Sie mit der Taste “” oder “” die Option „PIP-Bild“ aus, und drücken Sie die Taste “”, “” oder „MODE“, um das PIP-Menü aufzurufen.

Das Menü wird zusammen mit dem Bild-im- Bild am Bildschirm eingeblendet. Anderenfalls wird die Meldung „PIP Kein Eingabe“ unten am Menü angezeigt.

Das PIP (Bild im Bild) wird mit der Taste „“ eingeblendet.

Größe und Position des PIP-Fensters

Mit dem Drücken der „MODE“-Taste wählen Sie das PIP-Fenster aus und der Rahmen des PIP-Fensters wird grün. Die Position des PIP- Fensters kann mit der Taste “4” / “6” verändert werden. Es gibt sechs verschiedene PIP-Posi- tionen. Die Größe des PIP wird mit der “8”-Ta- ste verringert und mit der “2”-Taste vergrößert. Es stehen drei verschiedene PIP-Größen zur Verfügung.

Das Programm in dem PIP-Fenster wird auf- oder abwärts verändert, indem die „P+“ / „P-“ -Tasten betätigt werden. Auch der AV-Mo- dus ist im PIP-Fenster verfügbar. Die Eingabe- tasten sind für das PIP-Fenster nicht aktiv. Das

PIP-Fenster wird mit der “-Taste wieder ab- geschaltet.

Das Funktionsmenü:

Im Hauptmenü wählen Sie mit der Taste “” oder “” die Option „Funktion“ aus, und drük- ken Sie die Taste “”, “” oder „MODE“, um das Funktionsmenü aufzurufen.

Die Optionen dieses Menüs werden ab Seite 15 unter Funktionsmenü beschrieben.

PC Ton Modus

Das Gerät wählt den Ton Modus im PC Betrieb aus. Beachten Sie dabei : Falls PIP (Bild in Bild) eingeschaltet ist und der Rahmen grün leuchtet, schaltet der Ton zu dem PIP Bild. Wenn Sie PIP schließen oder der Bildrahmen

blau ist, schaltet der Ton in den PC Modus zu- rück.

Das Geometriemenü:

Im Hauptmenü wählen Sie mit der Taste “” oder “” die Option „Geometry“ aus, und drük- ken Sie die Taste “”, “” oder „MODE“, um das Geometriemenü aufzurufen.

Stellen Sie mit den Tasten “”, “” die erfor- derliche Horizontal-, Vertikallage oder Hsync- Phase ein.

Sie können die Positionseinstellung auch di- rekt mit Auto-Position durchführen.

Wählen Sie mit der Taste “” oder “” die Op- tion „Auto-Position“, und drücken Sie die Taste

” oder “”.

Unten im Menü wird die Meldung „Warten“ an- gezeigt. Nach wenigen Sekunden wird die Bild- schirmgeometrie automatisch eingestellt.

Warnhinweis: Die Funktion Auto-Position soll- te mit Vollbild durchgeführt werden, damit das Gerät ordnungsgemäß eingestellt wird.

Um diese Menüeinstellung zu speichern, wäh-

len Sie mit der Taste “” oder “” die Option „Speichern“, und drücken Sie auf „MODE“. Im unteren Bereich des Menüs wird einige Sekun- den lang die Meldung „Gespeichert“ angezeigt.

23

Page 25
Image 25
Metz 20 TM 52 operating instructions PIP-Bild Bild-im-Bild, Das Funktionsmenü, Das Geometriemenü

20 TM 52 specifications

The Metz 20 TM 52 is a notable entry in the world of advanced photographic flash systems. This powerful, compact flash unit is designed to cater to both professional photographers and serious enthusiasts who demand versatility and high performance from their equipment.

One of the key features of the Metz 20 TM 52 is its exceptional guide number, which delivers an impressive amount of light output, making it suitable for a range of shooting conditions, from dimly lit environments to brightly lit outdoor settings. This high guide number allows users to capture stunning images without compromise, ensuring subjects are illuminated perfectly regardless of the context.

The flash utilizes a state-of-the-art TTL (Through The Lens) metering technology that excels in providing accurate exposure control. With TTL capabilities, photographers can rely on the Metz 20 TM 52 to automatically adjust the flash output based on the camera’s metering system, greatly simplifying the shooting process and allowing for more creativity. This ensures that even novice users can achieve professional-quality results.

Another noteworthy feature of the Metz 20 TM 52 is its swivel and tilt head. This flexibility permits bounce flash techniques, which can significantly soften shadows and provide a more natural look to portraits. Photographers can easily manipulate the light direction to achieve desired effects without the harshness typically associated with direct flash lighting.

The Metz 20 TM 52 is equipped with various shooting modes, including multiple flash and high-speed sync functionalities. This versatility allows creative applications in various scenarios, from high-speed sports photography to elaborate lighting setups for events. Furthermore, it supports various camera brands, making it a valuable accessory for photographers who might switch between different systems.

Another technology integrated into the Metz 20 TM 52 is its user-friendly interface and quick recycling time. It features an intuitive control panel that enables photographers to adjust settings effortlessly on the fly. With a minimal wait time between shots, this flash unit can keep up with the fast-paced demands of modern photography.

In summary, the Metz 20 TM 52 stands out for its powerful output, advanced TTL technology, flexibility in operation, and user-centric design. With its ability to enhance imaging capabilities across various photographic styles, it serves as a reliable tool for anyone aiming to elevate their photography to the next level.