
H 5961 B specifications
The Miele H 5961 B is a premium built-in oven that exemplifies luxury and advanced culinary technology. Designed for serious cooks and baking enthusiasts, this model combines performance, precision, and innovative features, making it a great addition to any modern kitchen.One of the standout features of the Miele H 5961 B is its impressive cooking capacity. With a spacious interior, it allows for the simultaneous cooking of multiple dishes, making it perfect for entertaining or large family meals. The oven’s innovative design also ensures optimal heat distribution, enabling excellent baking and roasting results.
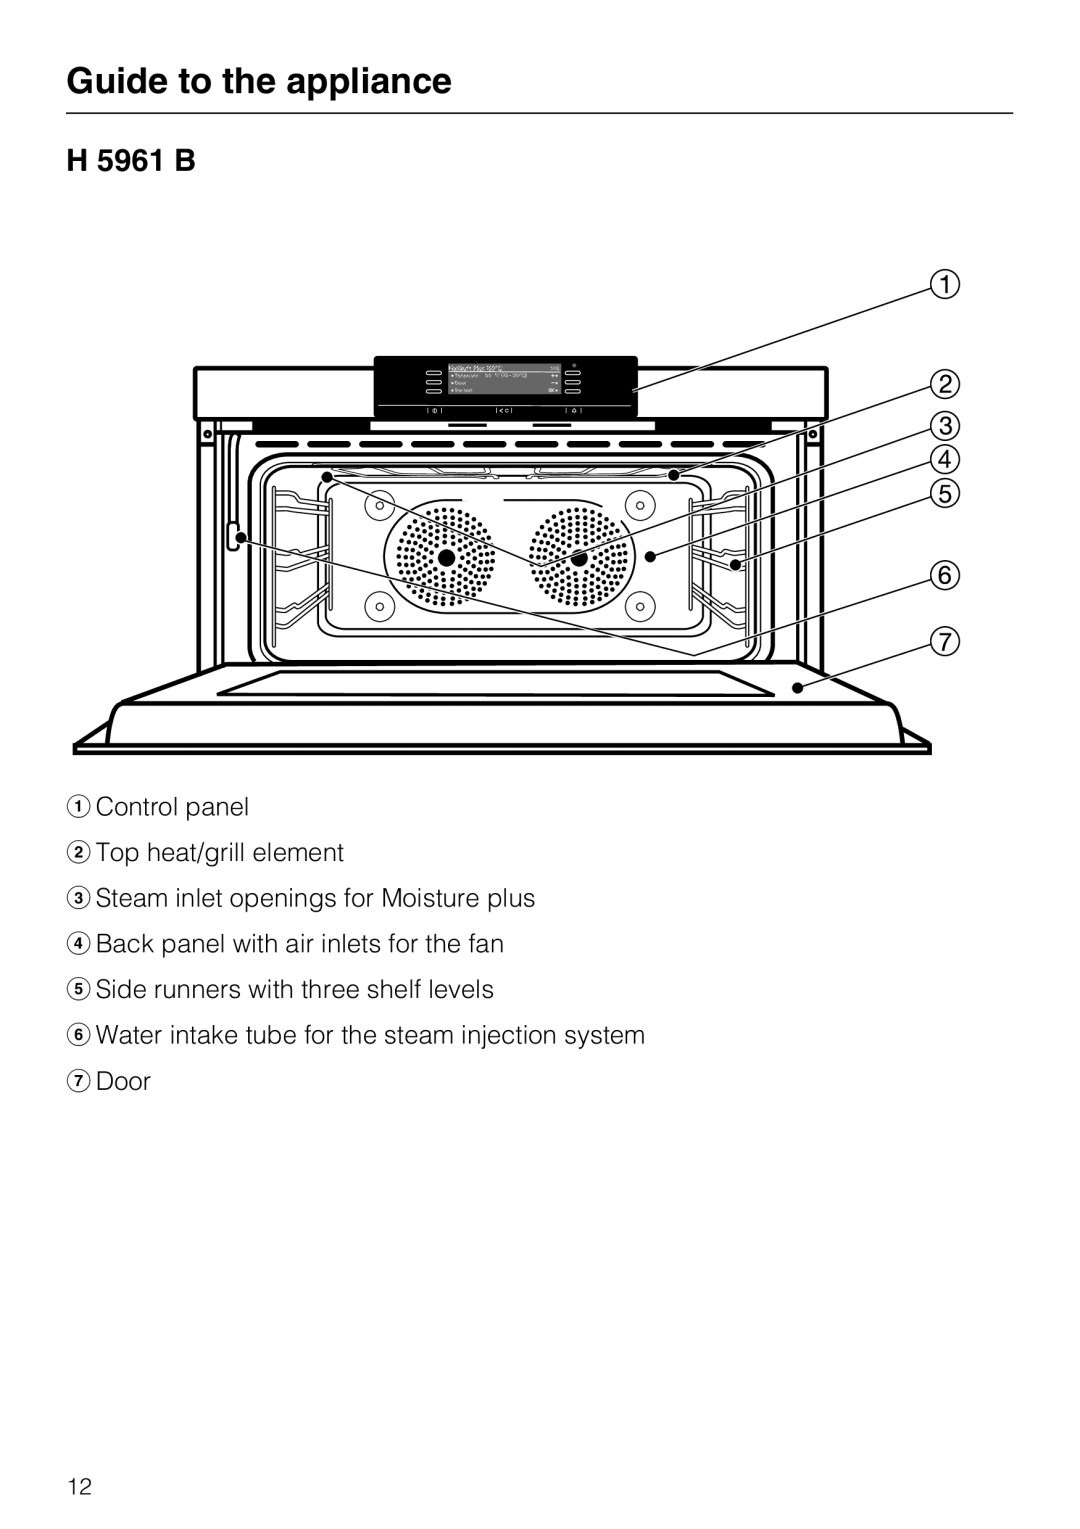
Miele’s proprietary Moisture Plus technology is another hallmark of the H 5961 B. This feature introduces steam into the cooking process, enhancing moisture retention in your dishes, which is especially beneficial for baking bread, roasting meats, or cooking casseroles. The result is beautifully browned, moist, and flavorful dishes every time.
The H 5961 B also boasts a range of automatic programs that simplify the cooking experience. These programs eliminate guesswork, adjusting time, temperature, and moisture levels to deliver perfect results. The intuitive touch control panel makes navigating these features easy and straightforward, allowing users of all skill levels to benefit from sophisticated cooking options.
Additionally, the Miele H 5961 B is equipped with Pyrolytic self-cleaning technology, a true time-saver for busy home chefs. This innovative feature heats the oven to extremely high temperatures, incinerating any food residues and grease, leaving behind only ash that can be easily wiped away. This makes maintaining the oven clean and hygienic a hassle-free task.
Energy efficiency is another important aspect of the H 5961 B. It operates with a high energy efficiency rating, minimizing energy consumption without compromising performance. With its sleek design, sophisticated black glass surface, and intuitive interface, this oven not only performs exceptionally but also enhances the aesthetic appeal of any kitchen.
In summary, the Miele H 5961 B built-in oven unites advanced cooking technologies, stylish design, and energy efficiency. Its spacious interior, innovative features, and self-cleaning capabilities make it a top choice for anyone looking to elevate their culinary experience. Whether you are baking, roasting, or steaming, the H 5961 B is engineered to deliver impeccable results and meet the highest standards of modern cooking.