.A complete Parts List is available at www.MillerWelds.com
5-2. Controls (CE Models)
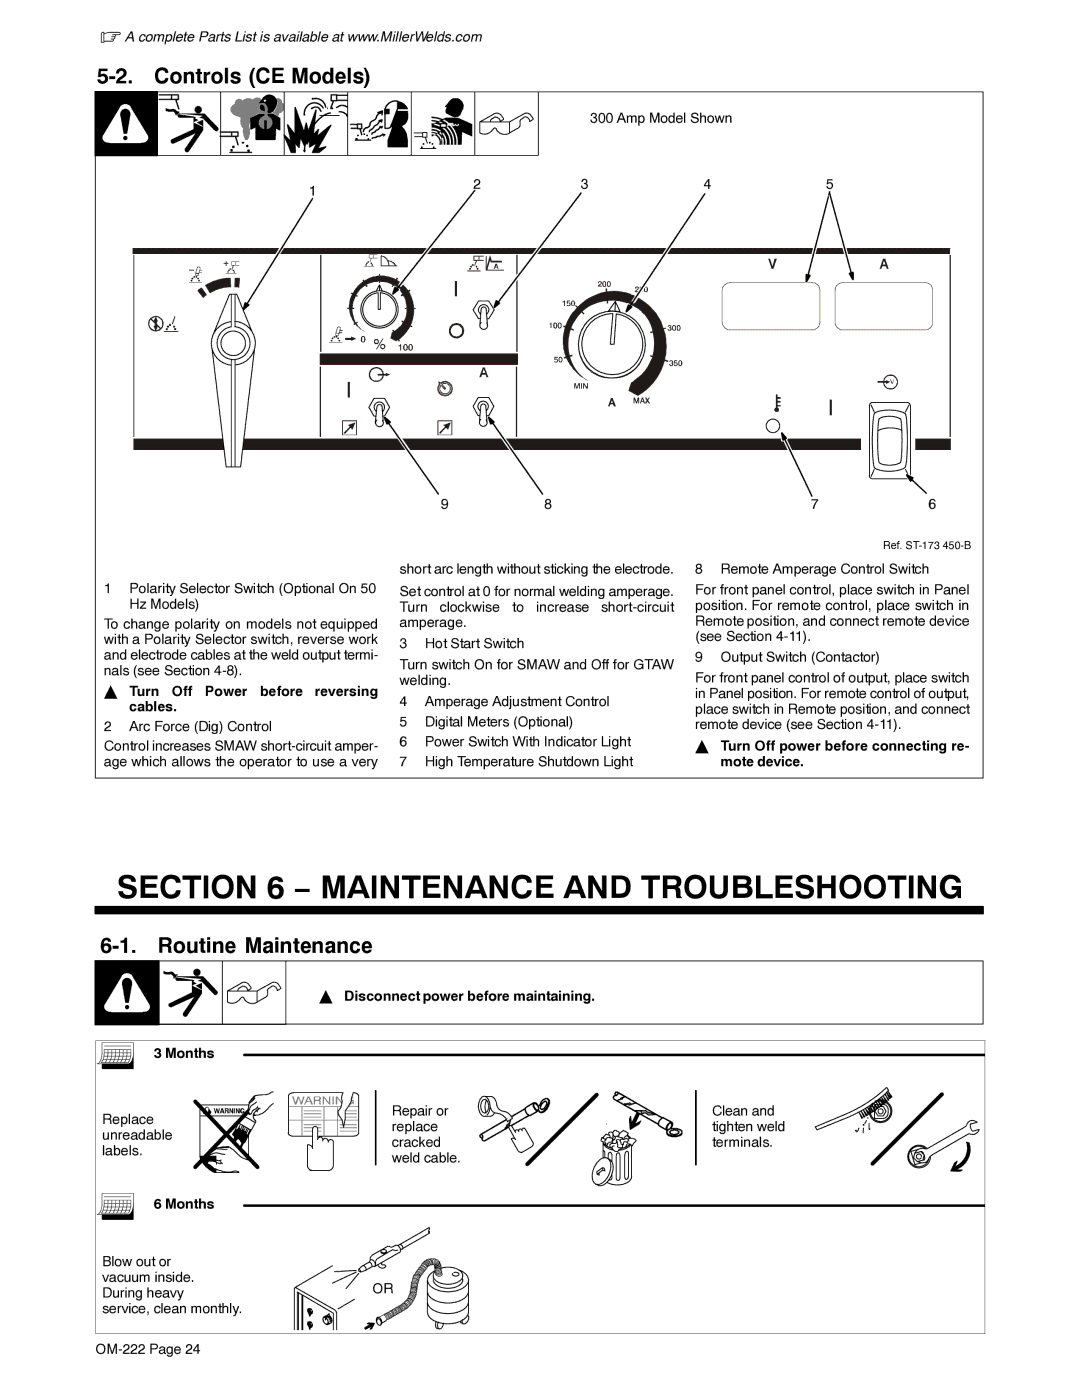
300 Amp Model Shown
1 | 2 | 3 | 4 | 5 |
|
|
|
|
9 | 8 | 7 | 6 |
Ref.
1Polarity Selector Switch (Optional On 50 Hz Models)
To change polarity on models not equipped with a Polarity Selector switch, reverse work and electrode cables at the weld output termi- nals (see Section
YTurn Off Power before reversing cables.
2 Arc Force (Dig) Control
Control increases SMAW
short arc length without sticking the electrode.
Set control at 0 for normal welding amperage. Turn clockwise to increase
3 Hot Start Switch
Turn switch On for SMAW and Off for GTAW welding.
4Amperage Adjustment Control
5Digital Meters (Optional)
6Power Switch With Indicator Light
7High Temperature Shutdown Light
8 Remote Amperage Control Switch
For front panel control, place switch in Panel position. For remote control, place switch in Remote position, and connect remote device (see Section
9 Output Switch (Contactor)
For front panel control of output, place switch in Panel position. For remote control of output, place switch in Remote position, and connect remote device (see Section
YTurn Off power before connecting re- mote device.
SECTION 6 − MAINTENANCE AND TROUBLESHOOTING
6-1. Routine Maintenance
Y Disconnect power before maintaining.
3 Months |
|
| |
Replace | Repair or | Clean and | |
replace | tighten weld | ||
unreadable | |||
cracked | terminals. | ||
labels. | |||
weld cable. |
| ||
|
| ||
6 Months |
|
| |
Blow out or |
|
| |
vacuum inside. | OR |
| |
During heavy |
| ||
service, clean monthly. |
|
| |
|
|