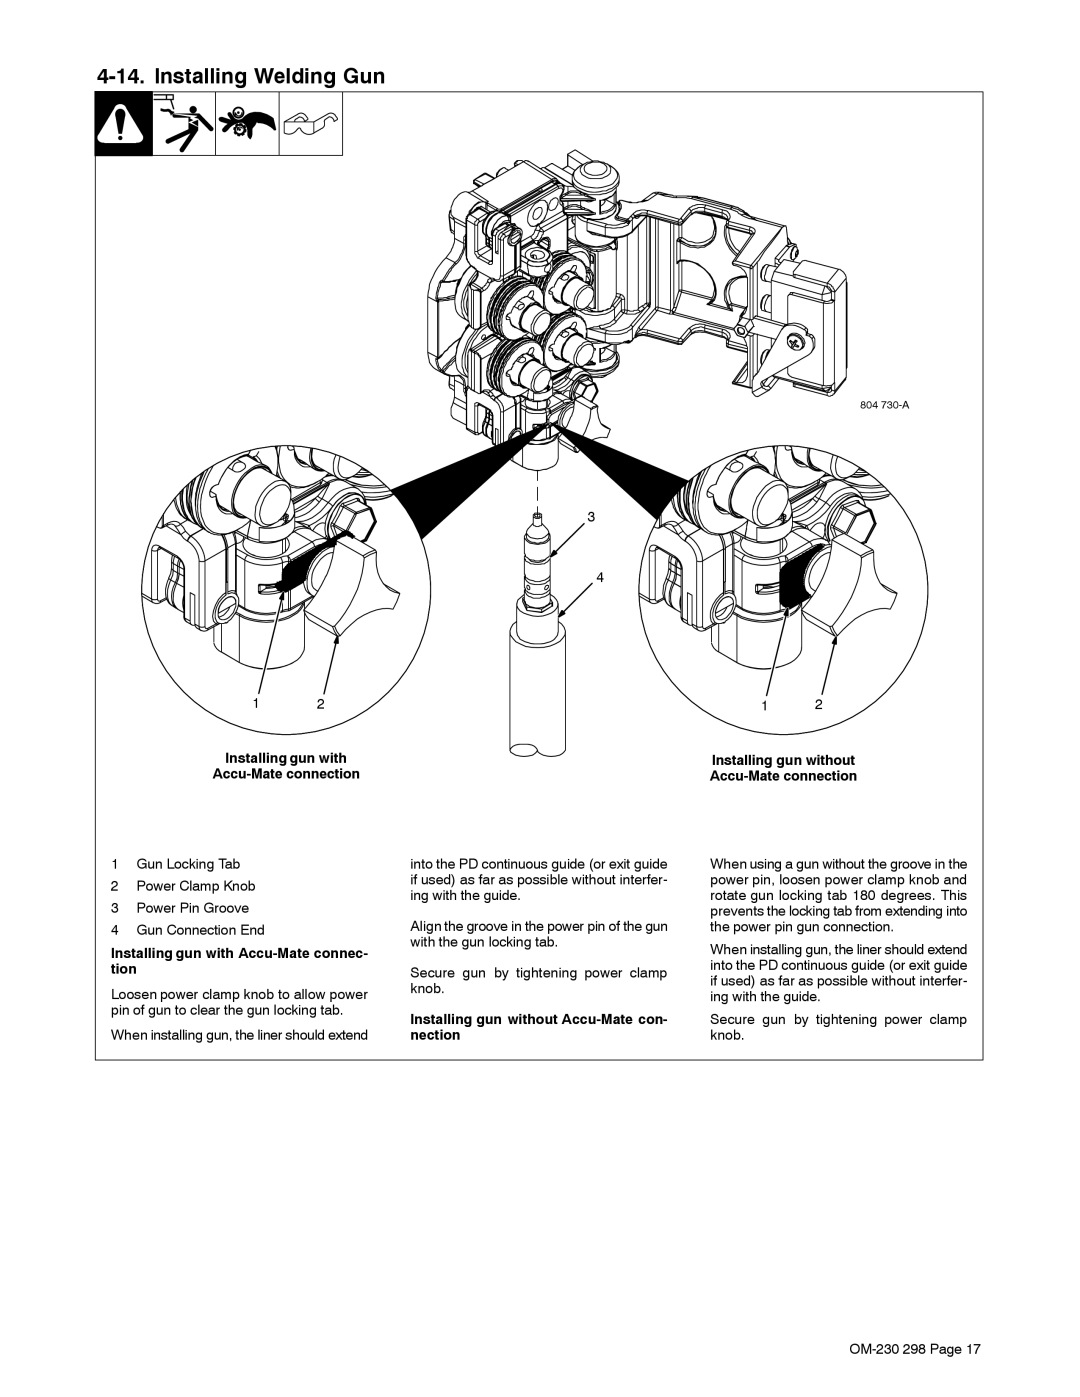
4-14. Installing Welding Gun
1 2
Installing gun with
Accu-Mate connection
804
3
4
1 2
Installing gun without
Accu-Mate connection
1Gun Locking Tab
2Power Clamp Knob
3Power Pin Groove
4Gun Connection End
Installing gun with Accu-Mate connec- tion
Loosen power clamp knob to allow power pin of gun to clear the gun locking tab.
When installing gun, the liner should extend
into the PD continuous guide (or exit guide if used) as far as possible without interfer- ing with the guide.
Align the groove in the power pin of the gun with the gun locking tab.
Secure gun by tightening power clamp knob.
Installing gun without Accu-Mate con- nection
When using a gun without the groove in the power pin, loosen power clamp knob and rotate gun locking tab 180 degrees. This prevents the locking tab from extending into the power pin gun connection.
When installing gun, the liner should extend into the PD continuous guide (or exit guide if used) as far as possible without interfer- ing with the guide.
Secure gun by tightening power clamp knob.