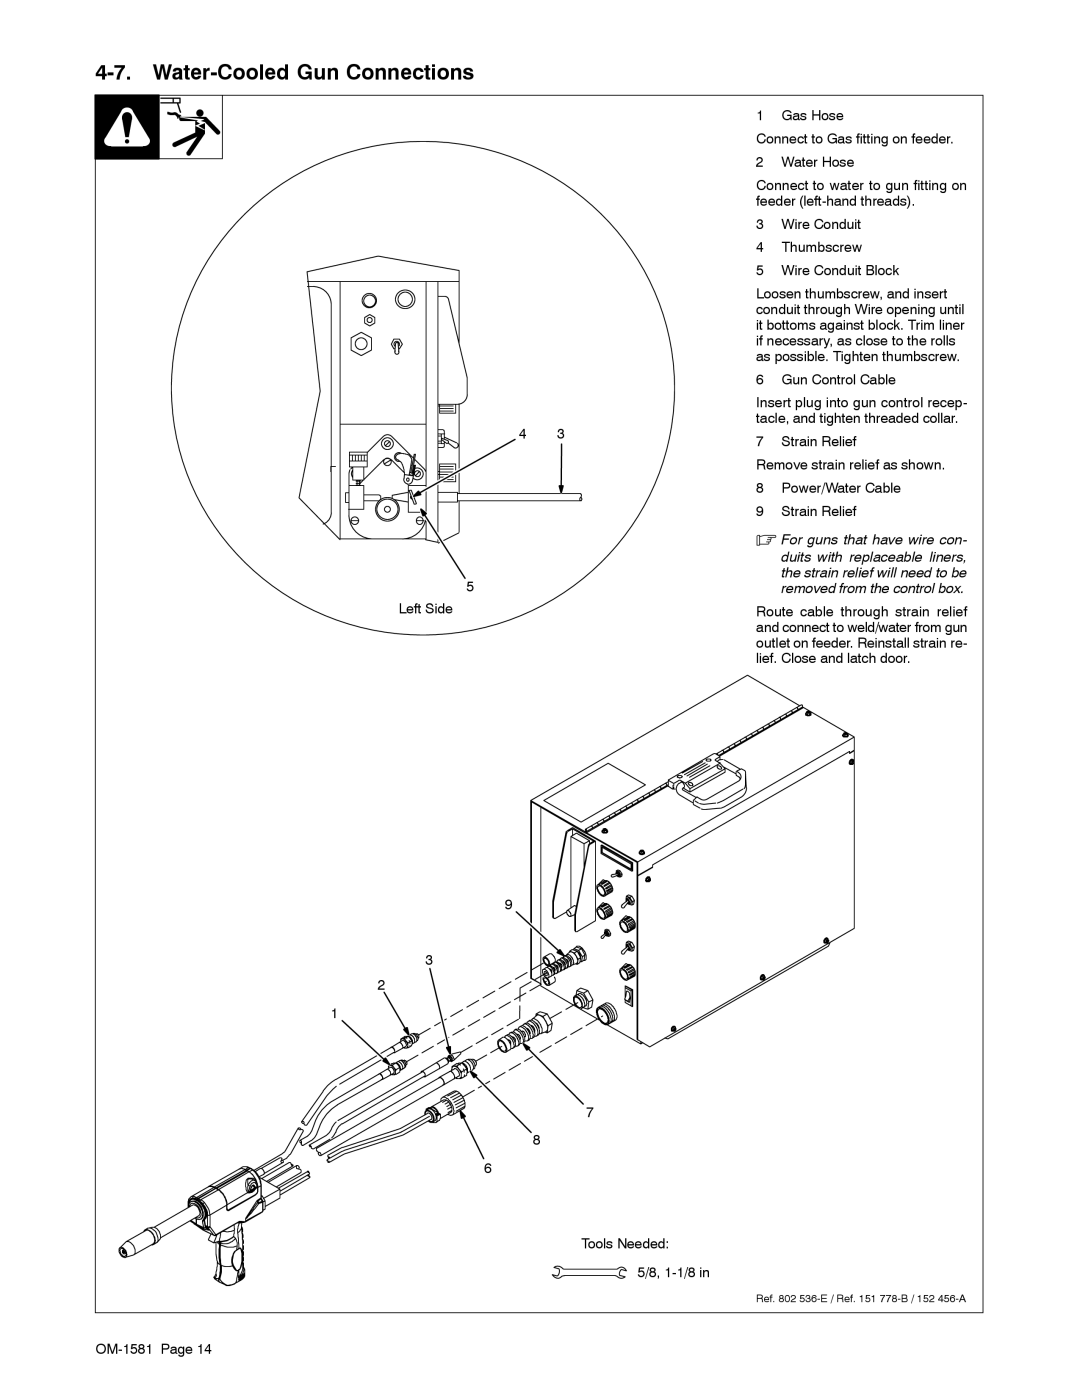
4-7. Water-Cooled Gun Connections
4 3
5
Left Side
9
3
2
1
7
8
6
Tools Needed:
5/8,
1 Gas Hose
Connect to Gas fitting on feeder.
2 Water Hose
Connect to water to gun fitting on feeder
3Wire Conduit
4Thumbscrew
5Wire Conduit Block
Loosen thumbscrew, and insert conduit through Wire opening until it bottoms against block. Trim liner if necessary, as close to the rolls as possible. Tighten thumbscrew.
6 Gun Control Cable
Insert plug into gun control recep- tacle, and tighten threaded collar.
7 Strain Relief
Remove strain relief as shown.
8Power/Water Cable
9Strain Relief
.For guns that have wire con-
duits with replaceable liners, the strain relief will need to be removed from the control box.
Route cable through strain relief and connect to weld/water from gun outlet on feeder. Reinstall strain re- lief. Close and latch door.
Ref. 802
